HTML MCQ Questions for Class 10 with Answers

HTML MCQ Questions for Class 10 with Answers

MCQ Quiz Questions with Answers for Class 10 Computer Science

MCQ Questions for Class 10 HTML with Answers or Mcq Questions For Class 10 Computer With Answers Html

Q1. HTML is a CBSE2011
(a) package
(b) software
(c) markup language
(d) None of these
Answer: (c) HTML is a markup language which is used to define the layout and attributes of WWW document.

Q2. HTML tags are enclosed in
(a) curly brackets
(b) square brackets
(c) double quotes
(d) angular brackets
Answer: (d) HTML tags are enclosed within angular brackets (< and >).

Q3. Which of the following tag identifies the document as an HTML document?
(a) <HTML>
(b) <HEAD>
(c) <BODY>
(d) <P>
Answer: (a) tag identifies the document as an HTML document.

Q4. Container elements in HTML require     CBSE 2015
(a) starting tag
(b) ending tag
(c) starting and ending tags
(d) None of the above
Answer: (c) In HTML, container elements are required as both starting and ending tags.

Q5. HTML tags are
(a) in uppercase
(b) case sensitive
(c) in lowercase
(d) not case sensitive
Answer: (d) HTML tags are not case sensitive means we can write tags either in uppercase or lowercase.

Q6. Which type of tags used by HTML?
(a) tags only for image
(b) user defined tags
(c) tags only for linking
(d) fixed tags defined by the language
Answer: (d) HTML provides predefined and fixed tags.

Q7. Which program do you need to write HTML code?
(a) Spreadsheet
(b) Access
(c) Notepad
(d) None of these
Answer: (c) From the given options, Notepad is useful program to write HTML code.

Q8. An example of HTML editor is
(a) Notepad
(b) Dreamweaver
(c) Microsoft Frontpage
(d) All of these
Answer: (d) HTML provides various text editors like Notepad, Dreamweaver etc.

Q9. To create an HTML page, you need
(a) text editor
(b) Web browser
(c) Both (a) and (b)
(d) None of these
Answer: (c) Because text editor is required to write HTML code and Web browser is needed to display the page.

Q10. Which of the following is the correct code of HTML page?

(a) <HTML>
<TITLE> Hello
</TITLE>
</HTML>

(b) <HTML>
<HEAD>
<TITLE> Hello
</TITLE>
</HEAD>
</HTML>

(c) <HTML>
<BODY> Hello
</HTML>

(d) <HTML><HEAD> Hello
<BODY>
</HTML>

Answer: (b) Because <TITLE> tag must close inside the <HEAD> tag.

Q11. Tags and text that do not display directly on the page afe placed in
(a) body
(b) table
(c) head
(d) title
Answer: (c) Information in <HEAD> tag is not displayed directly in Web page. It is used to identify the matter (tags) used in a Web page.

Q12. A Web page normally consists of
(a) head and body
(b) top and bottom
(c) body and font
(d) body and title
Answer: (a) From the given options, a Web page normally consists of head and body.

Q13. Which section is used for text and tags that are shown directly on your Web pages?
(a) Meta
(b) Head
(c) Body
(d) Table
Answer: (c) Information in <BODY> tag is directly displayed on Web pages.

Q14. Where do you place the <TITLE> tag in a HTML?
(a) BODY
(b) HEAD
(c) TITLE
(d) FONT

Answer: (b) <TITLE> tag is placed in the <HEAD> tag.

Q15. Which attribute is not supported by a <BODY> tag? CBSE 2013
(a) bgcolor
(b) size
(c) text
(d) link
Answer: (b) size is not an attribute of <BODY> tag.

Q16. What will happen if the background image is smaller than the browser’s window?
(a) It will leave a blank space at the bottom of your page
(b) It will be repeated
(c) It will be stretched
(d) It will not be displayed
Answer: (b) When the background image is smaller than the browser’s window then it will be shown in boxes in repeated pattern.

Q17. Why should you specify a background color, if you are using an image for the actual background of your page?
(a) So the text shows up better
(b) The background color will be shown until the image loads
(c) In case the image does not fit right
(d) None of the above
Answer: (b) We have to use background color because if in any case image is not displayed then atleast background color will be shown on that place.

Q18. Which attribute of <BODY> tag specifies the color of visited links in a document?
(a) vlink
(b) alink
(c) link
(d) None of these
Answer: (a) vlink attribute specifies the color of visited links in a HTML document.

Q19. Choose the correct HTML tag for the largest heading.
(a) <H2>
(b) <H4>
(c) <H6>
(d) <H1>
Answer:(d) <H1> tag provides the largest heading in HTML.

Q20. Which of the following will give smallest size of the text? CBSE 2014
(a) <H3>
(b) <H6>
(c) <H2>
(d) <H4>
Answer: (b) From the given options, <H6> tag displays the smallest size of heading text.

Q21. In a Web page, you can place
(a) 2 levels of headings
(b) 6 levels of headings
(c) 4 levels of headings
(d) 7 levels of headings
Answer: (b) Web page provides six levels of headings.

Q22. The default alignment for paragraph is
(a) left
(b) right
(c) center
(d) justified
Answer: (a) The align attribute of <P> tag provides various alignments like left, right, center and justify. But by default, its alignment is left.

Q23. Which of the following HTML container tags do you apply to text for formatting the text as a paragraph?
(a) <PARAGRAPH> ……. c/PARAGRAPH>
(b) <PARA> ………. </PARA>
(c) <P> ……… </P>
(d) None of the above
Answer: (c) <P>…….</P> is a container tag, which is used for formatting text.

Q24. Which of the following is not a container element? CBSE 2013
(a) P
(b) B
(c) OL
(d) HR
Answer: (d) HR is an empty tag because it has no closing tag.

Q25. The style element holds the document for setting
(a) font, color and alignment
(b) font, color, alignment and border
(c) color, alignment and border
(d) None of the above
Answer: (b) Because they are used to give a better look and feel to the Web documents.

Q26. The tags used for specifying the style in HTML are
(i) <B> (ii) <I> (iii) <M> (iv) <L>
Choose the correct one
(a) (i) and (ii)
(b) (i) and (iii)
(c) (ii) and (iv)
(d) (i), (ii) and (iii)
Answer: (a) Because these two tags are text formatting/styling tags.

Q27. Which of the following tag is used to make a list that lists the items with numbers?
(a) <DL>
(b) <UL>
(c) <OL>
(d) None of these
Answer: (c) <OL> is the ordered list that starts with a number like 1, A, a, i and I etc.

Q28. Which of the following is not HTML list? CBSE 2013
(a) Ordered
(b) Unordered
(c) Definition
(d) Detailed
Answer: (d) Detailed list is not a type of HTML list.

Q29. In an unordered list, it is necessary to enclose each item in CBSE 2013
(a) <LI> tag
(b) <UL> tag
(c) <I> tag
(d) <OL> tag
Answer: (a) Each item must be enclosed in <LI> tag either in ordered list or unordered list.

Q30. Which option do you have while making bulleted lists?
(a) Disc, circle, square
(b) Square, polygon
(c) Disc, circle, rectangle
(d) Disc, oval, polygon
Answer: (a) Bulleted list provides various values like disc, circle and square.

Q31. Which one of the following list type that will create a bulleted list? CBSE 2014
(a) Unordered
(b) Ordered
(c) Definition
(d) All of these
Answer: (a) Unordered list provides various types of bullets like square, disc and circle.

Q32. Which of the following will produce a solid circle bullet when given as value of type with <UL>?
(a) Circle
(b) Disc
(c) Square
(d) Rectangle
Answer: (b) A solid circle bullet use the type disc.

Q33. To create a square bulleted list, use
(a) <UL type=”circle”>
(b) <OL type= “square”>
(c) <ULtype=”square”>
(d) <UL start= “square”>
Answer: (c) Square bulleted list is the part of unordered list.

Q34. In an ordered list, each item cannot be preceded with CBSE 2013
(a) Counting numbers
(b) Arabic numbers
(c) Roman numerals
(d) Bullets
Answer: (d) In unordered list, bullets are used while counting numbers, arabic numbers and roman numbers are used in an ordered list.

Q35. To create a numbered list with A, B, … use
(a) <OL type=”A”>
(b) <OL start=”A”>
(c) <OL begin=”A”>
(d) <OL starts=“a”>
Answer: (a) The given list uses the uppercase letter for each item so, the correct syntax is <OL type=“A”>

Q36. To start a list with number 3, we should write CBSE 2015
(a) <OL start=”3″>
(b) <OLtype=”3″>
(c) <OL value=”3″>
(d) All of these
Answer: (a) The correct syntax for start a list with number 3 is <OL start = “3”>.

Q37. To start a list using circles, use
(a) <UL type=”round”>
(b) <OL start=”l”>
(c) <UL =”circle”>
(d) <UL type =”circle”>
Answer: (d) Because circular list starts with unordered list type circle.

Q38. To start a numbered list with regular numerals, use
(a) <OL type=”A”>
(b) <OL type=”r”>
(c) <OL type=”r”>
(d) <OL type=”u”>
Answer: (b) Because regular numbering is the natural numbers starting from 1, 2, 3, … etc.

Q39. If you want to make a list of items in the form of terms and their descriptions, then you can create a …………. list.
(a) ordered
(b) unordered
(c) definition
(d) nested
Answer: (c) A definition list is a list of items, with a description of each item.

HTML Class 10 Fill in the Blanks [1 Mark each]

Q1. HTML is a subset of ……… .
Answer: SGML

Q2. An element that only has a starting tag and no ending tag is ………….. element.
Answer: empty tag

Q3. The tag that requires a opening as well as closing tag is called ………. .
Answer: container tag

Q4. The attribute topmargin sets a margin alongwith the top of your ………… element.
Answer: BODY

Q5. ………. attribute of BODY tag helps to set background color.
Answer: bgcolor

Q6. The ………… tag is used to define basic font size for the HTML page.
Answer: <BASEFONT>

Q7. The ……….. tag is used to make the Web browser ignore anything that the tag contains.
Answer: <!–…..–>

Q8. ……….. tag is used to bring the text to new line. CBSE 2014
Answer: <BR>

Q9. HR tag is used for  ………..     CBSE 2014
Answer: horizontal line

Q10. …….. and ……… tags break the line flow.
Answer: <BR>, <HR>

Q11. ………… attribute of <HR> tag specifies the width of a horizontal line.
Answer: width

Q12. ……… tag is used to make the text bold.
Answer: <B>

Q13. <LI> tag is an ………… element tag.
Answer: empty

Q14. To display the text in italics, ………. tag is used and to display in type writer font, ……… tag is used. CBSE 2013
Answer: <I>, <TT>

Q15. ………… tag is used to underline the text.
Answer: <U>

Q16. …………. tag creates a bulleted list. CBSE 2015
Answer: <UL>

Q17. noshade is an attribute of …………. tag.
Answer: <HR>

Q18. The unordered list starts with ………….. tag.
Answer: <UL>

Q19. ……..value of type attribute displays a hollow circle for an unordered lists.
Answer: Circle

Q20. If you want to display uppercase alphabets instead of numbers, ………… ordered type should you use.
Answer: A

HTML Class 10 True or False [1 Mark each]

Q1. HTML is a case sensitive Web language.
Answer: False No, you can write your text in both uppercase and lowercase.

Q2. HTML is a programming language CBSE 2015
Answer: False Because it is a markup language.

Q3. <Head> tag is used to define document body.
Answer: False <HEAD> tag is used to define the document head.

Q4. <TITLE> tag is one of the structural tags of HTML document. CBSE 2015
Answer: True HTML provides four structural tags, these are as follows:
<HTML>, <HEAD>, <TITLE>, <BODY>.

Q5. There should be only one <BODY> tag in each Web page. CBSE 2014
Answer: True A Web page contains necessarily one <HEAD> tag and one <BODY> tag.

Q6. All HTML document contains only <BODY> tag.
Answer: False All HTML document contains various tags.

Q7. bgcolor is an attribute of <FONT> tag.
Answer: False It is an attribute of <BODY> tag.

Q8. background attribute is used to display image.
Answer: True It is an attribute of <BODY> tag used to display background image.

Q9. topmargin is used to specify the distance between the top of the document and top of the browser window.
Answer: True topmargin is an attribute of <BODY> tag, which is used to specify the distance between the top of the document and top of the browser window.

Q10. color is an attribute of <FONT> tag.
Answer: True It defines color of the text.

Inserting Images and Links in HTML MCQ Questions

Q1. Web browsers display images in the following format
(a) XBM
(b) JPEG
(c) GIF
(d) All of these
Answer: (d) All of these

Q2. Which tag is used to insert an image in Web page?
(a) <a>
(b) <table>
(c) <img>
(d) <p>
Answer: (c) <img> tag is used to insert inline image in a Web page.

Q3. The correct HTML code for inserting an image is CBSE 2012
(a) <img href=”image.gif”>
(b) <img> image.gif</gif>
(c) <img src = “image.gif”>
(d) <image src = “image.gif” >
Answer: (c) <img src=”image.gif “>

Q4. src attribute used with <img> tag stands for CBSE 2013
(a) screen (b) screen resolution count
(c) source (d) structure
Answer: (c) source

Q5. …………. attribute is used to specify the location of an image file.
(a) alt
(b) src
(c) align
(d) name
Answer: (b) src attribute is used to specify the location of an image file.

Q6. The text specified in the alt attribute is displayed as tooltip in
(a) Internet Explorer
(b) Google Chrome
(c) Both (a) and (b)
(d) None of these
Answer: (a) The text specified in alt attribute is displayed as tooltip in Internet Explorer only.

Q7. The alternate text of an image can be displayed by using attribute of the <img> tag.
(a) src (b) alt
(c) align (d) None of these
Answer: (b) alt attribute of the <img> tag is used to display the alternate text of an image.

Q8. alt attribute allows CBSE 2016
(a) addition of an alternate hyperlink
(b) addition of a border to image
(c) use of an alternative image in place of the specified image
(d) addition of alternative text about an image
Answer: (d) alt attribute allows addition of alternative text about an image.

Q9. The default alignment of images, that are inserted in Web page, is
(a) left
(b) right
(c) inline with text
(d) middle
Answer: (c) An image which is inserted in Web page by default placed inline with text.

Q10. Which is not a valid value in the align attribute of <img> tag? CBSE 2014,2013
(a) top
(b) center
(c) bottom
(d) right
Answer: (b) center is not a valid value in the align attribute of <img> tag. To align in center, <center> tag can be used.

Q11. Why is it important to specify width and height attribute in <img> tag? CBSE 2013
(a) To ensure that image is not copied
(b) The image will not render without these
(c) To stop the image from loading
(d) Helps the browser to load the Web page faster
Answer: (d) Helps the browser to load the Web page faster.

Q12. When creating a Web document, which unit is used to express an image’s height and width? CBSE 2013
(a) Centimetres
(b) Pixels
(c) Dots per inch
(d) Inches
Answer: (b) Image’s height and width unit are expressed in pixels or in per cent form.

Q13. The <a> tag is
(a) a container tag
(b) an empty tag
(c) a closing tag
(d) None of these
Answer: (a) <a> is a container tag, which requires starting as well as matching ending tag.

Q14. ………… is the default color of a hyperlink.
(a) Red
(b) Blue
(c) Green
(d) Black
Answer: (b) Blue

Q15. The tag used in HTML to link a Web page with other Web page is CBSE 2013
(a) <a> (b) <h> (c) <u> (d) <l>
Answer: (a) <a> anchor tag is used to create links.

Q16. Which tag tells, where a link starts? CBSE 2014
(a) <1> (b) <start>
(c) <a> (d) None of these
Answer: (c) <a> tag specify that a link starts, in which, href create a hyperlink.

Q17. Which command should be use to link a page with HTML page? CBSE 2013
(a) <a link = “page.htm” > </a>
(b) <a href = “page.htm”>page</a>
(c) <a connect = “page.htm”></a>
(d) <a attach = “page.htm”></a>
Answer: (b) <a href=”page.htm”>page</a>

Q18. With which code you .can make an image works as link? CBSE 2016
(a) <a href = “URL”>Text</a>
(b) “<a href=”ABC.html”><img src =”graphic.gif”>Click Here</a>
(c) <a ref=mailto:<img src = graphic.gif>Click Here</a>
(d) None of the above
Answer: (b) With <a href=”ABC.html”><img src= “graphic.gif >Click Here</a> image works as link.

Q19. To create a hyperlinked image
(a) the image tag should be within anchor tag
(b) the anchor tag should be within image tag
(c) the image tag should be before the anchor tag
(d) the image tag should be after the anchor tag
Answer: (a) The image tag should be within anchor tag to create hyperlinked image.

Q20. For internal linking, the section names are provided by attribute of <a> tag.
(a) title
(b) href
(c) name
(d) None of these
Answer: (c) For internal linking, section names are provided by name attribute.

Q21. Is it possible to link within the current page?
(a) No
(b) Only in framesets
(c) Yes
(d) None of these
Answer: (c) Yes, it is possible to link within the current page, which is called internal linking.

Q22. ………. attribute of the <a> tag is used to name a section in a Web page to create an internal link.
(a) href
(b) name
(c) align
(d) link
Answer: (b) name attribute is used to create an internal link.

Q23. …………….. attribute is used to set the color of a link while it is active.
(a) vlink
(b) alink
(c) Both
(a) and (b)
(d) None of these
Answer: (b) alink attribute is used to set the color of link while it is active.

Q24. The attribute which is used to send E-mails through a Website.
(a) tomail
(b) mailto
(c) Both
(a) and (b)
(d) None of these
Answer: (b) mailto attribute is used to send E-mails through a Website.

Q25. Choose the correct syntax to create an E-mail link. CBSE 2014
(a) <a href = “abc@xyz.com”>
(b) <a href = “mailto:abc@xyz.com”>
(c) email = “abc@xyz.com”>
(d) <amail = “abc@xyz.com”>
Answer: (b) <a href = “mailto:abc@xyz.com”>

Q26. To display (X+Y)2, correct HTML code is         CBSE 2013
(a) <sub>(X+Y)2</sub>
(b) X+Y< sup > 2 </sup >
(c) (X+Y)<sup>2</sup>
(d) <sup>(X +Y)2</sup>
Answer: (c) (X+Y) <sup>2</sup> code is correct because superscript have to be placed in between <sup> and </sup> tags.

Inserting Images and Links in HTML Fill in the Blanks [1 Mark each]

Q1. The <img> tag is an ………… tag, that means it has no closing tag.
Answer: empty

Q2. <img> tag is used for …………. images. CBSE 2014
Answer: displaying

Q3. …………… tag is used to create inline images. CBSE 2013, 2012
Answer: <img>

Q4. ……………. is an attribute of the <img> tag which specifies the location or URL of the image to be displayed.
Answer: src

Q5. An attribute is an extra piece of information associated with a …………….
Answer: tag

Q6. The ait attribute provides …………… for an image.
Answer: alternative information

Q7. The value for alt attribute is a text string of upto ………….. characters.
Answer: 1024

Q8. An image to be displayed in a Web page has to cover 25% of the browser window horizontally and 50% vertically. The attributes ………… and ………….of the <img> tag would be used for achieving this.
Answer: height, width

Q9. attribute is used to give border to an image. CBSE 2016
Answer: border

Q10. ………… is a word or image that when clicked take us to another Web page. CBSE 2013
Answer: Hyperlink

Q11. ………… tag is used to connect Web pages. CBSE 2014
Answer: <a>

Q12. ……. are used to connect Web pages. They are created with <a> tag. CBSE 2016
Answer: Hyperlinks

Q13. The …………. tag is considered to establish a hypertext relationship between the current document and another URL.
Answer: <a>

Q14. The ………….. attribute is used for specifying the URL of the anchor tag.
Answer: href

Q15. An ……….. link allows a link to another Web page or another Website. CBSE 2011
Answer: external

Q16. The …………….. attribute of <a> tag is used to provide information or a title for the linked document or Web page.
Answer: title

Q17. An link allows a link to another section on the same or different Web page.
Answer: internal

Q18. A visited link on a Website is generally underlined and …………… in color.
Ans. purple

Q19. The default color of alink attribute is ………… .
Answer: red

Q20. ………… is used to change the color of a visited link. CBSE 2016
Ans. vlink

Q21. Using the ………… type URL, you can create the E-mail hyperlink.
Answer: mailto

Q22. The tag ……….. is used to create superscripts and …………. tag is used to create subscripts on a Web page.
Answer: <sup>, <sub>

Inserting Images and Links in HTML True or False [1 Mark each]

Q1. You can have inserted an image in your Web page which is physically present in your computer.
Answer: True With the help of <img src=”image URL”>, we can insert an image in Web page which is present in our computer.

Q2. If the image you are loading in the Web page is not available, then you want a text to appear in the image placeholder, text attribute lets you define this text.
Answer: False The alt attribute is used to define text to appear in the image placeholder, if image is not visible for any reason.

Q3. No value is specified with alt attribute of <img> tag. CBSE 2012
Answer: False alt attribute provides alternate text for an image if the image is not visible on Web page for any reason.

Q4. String as a value of alt attribute must be enclosed in quotation marks.
Answer: True alt attribute contains string which must be enclosed in quotation marks.

Q5. The general syntax for inline image is <img src = “file name” >.
Answer: True At the place of file name, path of the image is specified. If the image is in the same folder as HTML file, it is not needed to specify full path of an image.

Q6. The default alignment of image is right. CBSE 2014
Answer: False There is no default alignment of image with respect to text in HTML.

Q7. It is not important to specify an integer value as the width of the border of an image.
Answer: False Width takes an integer values that are in pixels.

Q8. The align attribute of the <img> tag is used to specify the text that is to be displayed in case the browser that does not support graphics.
Answer: False alt attribute is used to specify the text that is to be displayed in case the browser which does not support graphics.

Q9. We can put a border around an image by using width attribute. CBSE 2013
Answer: False We can put a border around an image by using border attribute.

Q10. border is an attribute of <a> tag. CBSE 2012
Answer: False border is an attribute of <img> tag.

Q11. The <a> tag is called the align tag. CBSE 2011
Answer: False The <a> tag is called anchor tag.

Q12. The anchor tag <a> signals the beginning of the text.
Answer: False Anchor tag is used to create hyperlinks not text.

Q13. The color of the hyperlinks in an HTML document can be changed.
Answer: True We can change the color of hyperlinks in HTML document.

Q14. Hyperlinks can also be created for links within the same document. Linking within the same document is called external linking.
Answer: False Linking within the same document is called internal linking.

Q15. It is not possible to create link within current document. CBSE 2012
Answer: False You can link various sections of the current document together, which is called internal linking.

Q16. The name attribute of the <a> tag allows the user to create links within the same document. CBSE 2011
Answer: True Because name attribute defines a name of a section in a document.

Q17. You should include a mailto function in the body of your document to allow user to respond to your Web page.
Answer: True The mailto function is used to send E-mails from the Website.

Working with Tables in HTML Class 10 MCQ Questions

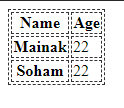
Question 1. Which of these tags belong to table? CBSE 2016
(a) <thead>,<body>,<tr>
(b) <table>,<head>,<tfoot>
(c) <table>,<tr>,<td>
(d) <table>,<tr>,<tt>
Answer: (c),<table>,<tr>, <td> tags are used with table.

Question 2. Which of the following tags gives a caption to the table?
(a) < caption >
(b) < summary >
(c) < frame >
(d) None of these
Answer:(a) <caption> tag is used to give caption to the table.

Question 3. Which of the following is used to specify the beginning of a table’s row?
(a) <table>
(b) <tr>
(c) <row>
(d) <begin>
Answer:(b) <tr> tag indicates the beginning of a table’s row.

Question 4. HTML tag for row is
(a) <colspan>
(b) <tr>
(c) <rowspan>
(d) <td>
Answer: (b) HTML tag for row is <tr>.

Question 5. Which tag is used to add columns in the tables?
(a) <colspan>
(b) <td>
(c) <tr>
(d) None of these
Answer: (b) <td> is used to add columns in the tables.

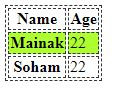
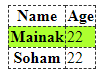
Question 6. The tag is used to specify the individual table data in a table.
(a) <tr>
(b) <td>
(c) <th>
(d)<table>
Answer:(b)The <td> tag is used to specify the individual table data in a table.

Question 7. In order to add border to a table, border attribute is specified in which tag?
(a) <th>
(b) <table>
(c) <td>
(d) <tr>
Answer:(b) border attribute is specified in <table> tag.

Question 8. The attribute used to set the border color of a table is
(a) border
(b) bordercolor
(c) color
(d) border color
Answer:(b) bordercolor is used to set the border color of a table.

Question 9. The frame attribute contains types of values.
(a) 9
(b) 3
(c) 6
(d) 4
Answer: (a) The frame attribute contains 9 types of values.

Question 10. Which of the following is an attribute of < table > tag?
(a) src
(b) cellpadding
(c) link
(d) bold
Answer:(b) cellpadding is an attribute of <table> tag.

Question 11. Which one of the following is not an option for aligning data in a table?
(a) justify
(b) right
(c) left
(d) center
Answer:(a) justify option is not used for aligning data in a table.

Question 12. Which attribute of the < table > tag is used to set an image in the background of a table?
(a) bgcolor
(b) background
(c) frame
(d) rules
Answer:(b) background attribute is used to set an image in the background of a table.

Question 13. The attribute used to specify the background cofor of a table is
(a) color
(b) bgtable
(c) backcolor
(d) bgcolor
Answer: (d) bgcolor is used to specify the background color of a table.

Question 14. The two common attributes of the <img> and the <table> tag are
(a) src and height
(b) height and width
(c) border and src .
(d) they do not have any common attributes.
Answer:(b) height and width are common attributes of the <img> tag and the <table> tag.

Question 15. border, frame, cellspacing, cellpadding, align are the attributes of
(a) <body> tag
(b) <img> tag
(c) <table> tag
(d) None of these
Answer: (c) border, frame, cellspacing, cellpadding, align are the attributes of <table> tag.

Question 16. Which of the following is not an attribute of < table > tag?
(a) border
(b) background
(c) bgcolor
(d) src
Answer:(d) src is not an attribute of <table> tag.

Question 17. In the <td> tag, td stands for
(a) Table Data
(b) Table Time and Date
(c) Table Date
(d) None of these
Answer:(a) td stands for Table Data.

Question 18. What is the correct HTML code to left align the content inside a table cell?
(a) <td valign = “left”>
(b) <td align = “left”>
(c) <td left align >
(d) <td left>
Answer:(b) <td align = “left”>

Question 19. Choose the correct HTML code to right align the content inside a table cell.
(a) <td align = “right” >
(b) <td valign = “right” >
(c) <td rightalign>
(d) <td right = “align” >
Answer: (a) <td align =”right”>

Question 20. Combining two or more cells in a table on a Web page is called
(a) merging
(b) spanning
(c) combining
(d) None of these
Answer:(b) Combining two or more cells in a table on a Web page is called spanning.

Question 21. Which attribute tells, how many rows a cell should span?
(a) colspan = n
(b) rowspan = n
(c) Both (a) and (b)
(d) None of these
Answer:(b) rowspan = n will tell how many rows a cell should span.

Question 22. rowspan = n can be added to only which tag?
(a) <hr>
(b) <table>
(c) <td>
(d) <tr>
Answer: (r) rowspan = n can be added to only <td> tag.

Question 23. Which attribute of <td> tag is used to merge two or more columns to form a single column?
(a) colspan
(b) cellspacing
(c) cellpadding
(d) rowspan
Answer: (a) colspan attribute is used to merge two or more columns to form a single column.

Question 24. colspan = n can be added to tag.
(a) <hr>
(b) < table >
(c) <td>
(d) <tr>
Answer:(r) colspan = n can be added to <td> tag.

Question 25. The attribute helps to align data vertical in a single cell.
(a) align
(b) valign
(c) halig
(d) Both (b) and (c)
Answer:(b) valign attribute is used to align data vertically in a single cell.

Question 26. In the <th> tag, th stands for
(a) Table Heading
(b) Total Heading
(c) Table Header
(d) All of the above
Answer: (c) th stands lor Table Header

Working with Tables in HTML Class 10 Fill in the Blanks [1 Mark each]

Question 1.
To insert a table on a Web page, we use  ………………. tag.
Answer: <table>

Question 2.
The tag to start a table is
Answer:<table>

Question 3.
…………… tag is used to insert data into a table.
Answer: <td>

Question 4.
The <td> tag is a …………………
Answer: container

Question 5.
The……………. attribute is used to display a specific portion of a table border.
Answer: frame

Question 6.
frame attribute is used with…………attribute.
Answer: border

Question 7.
There are total………… values for rules attribute in <table> tag.
Answer: 5

Question 8.
In the rules attribute, the………… value helps to display a table border only between rows.
Answer: rows

Question 9.
Cellspacing is used to create space between different…………… in a table.
Answer: cells

Question 10.
The….. is an attribute of the < table > tag to set the distance between the cell content and its boundary.
Answer: cellpadding

Question 11.
To set image as background of an HTML table, you can use………………… attribute.
Answer: background

Question 12.
By default, color of a table is…………..
Answer: white

Question 13.
The height and width attributes of < table > tag are specified in terms of………….. or percentage.
Answer: pixels

Question 14.
The… attribute is used to provide information about a table.
Answer: summary

Question 15.
<td> tag can only be present inside……….
Answer: <tr>

Question 16.
The………………. attributes is used to combine the cells vertically.
Answer: rowspan

Question 17.
The……………… attribute is used to span two or more columns in a table.
Answer: colspan

Question 18.
The……………… attribute is used to align the data vertically within cells.
Answer: valign

Question 19.
The <tr> tag can only be present inside…………tag.
Answer: <table>

Question 20.
The <thead> tag is used to specify the………..part of the table.
Answer: header

Working with Tables in HTML Class 10 True or False [1 Mark each]

Question 1.
A cell is an intersection of a row and a column.
Answer: True A cell is an intersection of a row and a column.

Question 2.
The cellpadding attribute is used with <td> tag.
Answer: False The cellpadding is used with <table> tag.

Question 3.
<caption> is placed just above the < table> tag.
Answer:False <caption> tag is placed inside the <table> tag.

Question 4.
<td> will make the text bold.
Answer:False <td> is a table data. It is used to define a cell of a table that contains data.

Question 5.
The border is an attribute of <a> tag.
Answer:F3lSB The border is an attribute of <table> tag.

Question 6.
The default value of border attribute is 1.
Answer:False The default value of border attribute is 0.

Question 7.
The cols value in the rules attribute, allows you to display table border only between columns.
Answer:True The cols value in the rules attribute is drawn between columns only.

Question 8.
The cellspacing attribute tells the browser how much space to include between the walls of the table.
Answer:False cellspacing attribute is used to create space between different cells in a table.

Question 9.
< caption > tag gives heading to a Web page.
Answer:False <caption> tag gives title or caption for the table.

Question 10.
cellpadding attribute is used with <body> tag.
Answer:False cellpadding attribute is used with <table> tag.

Question 11.
The rowspan attribute with < table > tag is used to merge more than one cells row wise.
Answer:True The rowspan attribute merges the cells row wise in a table.

Question 12.
The rowspan attribute is used to make a cell span multiple columns.
Answer:False The rowspan attribute is used to make a cell span multiple rows.

Question 13.
The align and valign are the attributes used with <td> tag to set the alignment of data in a cell.
Answer:True The align and valign attributes are used to set alignment of the data.

Question 14.
The <td> tag (column setting) have higher priority than <tr> tag (row setting).
Answer:True The <td> tag (column setting) have higher priority than <tr> tag (row setting).

Question 15.
Table row <tr> tag can accept one attribute.
Answer:False The <tr> tag can accept many attributes.

Question 16.
<th>‘tag is used to specify the column heading in a table.
Answer:True <th> tag is used to specify the column heading in a table.

Computer MCQ Questions

Html project ideas – Best HTML Project Ideas & Topics for Beginners | Latest HTML Practice Project Topics to Learn

HTML Project Ideas & Topics for Beginners

HTML project ideas: For those who have even a little bit of interest in programming, creating the very first HTML project is definitely exciting and something to look forward to. Those who are newbies to coding often wonder what sort of project they can work on to be able to either start their development business or to impress their colleagues, college mates, or even their employers.

Most people start with the most basic ways to code when they’re just joining, and that is by learning HTML and CSS. There are many HTML Project Ideas & Topics for Beginners that you can start out with when they’re just learning. The path for every beginner with coding always begins with these two elements, which means that if you want to make something that is creative, you need to have something that will stand out and be innovative.

Getting the right HTML Project Topics is not the easiest thing in the world, which is why we have a few ideas here that can help you out if you’re a beginner with HTML. You can practice these HTML Topics for Students and even save them as a part of your coding portfolio.

What is HTML?

HTML website ideas: HTML is a markup language, also called a coding tool, that is used for website development. HTML and CSS are used together to make websites which means that learning HTML is important if you want to work in the niche of web development.

HTML has a very simple learning curve, so you can easily pick it up even if you don’t have any prior programming experience. If you know the basics, then it’s even easier to master this coding language.

It may seem daunting and very challenging in the beginning, but remember that baby steps also mean progress, and this is how you can get better. The best way to learn is to keep practicing, which means that trying out different HTML Practice Project Ideas for Beginners that can help you build your portfolio.

HTML Practice Projects for Beginners

html ideas: If you’re a beginner with HTML, then these are some HTML Projects for Students that can help you build up your portfolio and also polish your skills.

Technical Documentation Page

html beginner projects: Even if you’re a beginner with HTML and know the basics of CSS and JavaScript, you can very easily make a technical documentation page. The idea behind this is to make a page where you can click on any one of the topics on the left side of this page, and the associated content will automatically be loaded on the right side.

The making of a technical documentation page is a process that is simple and straightforward with no complexity at all. You need to divide up your webpage into two parts to be able to build this HTML project.

The left side of the page, as mentioned, will have a menu that has all the topics listed from top to bottom, and the right side will have the content that is the documentation that corresponds with each of the topics. You can use JavaScript or CSS bookmark if you want to put in the click function.

Tribute Page

If you’re a beginner with HTML, then this is one of the simplest ideas that you can work on. Now, a tribute page, as the name suggests, is a page where you show respect or honor to someone that has inspired you or someone that you look up to and admire. To make a page like this, all you need is some fundamental HTML concepts, and you’re good to go.

The first thing you need to do is to make the webpage itself. Then you need to add in the picture of the person this page is about, and all in all the details you wish to, like their personal details, history, achievements, and such. You can also have a section where you write some words of respect for this person and how they’ve helped you if you’d like.

If you want to use CSS for this project, you can, since it will be helpful for you to be able to put in different layouts and styles. Make sure that the page is visually appealing as well with good backgrounds. You can go for pastels or earthy tones, and it’s best to stay away from bright contrasting and loud colors for this, but the choice is ultimately yours.

Event Page

html projects for beginners: This is a great project even if you’re a beginner with HTML, and you can even experiment with it. You need to have both CSS and HTML skills for this one. Here you need to create a static page where all the details of an event (product launch, webinar, conference, etc.) are being displayed.

The layout of an event page is very simple too. The header section is where all the names and images of the various speakers with the links will be displayed along with the schedule and the venue of the event. You also need to have a section where the purpose of the event is being described. This is where you will say what the event is for and who is the audience that this is targeted at.

Then section off the page into smaller chunks so that it looks neater and not chaotic. You also need to choose the background color, font color, and font style for the different sections on the page. But be sure that everything complements each other. And add a registration button where people can go ahead and register if they are interested in the event.

Parallax Website

Building a parallax website is very easy and can be done in a day by someone who is well-versed in HTML concepts, even if they’re beginners. A parallax website in one wherein the background you will see a fixed image, and you can scroll up or down on that page and be able to see different sections of that image. This is a way to give a website a unique and beautiful effect.

You need to section out the page into about three to four parts to make a parallax website. Then choose some background images, align all of them on the page in the various section with the text that is relevant. THen set in the padding and the margin, after which you need to integrate the background-position. To add more stylish elements to the page, you can use CSS.

HTML lays a strong foundation for Web Development which is why we have listed Web Development Project Ideas for Beginners for your reference.

Survey Form

Many different websites have forms that they use as a strategy to get customer data. A survey form that is well-made can help you get all the relevant information that you need from the target audience, like the pain points, preference, taste, location, job, age, and more.

This is one of the HTML Project Ideas that is a great way for you to test what you know about it while you design a form and structure a webpage. Building a survey form isn’t very easy, but it’s not so complex that it can’t be done. You just need to know the basic tags/input fields and such that are needed to make a form.

Then just use the tags to make text fields, dates, radio buttons, checkboxes, and all the other elements that a form needs. You can use CSS here as well so that your webpage and form have a better look and feel.

Music Store Page

If you’re a music lover, then a music store page is the perfect experiment for you. You need to know the basics of CSS3 and HTML5 if you want to build this page. The first thing you need to do to make this page is to add a background image that is appropriate and add in a short description of all that you can find on the page.

The header section of the page also needs to have menus that list out songs based on the album, artist, year, genre, and so on. You also need the important and relevant buttons like rewind, stop, start, forward, etc. Add in links and images that are appropriate for the collection of songs available.

On the footer, put in contact details, as well as trial options, subscription packages, in-store purchases, and links for registration.

Do Refer: React Project Ideas & Topics for Beginners

Restaurant Website

This is a great project that will give you loads of chances to showcase all of your creativity. A website for a restaurant needs to have several functionalities while also being detailed and elaborate.

Firstly, you need to make a webpage layout that is aesthetic and captivating, and you need to also have various elements there. This means online reservation options, contact information, social media buttons, good images of the different dishes, prices, small descriptions of the food items, a list of the food items themselves, and all the other details that are important.

You can align all of the different beverages and food items with the prices in a grid by using CSS. When you’re making a website for a restaurant, you need to focus on a combination of colors that is eye-catching, neat font styles, and a stylish layout.

If you want to take this up a notch, you can have a photo gallery that has sliding images of all of the various items of food. You can also have the relevant links on this website so that the audience has an easier time navigating through the site.

Landing Page

This is not really a project that will be best for you if you’re a  beginner with HTML since a strong knowledge of CSS and HTML is needed. But, this is really good practice and will be a great addition to your coding portfolio. Landing pages have a lot of vital elements, and so you need to combine your creativity with the HTML knowledge that you have to make it.

You need to make columns and margins, edit images (resize and crop), make separate sections for the site/content elements, add header and footer, and align the items that are in the columns to make the landing page.

Apart from all of this, you need to also pick the right colors for the page. The colors that you pick have to be ones that complement each other, and each section can have different colors if that is what you want. Just be sure that the page elements aren’t clashing with each other when you use CSS for layout and styling.

Personal Portfolio Page

You need to be well-versed in CSS3 and HTML5 if you want to make a personal portfolio page. Here you need to make a webpage that has all the standard information you would find in a work portfolio like your interest, niche skills, name, projects, and image. You can also add your CV here and host the entire portfolio on GitHub using your account.

The portfolio page should have two sections, that is the header and the footer. The former will have a menu that highlights all of your personal information, work as well as contact information. You can also add an image of yourself on top of the page and have a short summary of your interests and professional career.

Below all of this, add in a few samples of the work that you’ve done. The footer section will then have all of your social media handles where people can reach you.

Photography Website

To make a photography website, you need to work with both CSS3 and HTML5 so that you can add in all the needed elements. You need to make a one-page responsive photography website here with those skills.

You need a landing page on top of which you need to add the name and logo of the brand as well as a description of the site. You can put in a gallery with a view button so that the users on the page can go to the section with the images and slide to view all of them.

There are different viewing layouts that you can add in, like a list, grid, and more. Then add in the padding and margin for the page and pick the color combination that you want along with the image size and font style. Use a flexbox for media queries to get a responsiveness quotient.

Conclusion

HTML and CSS are both the highlights of all of these projects that have been listed out. We recommend that you get a good grasp of both of these before switching to something more complex like Python, PHP, or Python. You need to be comfortable with making HTML projects before you can go ahead and work with more complex projects for development.

You need to keep practicing and working to be better. This is why we have HTML Project Ideas listed here for you. These projects can put all that you’ve learned into practice, and you can highlight them in your CV or even use them to get better opportunities. Once your basics and foundations are right, you can start working on real-world projects that are much bigger and keep challenging yourself as you keep growing.

Props.children react – A quick intro to React’s props.children

INTRODUCTION

Props.children react: At the first sight, the this.props.children can be a bit overwhelming when studying class based components. As many developers and tutorials use React class based components as it gives access to state, it is very necessary to be familiar with props.children (if you are using stateless functional components) and this.props.children (if you are using class components)

What is ‘children’?

What this.props.children  does is that it displays whatever you include between the opening and closing tags when invoking a component.

A simple example

For example, in a class based component.

import React, { Component } from "react";

class Welcome extends Component {
  render(props) {
    return (
      <div>
        <p>Hello Class Component</p>
        <p>{this.props.children}</p>
      </div>
    );
  }
}
export default Welcome;

Here the component is receiving children from , say, app.js which can be passed in the manner shown below.

import Welcome from "./components/React/Welcome";

function App() {
  return (
    <>
      <div className="App">
        <Welcome children="I am a child" />
      </div>
    </>
  );
}

export default App;

As you can see, when the string “I am a child” is passed through to the Welcome component the output looks similar to what is shown below.

Hello Class Component.

I am a child 

Whenever this component is invoked {props.children} will also be displayed and this is just a reference to what is between the opening and closing tags of the component.


A complex example

I will now demonstrate an error solving method via this.props.children , where if there is an error in code it will display Something Went Wrong  or if it is error free code it will simply say Error Free Code

import React, { Component } from "react";

class ErrorBoundary extends Component {
  constructor(props) {
    super(props);

    this.state = {
      hasError: true,
    };
  }

  componentDidCatch(error, info) {
    console.log(error);
  }

    render() {
        if (this.state.hasError) {
        return <h1>Something Went Wrong</h1>;
        } else if (!this.state.hasError) {
        return (<>
                   <h1>Error Free Code</h1>
                   {this.props.children};
                </>);
        }
    }
    }
export default ErrorBoundary;

So, if there is error in the code, then the first return statement will be implemented and all others will be ignored. Or else, the this.props.children that is passed via another (parent) component will be displayed.


CONCLUSION

I hope this shed a little bit more light on React and how you can use props.children to help you customize your app’s content while still being able to reuse the same components in my case for error checking purposes.


React js alternatives – Lightweight Alternatives to React

Lightweight Alternatives to React

React js alternatives: React.js is a marvelous JavaScript library that employs Virtual DOM. React is the prime choice of developers when it comes to building single-page applications.

Why do you need an alternative to React.js?

  • Most of the React developers find it challenging to manage the huge library size of the React.js framework. Surely you can not afford to invest in a framework that demands an exquisite memory space.
  • Secondly, React lacks MVC architecture, especially since the View functionality is not managed by its Model and Controller. Hence, you need an alternative React framework, which is view-oriented.
  • React has a steep learning curve, and developers need to invest a lot of time to learn new technology. Project ignition is delayed.
  • Many React.js developers find it hard to grasp the documentation of JSX React. Beginners are never comfortable with this framework.

In this blog, I am recalling and bringing in front of you the list of React.js alternatives that those experts realized in the tech-talk show. Along with the javascript frameworks, I have mentioned the pros and cons of each of the frameworks and their comparison with React.js.

Preact

Alternatives to react: Jason Miller introduced Preact under the open-source MIT license. You can think of Preact as a lightweight alternative to the React library for developing mobile or web applications, and progressive web apps PWA.

Preact Pros

React js alternatives: It is much compact, precise, and lightweight in size (3KB) so your application can perform faster.

  • Preact uses ES6 API, which enables you to uplift your application from React to Preact very easily. You can even adapt it as a library to create fantastic user interfaces for your project.
  • Entrepreneurs can create new projects easily by using the official CLI without the trouble of getting into Babel and Webpack configuration.
  • You can get all the help from the official website examples and Preact documentation to kick-start your application development.
  • Along with all the inspiring features of React, the Preact library also consists of some special features like the LinkedState.

Preact Cons

You do not get the context support.

  • For the stateful functionalities of your application, the createClass function is missing. Preact only allows you to use ES6 class and stateless components.
  • Preact doesn’t care about the React propTypes.
  • The community size is yet to reach the competition with React.
  • Preact lacks innovation and mostly mimics React.

Preact Vs. React

  • API: Not all the React features are present in Preact; it contains only a small part of the React Application Interface functionality.
  • Size: As I mentioned in the beginning, Preact is much lighter than React. React is 5.3 KB, whereas Preact is only 3 KB.
  • Performance: Because of being lightweight, Preact is faster as compared to React applications.

Svelte

React alternatives: Svelte is a free and open-source front-end compiler created by Rich Harris and maintained by the Svelte core team members. Svelte applications do not include framework references.

Svelte Pros

  • The building time is blazing fast when compared to React or even other frameworks. Usage of the rollup plugin as the bundler might be the secret here.
  • Bundle size is smaller and tiny when gzipped when compared to React, and this is a huge plus point. Even with the shopping cart application I built, the initial load time and the duration to render the UI is extremely low, only the chunky images I have added takes some time :).
  • Binding classes and variables are relatively easy, and custom logic is not needed when binding classes.
  • Scoping CSS <style> within the component itself allows flexible styling.
  • Easier to understand and get started when compared to other frameworks as the significant portion of Svelte is plain JavaScript, HTML, and CSS.
  • More straightforward store implementation when compared to React’s context API, granted context API provides more features, and Svelte might be simple enough for common scenarios.

Svelte Cons

  • Svelte won’t listen for reference updates and array mutations, which is a bummer, and developers need to actively lookout for this and make sure arrays are reassigned so the UI will be updated.
  • Usage style for DOM events can also be annoying, as we need to follow Svelte’s specific syntax instead of using the predefined JS syntax. Cannot directly use onClick like in React, but instead, have to use special syntax such as on:click.
  • Svelte is a new and young framework with minimal community support, thereby doesn’t have support for a wide range of plugins and integrations that might be required by a heavy production application. React is a powerful contender here.
  • No additional improvements. Ex- React suspense actively controls your code and how it runs and tries to optimize when the DOM is updated and sometimes even provides automatic loading spinners when waiting for data. These extra features and continued improvements are relatively low in Svelte.
  • Some developers might not prefer using special syntaxes such as #if and #each within their templates and instead would want to use plain JavaScript, which React allows. This might come down to personal preferences.

Svelte Vs. React

Svelte does provide noticeable improvements in certain features when compared to React. But it may not still be significant or large enough to replace React completely. React is still robust and broadly adopted. Svelte has quite some catching up to do. But concept-wise, the compiling approach taken by Svelte has proven that virtual DOM diffing isn’t the only approach to build fast reactive applications, and a good enough compiler can get the same job done as well as it gets.

Vanilla JS

Vanilla JS is nothing but plain JS without any external libraries or frameworks. Using this we can build powerful and cross-platform applications.

The major differences

Since there are so many ways to write vanilla JS, it can be difficult to pin down a list of differences that applies to 100% of apps. But here we’ll define some key differences that apply to many plain JS apps that are written without a framework.

Those differences are:

  • How the user interface is first created
  • How functionality is split up across the app
  • How data is stored on the browser
  • How the UI is updated

Is Vanilla JS worth over React

Vanilla JS is awesome but it’s not a great alternative when it comes to building huge applications with complex dynamic functionalities. Besides, it cannot create complex and efficient UIs. So if you have an app that changes frequently and drastically with thousands of pages, it is better to use a modern Javascript framework.

On the other hand, React which allows us to use reusable components and is capable of keeping the UI in sync with the state can definitely solve this problem.

CSS url() Function – Definition, Syntax | CSS url Image Path | Examples for Absolute, Relative URL() Function in CSS

url() css: If we are talking about background images, we can use @import. CSS has a wide range of properties that can reference an image file, display that file on the image as a part of the element’s background. Of all those, we use CSS Image Syntax url() to load up a resource. From this tutorial, you will find the full details about the CSS URL() function like definition, syntax, supported browsers, properties that accept URL as a Value, and example programs.

CSS url() Function

CSS url function: To include a file, we use the inbuilt function ie., url() CSS function. The parameter is an absolute URL, a relative URL, or a data URL. The url() function can be passed as a parameter of another CSS function, like the attr() function. Based on the property for which it is a value, the resource queried can be an image, font, or stylesheet. The url() functional representation is the value for the <url> data type.

Syntax

url( <string> <url-modifier>* )

css url: String indicates the URL or ID of an SVG Shape. (*) asterisk denotes that the preceding group occurs zero or more times.

<URL> 

css url(): An URL is a relative or Absolute Address or Pointer for which the web resource is included or a data uri in single or double-quotes. Quotes are necessary if an URL includes Parentheses, whitespace, or quotes unless these characters are escaped, or if addresses include control characters above 0x7e. Double Quotes can’t occur inside double quotes and single quotes can’t occur within single quotes unless escaped.

If you want to write an URL without Quotes, you can use a backslash(\) before any paratheses, whitespace characters or single quotes, double quotes that are part of the URL.

Path

It References SVG Shape’s ID — circle, ellipse, line, path, polygon, polyline, or rect by using the shape’s geometry as the path.

<url-modifier>

In the coming future url() function can support specifying a modifier, functional notation, or identifier that alters the URL String Meaning. As of now, it is not fully defined and supported.

Parameters

This function allows a single parameter url that holds the url in string format. The following examples of url are such as:

<css_property>: url("https://btechgeeks.com/image.png")
<css_property>: url('https://btechgeeks.com/image.png')
<css_property>: url(https://betchgeeks.com/image.png)

Values

The url() function can be added as a value for background, background-image, list-style, list-style-image,content, cursor, border, border-image,border-image-source, mask, mask-image, src in the context of a @font-face block, and @counter-style/symbol

Some times url() is Optional

At times, url() functional notation is optional. For suppose when you use the @import rule, you can omit the URL() and simply provide a <string> for the url.

Absolute Vs Relatieve URL

You can choose between Absolute URL, Relative URL, and Root-Relative URL as the Parameter as all of them are valid.

/* Absolute URL */
background-image: url(http://www.btechgeeks.com/images/image.png);
​
/* Relative URLs */
background-image: url(image.png);
background-image: url(../images/image.png);
​
/* Root-relative URL */
background-image: url(/images/image.png);

Also Check:

Supported Browsers

The browsers supported by url() function are as follows:

  • Google Chrome
  • Internet Explorer
  • Firefox
  • Safari
  • Opera

Properties that accept URL as a Value

  • background-image
  • border-image
  • content
  • list-style-image

Usage of CSS url() function in Filter

If you use an URL as a path for filter the URL needs to meet the following criteria and they are as below

  • The Path to an SVG File should be appended with filter ID.
  • Should consist ID of the filter if an SVG already exists on the page.
.blur {
filter: url(my-file.svg#svg-blur); /* the URL of an SVG file used as a filter */
}

.inline-blur {
filter: url(#svg-blur); /* the ID of an SVG that is embedded in the HTML page */
}

Examples using url() in CSS

section {
  background-image: url(picture.png);
}

This is a relative URL which means that it will search for the file inside the same folder.

Relative url() Usage in CSS

We can go back to one folder:

section { 
    background-image: url(../picture.png); 
}

Or can go into a folder

section { 
    background-image: url(someFolder/picture.png); 
}

Or can directly load from the root folder of the CSS

section { 
    background-image: url(/picture.png); 
}

Or we can directly fetch from some website

section { 
    background-image: url(https://example.com/picture.png); 
}

Example of Usage in the Content Property

HTML

<ul>
  <li>Item 1</li>
  <li>Item 2</li>
  <li>Item 3</li>
</ul>

CSS

li::after {
  content: ' - ' url(https://mdn.mozillademos.org/files/16761/star.gif);
}

OUTPUT

css url() function example result

display: block css – The CSS Display Property | CSS Display Block, Inline, None Property Definitions, Syntax & Examples

The CSS Display property

Display: block css: In this tutorial, all you will gonna learn about the CSS Display property and its syntax with an example program. In HTML, the default display property value is obtained from the HTML specifications or from the browser/user default style sheet. The default value in XML is inline, including SVG elements. In CSS, the most important property for controlling layout is the CSS Display property. Gain more knowledge from the below links and become a good developer in CSS.

CSS Display Property

The display property determines how the elements are rendered onto the screen itself. The default display value for most elements is block or inline.

Syntax for Display Property in CSS

display: value;

The CSS display property is defined using keyword values:

  • block
  • inline
  • none
  • contents
  • flow
  • flow-root
  • table (and all the table-* ones)
  • flex
  • grid
  • list-item
  • inline-block
  • inline-table
  • inline-flex
  • inline-grid
  • inline-list-item

plus others you will not likely use, like ruby.

Syntax:

/* legacy values */
display: block;
display: inline;
display: inline-block;
display: flex;
display: inline-flex;
display: grid;
display: inline-grid;
display: flow-root;

/* Global values */
display: inherit;
display: initial;
display: unset;

/* box generation */
display: none;
display: contents;

/* two-value syntax */
display: block flow;
display: inline flow;
display: inline flow-root;
display: block flex;
display: inline flex;
display: block grid;
display: inline grid;
display: block flow-root;

/* other values */
display: table;
display: table-row; /* all table elements have an equivalent CSS display value */
display: list-item;

Each one of these will alter the behavior of how the elements are rendered onto the screen.

CSS Display Values

Value Description
inline It is used to displays an element as an inline element.
block It is used to displays an element as a block element
contents It is used to disappear the container.
flex It is used to display an element as a block-level flex container.
grid It is used to display an element as a block-level grid container.
inline-block It is used to display an element as an inline-level block container.
inline-flex It is used to display an element as an inline-level flex container.
inline-grid It is used to display an element as an inline-level grid container.
inline-table It is used to display an inline-level table
list-item It is used to display all the elements in <li> element.
run-in It is used to display an element inline or block level, depending on the context.
table It is used to set the behavior as <table> for all elements.
table-caption It is used to set the behavior as <caption> for all elements.
table-column-group It is used to set the behavior as <column> for all elements.
table-header-group It is used to set the behavior as <header> for all elements.
table-footer-group It is used to set the behavior as <footer> for all elements.
table-row-group It is used to set the behavior as <row> for all elements.
table-cell It is used to set the behavior as <td> for all elements.
table-column It is used to set the behavior as <col> for all elements.
table-row It is used to set the behavior as <tr> for all elements.
none It is used to remove the element.
initial It is used to set the default value.
inherit It is used to inherit the property from its parents’ elements.

By default, browsers render specific elements on different levels. For instance, <div> elements are represented as blocks by default, while <span> elements seem inline by default, as shown below:

<body>

<div id="div-0"> This is my first div.</div>

<div id="div-1"> This is my second div.</div>

<div id="div-2"> This is my third div.</div>

<br>

<span id="span-0">This is my first span.</span>

<span id="span-1">This is my second span.</span>

<span id="span-2">This is my third span.</span>

</body>

<style type="text/css">

body { font-family: "Avenir Heavy"; }

div, span {

background-color: #2e3f50;

padding: 10px;

border-radius: 5px;

}

div { color: #fd8f59; }

span { color: #1ebda5; }

</style>

Output:

display property values example output

In this post, we’ll analyze the most important ones:

  • block
  • inline
  • inline-block
  • none

CSS Display: Inline

It is the default value of every HTML element.

All the HTML tags are displayed inline out of the box except some elements like divp andsection, which are set asblockby the user-agent (the browser).

Inline elements don’t have any margin or padding applied.

Same for height and width.

inline-block

Similar toinline, but withinline-block width and height are applied as we specified.

Block

All the elements are inline elements except these:

  • div
  • p
  • section
  • ul

which are set as block by the browser.

Example:

span {
    display: block;
}
a {
    display: block;
}
Note: Changing

With display: block, elements are stacked one after each other, vertically, and every element takes up 100% of the page.

The values assigned to the width and height properties are respected, if you set them, along with marginandpadding.

None

With the help of display: none, elements will be made disappeared from the browser.

Example:

h1 {
    display: none;
}
p {
    display: none;
}

Font family inherit – CSS Inheritance | What is CSS Inherit Keyword? | List of CSS Properties that are Inherited

CSS Inheritance

Font family inherit: In CSS, inheritance manages what occurs when no value is named for a property on an element. This tutorial helps you more in learning about the CSS inherit Keyword along with the inherited and non-inherited properties. Click on the below available links and understand the concept of Inheritance in CSS.

CSS Inheritance

There are some CSS selectors that actually inherit styles from their parent element.

This helps us to specify the style of a particular element explicitly.

Some other properties make more sense to not be inherited.

For example, fonts, when we set the font-family to the body element, all other element inside the body tags get the same font. In better words, the children of the body elements inherit the CSS style/ font.

The background-color property, on the other hand, makes little sense to be inherited.

CSS properties can be classified into two types:

  • inherited properties, which by default are set to the computed value of the parent element
  • non-inherited properties, which by default are set to the initial value of the property

CSS inherit Keyword Definition & Syntax

In CSS, the inherit keyword defines that a property should inherit its value from its parent element. However, it can be used for any CSS property, and on any HTML element.

Syntax:

property

: inherit;

Example:

* {
  font-family: inherit;
  line-height: inherit;
  color: inherit;
}

html {
  font-size: 125%;
  font-family: sans-serif;
  line-height: 1.5;
  color: #222;
}

List of CSS Properties that are Inherited

List of the properties that inherit their parent style:

  • border-collapse
  • border-spacing
  • caption-side
  • color
  • cursor
  • direction
  • empty-cells
  • font-family
  • font-size
  • font-style
  • font-variant
  • font-weight
  • font-size-adjust
  • font-stretch
  • font
  • letter-spacing
  • line-height
  • list-style-image
  • list-style-position
  • list-style-type
  • list-style
  • orphans
  • quotes
  • tab-size
  • text-align
  • text-align-last
  • text-decoration-color
  • text-indent
  • text-justify
  • text-shadow
  • text-transform
  • visibility
  • white-space
  • widows
  • word-break
  • word-spacing

Forcing properties to inherit

Suppose one of the elements doesn’t inherit their parent, then we can explicitly state that to inherit their parent.

Example:

body {
    background-color: yellow;
}

p {
  background-color: inherit;
}

Forcing properties to NOT inherit

With contradiction, we also want some element not to inherit their parent.

We can use revert property value to explicitly tell not to inherit their parent.

This is very rarely used though.

Other special values

In addition to the keywords, inherit and revert, we can also set values like:

  • initial: use the default browser stylesheet if available. If not, and if the property inherits by default, inherit the value. Otherwise do nothing.
  • unset: if the property inherits by default, inherit. Otherwise do nothing.

Fancy html table – Styling HTML Tables with CSS | Stylish CSS Tables | HTML Table CSS Examples

Styling HTML Tables with CSS

fancy html table: In this tutorial, we will be learning how to style HTML tables with CSS properties or functions. Also, you can check some HTML Table CSS Examples from the below sections via using direct links available below:

How to Set Different Properties of an HTML table using CSS

You can set the following properties of a table:

  • The border-collapse defines whether the browser needs to control the appearance of the adjacent borders that touch each other or whether each cell should maintain its style.
  • The border-spacing names the width that should appear between table cells.
  • The caption-side captions are shown in the<caption>element. By default, these are rendered above the table in the document. You use the caption-side property to control the placement of the table caption.
  • The empty-cells specify whether the border should be shown if a cell is empty.
  • The table-layout permits browsers to speed up the layout of a table with the help of the first width properties it comes across for the rest of a column rather than having to load the whole table before rendering it.

Also Check:

How to Style a Table with CSS

By using Tables with CSS we can create a fancy page layout.

At first, let’s watch the table in HTML:

<table>
      <thead>
        <tr>
          <th scope="col">Name</th>
          <th scope="col">Age</th>
        </tr>
      </thead>
      <tbody>
        <tr>
          <th scope="row">Mainak</th>
          <td>22</td>
        </tr>
        <tr>
          <th scope="row">Soham</th>
          <td>22</td>
        </tr>
      </tbody>
    </table>

The default browser style is not very much attractive.

table default

We can use CSS on the table element to modify it for an even better look.

We can start with a border for the table.

We can apply it on thetableelement, and on the inner elements too, like th and td:

table,
th,
td {
  border: 1px dashed #333;
}

After putting a border we get a nice result.

table border

One common thing with tables is the ability to add color to one row, and a different color to another row. This is possible using the :nth-child(odd) or :nth-child(even) selector:

tbody tr:nth-child(odd) {
  background-color: greenyellow;
}

That gives us:

table border color

If we add border-collapse: collapse; to the table element, all borders are collapsed into one:

table border collapse

Image rotate css – How to Continuously Rotate an Image using CSS? | CSS Continuous Image Rotation

How to Continuously Rotate an Image using CSS

Image rotate css: If you are searching for a code in CSS that can rotate any image? Then this is the right tutorial you are looking for. We have covered everything like How to Continuously Rotate an Image using CSS Animations.

Image Element has three classes namely rotate, linear, infinite. In CSS Stylesheet we need to create a declaration block for each class. These classes are called utility or helper classes.

.rotate Code Block Declaration

.rotate {
animation: rotation 2s;
}

This will not make anything. We can add an animation property to the element to rotate it:

animation: rotation 2s infinite linear;

Or we can add a class namely rotate to a particular element to target that:

.rotate {
  animation: rotation 2s infinite linear;
}

We can tweak the 2s to slow down or speed up the rotation period of the element.

Then we can add the keyframes with transform property for it to make rotation:

@keyframes rotation {
  from {
    transform: rotate(0deg);
  }
  to {
    transform: rotate(359deg);
  }
}

Now the element should rotate. If you reload your browser you will see the image rotating a single time over 2 seconds. If you want to rotate the image continuously you need to change the animation transition timing from default ease to a consistent speed curve known as linear.

Do Check:

.Linear Code Block Declaration

.linear {
animation-timing-function: linear;
}

Reload your browser tab so that image will rotate to spin from start to end with a consistent speed rate.

.infinite Code Block Declaration

css rotate image animation: Let’s us make our image rotate infinitely by declaring our .infinite code block

.infinite {
animation-iteration-count: infinite;
}

We can declare all our animation properties in a single line and a single class as follows

.rotate-image {
animation: rotation 2s linear infinite;
}

This can save a lot of code but for learning purposes, it is better to break things into smaller pieces. You can understand how individual components work.

React bootstrap side navbar – How to Create a Navigation Bar and Sidebar Using React

INTRODUCTION

React bootstrap side navbar: The navbar I focus on will be a sidebar via React. I will guide you through the React project creation. Make sure you have node.js installed in your system.

  1. Make a workspace folder and name it.
  2. Use npx create-react-app navbar to create a new project in the directory.
  3. Navigate inside it by using cd navbar in your IDE, I would recommend using Visual Studio Code.
  4. npm start in terminal to start the localhost server in your browser, I would recommend using Google Chrome.


DEPENDENCIES REQUIRED

React sidebar navigation: Go into package.json file and paste these dependencies in there:

"bootstrap": "^4.3.1",
"react": "^16.10.2",
"react-bootstrap": "^1.0.0-beta.14",
"react-dom": "^16.10.2",
"react-router-dom": "^5.0.1",
"react-scripts": "3.1.1",
"styled-components": "^4.3.2"

Now actually install these dependencies by opening a terminal and typing:

npm install

Paste this CDN link in the <head> tag inside index.html. It is for Font Awesome icons.

<link rel="stylesheet" href="https://use.fontawesome.com/releases/v5.15.3/css/all.css" integrity="sha384-SZXxX4whJ79/gErwcOYf+zWLeJdY/qpuqC4cAa9rOGUstPomtqpuNWT9wdPEn2fk" crossorigin="anonymous">


MAKING COMPONENT STRUCTURE

React menu bar: Right click on the src folder and create a folder called components.

Right click on the components folder and create a Navbar.js file. Paste the code written below.

import React from "react";

export const NavigationBar = () => (
  <nav class="navbar navbar-expand-lg navbar-light bg-light">
    <div class="container-fluid">
      <a class="navbar-brand" href="#">
        Navbar
      </a>
      <button
        class="navbar-toggler"
        type="button"
        data-bs-toggle="collapse"
        data-bs-target="#navbarSupportedContent"
        aria-controls="navbarSupportedContent"
        aria-expanded="false"
        aria-label="Toggle navigation"
      >
        <span class="navbar-toggler-icon"></span>
      </button>
      <div class="collapse navbar-collapse" id="navbarSupportedContent">
        <ul class="navbar-nav me-auto mb-2 mb-lg-0">
          <li class="nav-item">
            <a class="nav-link active" aria-current="page" href="#">
              Home
            </a>
          </li>
          <li class="nav-item">
            <a class="nav-link" href="#">
              Link
            </a>
          </li>
          <li class="nav-item dropdown">
            <a
              class="nav-link dropdown-toggle"
              href="#"
              id="navbarDropdown"
              role="button"
              data-bs-toggle="dropdown"
              aria-expanded="false"
            >
              Dropdown
            </a>
          </li>
          <li class="nav-item">
            <a
              class="nav-link disabled"
              href="#"
              tabindex="-1"
              aria-disabled="true"
            >
              Disabled
            </a>
          </li>
        </ul>
        <form class="d-flex">
          <input
            class="form-control me-2"
            type="search"
            placeholder="Search"
            aria-label="Search"
          />
          <button class="btn btn-outline-success" type="submit">
            Search
          </button>
        </form>
      </div>
    </div>
  </nav>
);

Now the header will look similar to the picture mentioned below.

Routing is how you get from page to page, so paste the code below inside <Router>. It basically says, if on this path, render this particular component:

<Switch>
  <Route exact path="/" component={Home} />
  <Route path="/about" component={About} />
  <Route component={NoMatch} />
</Switch>

This currently breaks the app because we do not have these components. So, let’s add these pages to make sure navigation will work.

Inside of src/components/Pages, create Home.js and paste this inside:

import React from "react";
import styled from "styled-components";
const GridWrapper = styled.div`
  display: grid;
  grid-gap: 10px;
  margin-top: 1em;
  margin-left: 6em;
  margin-right: 6em;
  grid-template-columns: repeat(12, 1fr);
  grid-auto-rows: minmax(25px, auto);
`;
export const Home = (props) => (
  <GridWrapper>
    <p>This is a paragraph and I am writing on the home page</p>
    <p>This is another paragraph, hi hey hello whatsup yo</p>
  </GridWrapper>
);

Inside of src/components/Pages, create About.js and paste this inside:

import React from "react";
import styled from "styled-components";
const GridWrapper = styled.div`
  display: grid;
  grid-gap: 10px;
  margin-top: 1em;
  margin-left: 6em;
  margin-right: 6em;
  grid-template-columns: repeat(12, 1fr);
  grid-auto-rows: minmax(25px, auto);
`;
export const About = () => (
  <GridWrapper>
    <h2>About Page</h2>
    <p>
      State at ceiling lay on arms while you're using the keyboard so this human
      feeds me.
    </p>
    <p>I am a kitty cat, sup, feed me, no cares in the world</p>
    <p>Meow meow, I tell my human purr for no reason but to chase after</p>
  </GridWrapper>
);

Inside of src/components/Pages, create Nomatch.js and paste this inside:

import React from 'react';
import styled from 'styled-components';
const Wrapper = styled.div`
  margin-top: 1em;
  margin-left: 6em;
  margin-right: 6em;
`;
export const NoMatch = () => (
  <Wrapper>
    <h2>No Match</h2>
  </Wrapper>
)

Do not forget to include the components in App.js file.

import { Home } from "./components/Pages/Home";
import { About } from "./components/Pages/About";
import { Nomatch } from "./components/Pages/Nomatch";

Alright, we can actually create the sidebar now.

Inside of components, create Sidebar.js

We know that we want to create a Sidebar component and export it for use inside of App.js. Put this inside Sidebar.js:

import React, { Component } from 'react'

export class Sidebar extends Component {
    render() {
        return (
            <div>
                
            </div>  
        )
    }
}

export default Sidebar

This basically is a class component, which renders a given code.

Then paste the code given below inside the return statement.

<SideNav></SideNav>

Now creating all the components required in separate files namely,  SideNav.js and NavItem.js.

NavItem.js

class NavItem extends React.Component {
  render() {
    return (
    );
  }
}

Inside of render, but above return, type:

const { active } = this.props;

This gets the active variable out of NavItem’s props. Now import the following

import { BrowserRouter as Router, Route, Link } from "react-router-dom";

Inside NavItem’s return, add this:

<StyledNavItem active={active}>
  <Link to={this.props.path} className={this.props.css} onClick={this.handleClick}>
    <NavIcon></NavIcon>
  </Link>
</StyledNavItem>

If you look at the props on <Link>, to is the path to go to, className passes in the CSS for the Font Awesome icon, and onClick will call the handleClick() method. Let’s create that method. Put it above render:

handleClick = () => {
  const { path, onItemClick } = this.props;
  onItemClick(path);
}

This arrow function gets path and onItemClick from NavItem’s props and then calls onItemClick().

Create StyledNavItem. The <Link> tag uses an anchor, so, the anchor selector is used. The only confusing part about the CSS is the part that uses props. It says: using the active prop, decide which of the colors to choose. So, if the home page is active, make the home page icon white:

const StyledNavItem = styled.div`
  height: 70px;
  width: 75px; /* width must be same size as NavBar to center */
  text-align: center; /* Aligns <a> inside of NavIcon div */
  margin-bottom: 0;   /* Puts space between NavItems */
  a {
    font-size: 2.7em;
    color: ${(props) => props.active ? "white" : "#9FFFCB"};
    :hover {
      opacity: 0.7;
      text-decoration: none; /* Gets rid of underlining of icons */
    }  
  }
`;


SideNav.js

Styled components used for styling the sidenav component.

const StyledSideNav = styled.div`
  position: fixed; /* Fixed Sidebar (stay in place on scroll and position relative to viewport) */
  height: 100%;
  width: 75px; /* Set the width of the sidebar */
  z-index: 1; /* Stay on top of everything */
  top: 3.4em; /* Stay at the top */
  background-color: #222; /* Black */
  overflow-x: hidden; /* Disable horizontal scroll */
  padding-top: 10px;
`;

We want SideNav to be a stateful component. This is because it needs to store what the current path is and based on that decide which icon should be selected and colored white.

Create a constructor. In there, create a state that holds the activePath, which we will set to the home path for now, and items that holds the information for our selectable icons

constructor(props) {
  super(props);
  this.state = {
    activePath: '/',
    items: [
      {
        path: '/', 
        name: 'Home',
        css: 'fa fa-fw fa-home',
        key: 1 
      },
      {
        path: '/about',
        name: 'About',
        css: 'fa fa-fw fa-clock',
        key: 2
      },
      {
        path: '/NoMatch',
        name: 'NoMatch',
        css: 'fas fa-hashtag',
        key: 3
      },
    ]
  }  
}
onItemClick = (path) => {
  this.setState({ activePath: path }); /* Sets activePath which causes rerender which causes CSS to change */
}

All this code says is change the activePath by setting the state. If you do not know, whenever you call setState(), React will rerender your component, which will render the change to show you selected a different icon.

Change your render to look like this:

render() {
  const { items, activePath } = this.state;
  return (
    <StyledSideNav>
      {
        /* items = just array AND map() loops thru that array AND item is param of that loop */
        items.map((item) => {
          /* Return however many NavItems in array to be rendered */
          return (
            <NavItem path={item.path} name={item.name} css={item.css} onItemClick={this.onItemClick} /* Simply passed an entire function to onClick prop */ active={item.path === activePath} key={item.key}/>
          )
        })
      }
    </StyledSideNav>
  );
}

Before return, items and activePath are retrieved from the state. In order to render out all NavItems, we loop through all of the items using map().


NOTE: Remember to import all required imports that are used in the files, specially the custom HTML tags.