CSS url() Function – Definition, Syntax | CSS url Image Path | Examples for Absolute, Relative URL() Function in CSS

url() css: If we are talking about background images, we can use @import. CSS has a wide range of properties that can reference an image file, display that file on the image as a part of the element’s background. Of all those, we use CSS Image Syntax url() to load up a resource. From this tutorial, you will find the full details about the CSS URL() function like definition, syntax, supported browsers, properties that accept URL as a Value, and example programs.

CSS url() Function

CSS url function: To include a file, we use the inbuilt function ie., url() CSS function. The parameter is an absolute URL, a relative URL, or a data URL. The url() function can be passed as a parameter of another CSS function, like the attr() function. Based on the property for which it is a value, the resource queried can be an image, font, or stylesheet. The url() functional representation is the value for the <url> data type.

Syntax

url( <string> <url-modifier>* )

css url: String indicates the URL or ID of an SVG Shape. (*) asterisk denotes that the preceding group occurs zero or more times.

<URL> 

css url(): An URL is a relative or Absolute Address or Pointer for which the web resource is included or a data uri in single or double-quotes. Quotes are necessary if an URL includes Parentheses, whitespace, or quotes unless these characters are escaped, or if addresses include control characters above 0x7e. Double Quotes can’t occur inside double quotes and single quotes can’t occur within single quotes unless escaped.

If you want to write an URL without Quotes, you can use a backslash(\) before any paratheses, whitespace characters or single quotes, double quotes that are part of the URL.

Path

It References SVG Shape’s ID — circle, ellipse, line, path, polygon, polyline, or rect by using the shape’s geometry as the path.

<url-modifier>

In the coming future url() function can support specifying a modifier, functional notation, or identifier that alters the URL String Meaning. As of now, it is not fully defined and supported.

Parameters

This function allows a single parameter url that holds the url in string format. The following examples of url are such as:

<css_property>: url("https://btechgeeks.com/image.png")
<css_property>: url('https://btechgeeks.com/image.png')
<css_property>: url(https://betchgeeks.com/image.png)

Values

The url() function can be added as a value for background, background-image, list-style, list-style-image,content, cursor, border, border-image,border-image-source, mask, mask-image, src in the context of a @font-face block, and @counter-style/symbol

Some times url() is Optional

At times, url() functional notation is optional. For suppose when you use the @import rule, you can omit the URL() and simply provide a <string> for the url.

Absolute Vs Relatieve URL

You can choose between Absolute URL, Relative URL, and Root-Relative URL as the Parameter as all of them are valid.

/* Absolute URL */
background-image: url(http://www.btechgeeks.com/images/image.png);
​
/* Relative URLs */
background-image: url(image.png);
background-image: url(../images/image.png);
​
/* Root-relative URL */
background-image: url(/images/image.png);

Also Check:

Supported Browsers

The browsers supported by url() function are as follows:

  • Google Chrome
  • Internet Explorer
  • Firefox
  • Safari
  • Opera

Properties that accept URL as a Value

  • background-image
  • border-image
  • content
  • list-style-image

Usage of CSS url() function in Filter

If you use an URL as a path for filter the URL needs to meet the following criteria and they are as below

  • The Path to an SVG File should be appended with filter ID.
  • Should consist ID of the filter if an SVG already exists on the page.
.blur {
filter: url(my-file.svg#svg-blur); /* the URL of an SVG file used as a filter */
}

.inline-blur {
filter: url(#svg-blur); /* the ID of an SVG that is embedded in the HTML page */
}

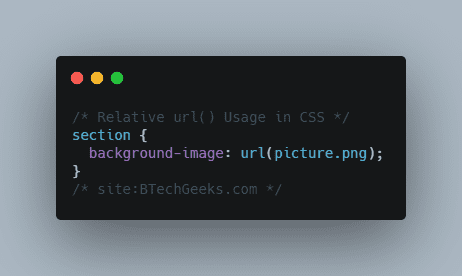
Examples using url() in CSS

section {
  background-image: url(picture.png);
}

This is a relative URL which means that it will search for the file inside the same folder.

Relative url() Usage in CSS

We can go back to one folder:

section { 
    background-image: url(../picture.png); 
}

Or can go into a folder

section { 
    background-image: url(someFolder/picture.png); 
}

Or can directly load from the root folder of the CSS

section { 
    background-image: url(/picture.png); 
}

Or we can directly fetch from some website

section { 
    background-image: url(https://example.com/picture.png); 
}

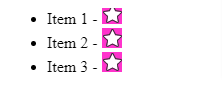
Example of Usage in the Content Property

HTML

<ul>
  <li>Item 1</li>
  <li>Item 2</li>
  <li>Item 3</li>
</ul>

CSS

li::after {
  content: ' - ' url(https://mdn.mozillademos.org/files/16761/star.gif);
}

OUTPUT

css url() function example result

display: block css – The CSS Display Property | CSS Display Block, Inline, None Property Definitions, Syntax & Examples

The CSS Display property

Display: block css: In this tutorial, all you will gonna learn about the CSS Display property and its syntax with an example program. In HTML, the default display property value is obtained from the HTML specifications or from the browser/user default style sheet. The default value in XML is inline, including SVG elements. In CSS, the most important property for controlling layout is the CSS Display property. Gain more knowledge from the below links and become a good developer in CSS.

CSS Display Property

The display property determines how the elements are rendered onto the screen itself. The default display value for most elements is block or inline.

Syntax for Display Property in CSS

display: value;

The CSS display property is defined using keyword values:

  • block
  • inline
  • none
  • contents
  • flow
  • flow-root
  • table (and all the table-* ones)
  • flex
  • grid
  • list-item
  • inline-block
  • inline-table
  • inline-flex
  • inline-grid
  • inline-list-item

plus others you will not likely use, like ruby.

Syntax:

/* legacy values */
display: block;
display: inline;
display: inline-block;
display: flex;
display: inline-flex;
display: grid;
display: inline-grid;
display: flow-root;

/* Global values */
display: inherit;
display: initial;
display: unset;

/* box generation */
display: none;
display: contents;

/* two-value syntax */
display: block flow;
display: inline flow;
display: inline flow-root;
display: block flex;
display: inline flex;
display: block grid;
display: inline grid;
display: block flow-root;

/* other values */
display: table;
display: table-row; /* all table elements have an equivalent CSS display value */
display: list-item;

Each one of these will alter the behavior of how the elements are rendered onto the screen.

CSS Display Values

Value Description
inline It is used to displays an element as an inline element.
block It is used to displays an element as a block element
contents It is used to disappear the container.
flex It is used to display an element as a block-level flex container.
grid It is used to display an element as a block-level grid container.
inline-block It is used to display an element as an inline-level block container.
inline-flex It is used to display an element as an inline-level flex container.
inline-grid It is used to display an element as an inline-level grid container.
inline-table It is used to display an inline-level table
list-item It is used to display all the elements in <li> element.
run-in It is used to display an element inline or block level, depending on the context.
table It is used to set the behavior as <table> for all elements.
table-caption It is used to set the behavior as <caption> for all elements.
table-column-group It is used to set the behavior as <column> for all elements.
table-header-group It is used to set the behavior as <header> for all elements.
table-footer-group It is used to set the behavior as <footer> for all elements.
table-row-group It is used to set the behavior as <row> for all elements.
table-cell It is used to set the behavior as <td> for all elements.
table-column It is used to set the behavior as <col> for all elements.
table-row It is used to set the behavior as <tr> for all elements.
none It is used to remove the element.
initial It is used to set the default value.
inherit It is used to inherit the property from its parents’ elements.

By default, browsers render specific elements on different levels. For instance, <div> elements are represented as blocks by default, while <span> elements seem inline by default, as shown below:

<body>

<div id="div-0"> This is my first div.</div>

<div id="div-1"> This is my second div.</div>

<div id="div-2"> This is my third div.</div>

<br>

<span id="span-0">This is my first span.</span>

<span id="span-1">This is my second span.</span>

<span id="span-2">This is my third span.</span>

</body>

<style type="text/css">

body { font-family: "Avenir Heavy"; }

div, span {

background-color: #2e3f50;

padding: 10px;

border-radius: 5px;

}

div { color: #fd8f59; }

span { color: #1ebda5; }

</style>

Output:

display property values example output

In this post, we’ll analyze the most important ones:

  • block
  • inline
  • inline-block
  • none

CSS Display: Inline

It is the default value of every HTML element.

All the HTML tags are displayed inline out of the box except some elements like divp andsection, which are set asblockby the user-agent (the browser).

Inline elements don’t have any margin or padding applied.

Same for height and width.

inline-block

Similar toinline, but withinline-block width and height are applied as we specified.

Block

All the elements are inline elements except these:

  • div
  • p
  • section
  • ul

which are set as block by the browser.

Example:

span {
    display: block;
}
a {
    display: block;
}
Note: Changing

With display: block, elements are stacked one after each other, vertically, and every element takes up 100% of the page.

The values assigned to the width and height properties are respected, if you set them, along with marginandpadding.

None

With the help of display: none, elements will be made disappeared from the browser.

Example:

h1 {
    display: none;
}
p {
    display: none;
}

Font family inherit – CSS Inheritance | What is CSS Inherit Keyword? | List of CSS Properties that are Inherited

CSS Inheritance

Font family inherit: In CSS, inheritance manages what occurs when no value is named for a property on an element. This tutorial helps you more in learning about the CSS inherit Keyword along with the inherited and non-inherited properties. Click on the below available links and understand the concept of Inheritance in CSS.

CSS Inheritance

There are some CSS selectors that actually inherit styles from their parent element.

This helps us to specify the style of a particular element explicitly.

Some other properties make more sense to not be inherited.

For example, fonts, when we set the font-family to the body element, all other element inside the body tags get the same font. In better words, the children of the body elements inherit the CSS style/ font.

The background-color property, on the other hand, makes little sense to be inherited.

CSS properties can be classified into two types:

  • inherited properties, which by default are set to the computed value of the parent element
  • non-inherited properties, which by default are set to the initial value of the property

CSS inherit Keyword Definition & Syntax

In CSS, the inherit keyword defines that a property should inherit its value from its parent element. However, it can be used for any CSS property, and on any HTML element.

Syntax:

property

: inherit;

Example:

* {
  font-family: inherit;
  line-height: inherit;
  color: inherit;
}

html {
  font-size: 125%;
  font-family: sans-serif;
  line-height: 1.5;
  color: #222;
}

List of CSS Properties that are Inherited

List of the properties that inherit their parent style:

  • border-collapse
  • border-spacing
  • caption-side
  • color
  • cursor
  • direction
  • empty-cells
  • font-family
  • font-size
  • font-style
  • font-variant
  • font-weight
  • font-size-adjust
  • font-stretch
  • font
  • letter-spacing
  • line-height
  • list-style-image
  • list-style-position
  • list-style-type
  • list-style
  • orphans
  • quotes
  • tab-size
  • text-align
  • text-align-last
  • text-decoration-color
  • text-indent
  • text-justify
  • text-shadow
  • text-transform
  • visibility
  • white-space
  • widows
  • word-break
  • word-spacing

Forcing properties to inherit

Suppose one of the elements doesn’t inherit their parent, then we can explicitly state that to inherit their parent.

Example:

body {
    background-color: yellow;
}

p {
  background-color: inherit;
}

Forcing properties to NOT inherit

With contradiction, we also want some element not to inherit their parent.

We can use revert property value to explicitly tell not to inherit their parent.

This is very rarely used though.

Other special values

In addition to the keywords, inherit and revert, we can also set values like:

  • initial: use the default browser stylesheet if available. If not, and if the property inherits by default, inherit the value. Otherwise do nothing.
  • unset: if the property inherits by default, inherit. Otherwise do nothing.

Fancy html table – Styling HTML Tables with CSS | Stylish CSS Tables | HTML Table CSS Examples

Styling HTML Tables with CSS

fancy html table: In this tutorial, we will be learning how to style HTML tables with CSS properties or functions. Also, you can check some HTML Table CSS Examples from the below sections via using direct links available below:

How to Set Different Properties of an HTML table using CSS

You can set the following properties of a table:

  • The border-collapse defines whether the browser needs to control the appearance of the adjacent borders that touch each other or whether each cell should maintain its style.
  • The border-spacing names the width that should appear between table cells.
  • The caption-side captions are shown in the<caption>element. By default, these are rendered above the table in the document. You use the caption-side property to control the placement of the table caption.
  • The empty-cells specify whether the border should be shown if a cell is empty.
  • The table-layout permits browsers to speed up the layout of a table with the help of the first width properties it comes across for the rest of a column rather than having to load the whole table before rendering it.

Also Check:

How to Style a Table with CSS

By using Tables with CSS we can create a fancy page layout.

At first, let’s watch the table in HTML:

<table>
      <thead>
        <tr>
          <th scope="col">Name</th>
          <th scope="col">Age</th>
        </tr>
      </thead>
      <tbody>
        <tr>
          <th scope="row">Mainak</th>
          <td>22</td>
        </tr>
        <tr>
          <th scope="row">Soham</th>
          <td>22</td>
        </tr>
      </tbody>
    </table>

The default browser style is not very much attractive.

table default

We can use CSS on the table element to modify it for an even better look.

We can start with a border for the table.

We can apply it on thetableelement, and on the inner elements too, like th and td:

table,
th,
td {
  border: 1px dashed #333;
}

After putting a border we get a nice result.

table border

One common thing with tables is the ability to add color to one row, and a different color to another row. This is possible using the :nth-child(odd) or :nth-child(even) selector:

tbody tr:nth-child(odd) {
  background-color: greenyellow;
}

That gives us:

table border color

If we add border-collapse: collapse; to the table element, all borders are collapsed into one:

table border collapse

Image rotate css – How to Continuously Rotate an Image using CSS? | CSS Continuous Image Rotation

How to Continuously Rotate an Image using CSS

Image rotate css: If you are searching for a code in CSS that can rotate any image? Then this is the right tutorial you are looking for. We have covered everything like How to Continuously Rotate an Image using CSS Animations.

Image Element has three classes namely rotate, linear, infinite. In CSS Stylesheet we need to create a declaration block for each class. These classes are called utility or helper classes.

.rotate Code Block Declaration

.rotate {
animation: rotation 2s;
}

This will not make anything. We can add an animation property to the element to rotate it:

animation: rotation 2s infinite linear;

Or we can add a class namely rotate to a particular element to target that:

.rotate {
  animation: rotation 2s infinite linear;
}

We can tweak the 2s to slow down or speed up the rotation period of the element.

Then we can add the keyframes with transform property for it to make rotation:

@keyframes rotation {
  from {
    transform: rotate(0deg);
  }
  to {
    transform: rotate(359deg);
  }
}

Now the element should rotate. If you reload your browser you will see the image rotating a single time over 2 seconds. If you want to rotate the image continuously you need to change the animation transition timing from default ease to a consistent speed curve known as linear.

Do Check:

.Linear Code Block Declaration

.linear {
animation-timing-function: linear;
}

Reload your browser tab so that image will rotate to spin from start to end with a consistent speed rate.

.infinite Code Block Declaration

css rotate image animation: Let’s us make our image rotate infinitely by declaring our .infinite code block

.infinite {
animation-iteration-count: infinite;
}

We can declare all our animation properties in a single line and a single class as follows

.rotate-image {
animation: rotation 2s linear infinite;
}

This can save a lot of code but for learning purposes, it is better to break things into smaller pieces. You can understand how individual components work.

Javascript string slice – The String slice() method in JavaScript | Definition, Syntax, How it works, Examples of JavaScript String slice() method

JavaScript String slice() method

Javascript string slice: In this ultimate tutorial, we have discussed complete details about the JavaScript String slice() method like definition, syntax, how to use the string slice() method to extract a substring from a string with examples.

JavaScript String slice() method – Definition

Return a new string from the part of the string included between the begin and end positions.

The original string is not mutated.

end is optional.

"This is my work".slice(5)
//"is my work"
"This is my work".slice(5,10)
//"is my"

If you set a negative first parameter, the start index starts from the end, and the second parameter must be negative as well, always counting from the end:

"This is my work".slice(-4)
//"work"
"This is my work".slice(-4,-1)
//"wor"

String.prototype.slice() Syntax

slice(beginIndex)
slice(beginIndex, endIndex)

Parameters Included in String Slice() Method

1. beginIndex: 

The zero-based index whereat to start extraction. In the case of negative, it is treated as str.length + beginIndex. (For instance, if beginIndexis -2, it is interpreted as str.length – 2.) If beginIndex is not a numeral after Number (beginIndex), it is considered as 0. In case beginIndexis greater than or equal to the str.length, an empty string is returned.

2. endIndex (Optional):

The zero-based index before which to end extraction. The character at this index wouldn’t be involved.

If endIndex is excluded or undefined, or greater than str.length, slice() extracts to the edge of the string. If negative, it is handled as str.length + endIndex. (For instance, if endIndex is -5, it is treated as str.length – 5.) If it is not undefined, and the Number(endIndex) is not positive, an empty string is returned.

If endIndex is defined, then beginIndex should be smaller than endIndex otherwise, an empty string is returned. (For example, slice(-3, 0), slice(-1, -3), or slice(3, 1) returns "".)

Return Values

It returns a part or a slice of the furnished input string.

Do Check:

Examples on String slice() method in JavaScript

In this section, you will find plenty of example programs to learn how to create and use the javascript string slice() method in various conditions:

1. Using slice() to create a new string

The following examples utilize the string slice() method to create a new string.

let str1 = 'The morning is upon us.', // the length of str1 is 23.
    str2 = str1.slice(1, 8),
    str3 = str1.slice(4, -2),
    str4 = str1.slice(12),
    str5 = str1.slice(30);
console.log(str2)  // OUTPUT: he morn
console.log(str3)  // OUTPUT: morning is upon u
console.log(str4)  // OUTPUT: is upon us.
console.log(str5)  // OUTPUT: ""

2. Using slice() with negative indexes

The following example uses slice() with negative indexes.

<script> 
var str = "Javatpoint"; 
document.writeln(str.slice(-5)); 
</script>

Output:

point

Invert colors css – How to invert colors using CSS | Invert() CSS Function Definition, Syntax, Parameter, Example Program

How to invert colors using CSS

Invert colors css: Do you know there is an option to invert the color of every element on a page? The invert()CSS function inverts the color samples in the input image. And its conclusion is a <filter-function>. In this tutorial, you can easily learn How to invert colors of elements and images using CSS? So, stay continued with this tutorial and grasp the concept thoroughly.

CSS Invert() Function

CSS invert colors: The invert() function in CSS is an inbuilt function that is utilized to implement a filter to the image to produce the invert of the color of the example image.

Syntax:

invert (amount)

Parameter:

Invert color css: This function allows a single parameter amount that holds the amount of conversion. The value of the invert is estimated in the context of value and percentage. The value 0% draws the original image and 100% draws the inverted image.

Theinvert()function inside utilizes the following formula, to computer the inverse of the image:

amount * (255 - value) + (1 - amount) * value

The inversion value is measured by the variable amount, the variable value range lies between 0 – 1(floating) (this is accomplished by converting the passed percentage of color inversion to a value between 0-1). The value is the color value of the pixel. (255-value) provides the color after subtracting the color value with the max pixel value, estimates that the value of the pixel is in the range 0 – 255 (though input image representation space could be stretched /scaled to satisfy the specified criteria).

The following table contains a list of inversion percentages and the result they produce.

Inversion Result
0% Original Image
50% Image with each pixel having grey color
100% Completely inverted Image

Example of CSS Invert Color

CSS invert color: Here, we are changing the color of white to back by using the Invert color in CSS:

div {
    width: 100px;
    height: 100px;
    background-color: white;
    -webkit-filter: invert(100%);
    filter: invert(100%);
}

Output:

invert color css output image

Supported Browsers:

CSS invert image: The browsers supported by the invert() function in CSS are as follows:

  • Internet Explorer
  • Google Chrome
  • Safari
  • Firefox
  • Opera

How to Invert Colors Using CSS?

CSS invert: There is an issue i.e., I added a “black on white” image on a page, only to realize that with dark mode, my page correctly changes the background to black, but the image remains white on black.

So I added this rule to my CSS to detect dark mode and automatically invert the color of the image:

@media (prefers-color-scheme: dark) {
  .my-image {
    filter: invert(100%);
  }
}

It’s not 100% accurate in my case, because my dark background color is not perfectly black, but it’s better than nothing.

To make things perfect you could also add the image using a CSS background image instead of an img tag in HTML, and I could easily swap that in dark mode.

JavaScript — Breaking Down The Shortest Possible FizzBuzz Answer

JavaScript — Breaking Down The Shortest Possible FizzBuzz Answer

Fizzbuzz solution javascript: FizzBuzz is a classic programming task, usually used in software development interviews to determine if a candidate can code.

The Question

Write a program that prints the numbers from 1 to 100. But for multiples of three print “Fizz” instead of the number and for the multiples of five print “Buzz”. For numbers that are multiples of both three and five print “FizzBuzz”.

We just need to loop through each number from 1 to 100. So, one of the simplest solutions can be achieved with a for loop:

for (var i=1; i < 101; i++){
    if (i % 15 == 0) console.log("FizzBuzz");
    else if (i % 3 == 0) console.log("Fizz");
    else if (i % 5 == 0) console.log("Buzz");
    else console.log(i);
}

If you run this code in your console, you’ll see this works just fine. Here’s a snippet of the first 16 iterations through the loop:

FizzBuzz Output

There are probably hundreds of different ways to solve FizzBuzz. Some are cleaner, faster, and better than others. Some are just plain crazy.

for(let i=0;i<100;)console.log((++i%3?'':'fizz')+(i%5?'':'buzz')||i)

JavaScript Concepts You Need to Understand

Fizzbuzz javascript solution: This code utilizes many different JavaScript concepts to solve FizzBuzz. I’ve written about all of these concepts in the past — so I’ll give minor explanations in this article, but feel free to use these links to further your understanding if something isn’t entirely clear:

  • Logical OR / Short Circuit Evaluation
  • The Ternary Operator
  • Truthy & Falsy Values
  • The Increment Operator
  • Type Coercion

Breaking Down The Solution

The first thing we’ll do to better understand our code is to space things out a bit.

Here’s the same code with some breathing room added:

for(let i=0;i<100;)
  console.log(
    ( ++i%3 ? '' : 'fizz' ) + ( i%5 ? '' : 'buzz' ) || i
  )

Ok. Now we can start to see what our code is attempting to do. We clearly have a for loop that goes from 0 — 100. And within our for loop, we are attempting to console.log something.
Let’s take a deeper look at our first set of parenthesis within our console.log:

++i%3 ? '' : 'fizz'

If we recall the syntax for ternary operators, it is:

condition ? true result : false result ;

In this example, the condition that we’re testing is ++i%3. If that is true, then '' will be returned. If ++i%3 is false, then fizz will be returned.

++i%3

Above, the increment operator is being used. Using the operator before the operand ++i will increment the operator i before returning it. This means that on our first pass through the loop, i will increase from 0 to 1.
Now that i has increased to 1, our code will then check to see if 1%3 is true or false.
1 % 3 utilizes the remainder operator. The remainder operator returns the remainder of one number divided another. In this case we’ll check to see what the remainder of 1/3 is.
The remainder is 1 and thus our ternary condition is now simplified to 1:

1 ? '' : 'fizz'

A ternary condition is a Boolean Context. This means whatever we are testing must coerce to a true or false value.

true ? '' : 'fizz'

Since we have a true value in our ternary condition, the first expression is returned and the result of our first set of parenthesis is a blank string: ''.

Here’s where we’re at now:

for(let i=0;i<100;)
  console.log(
    ( '' ) + ( i%5 ? '' : 'buzz' ) || i
  )
i%5 ? '' : 'buzz'
console.log( '' + '' || i )

Since an empty string plus an empty string is still an empty string, our code will reduce further:

console.log( '' || i )

Now our code utilizes the JavaScript Logical OR Operator ||. Because an empty string is one of the seven falsy values in JavaScript, we skip over that operand entirely and accept whatever the second operand is. In this code, it is i.

console.log(i)

React native sqlite – Getting started with SQLite in React-Native | Creating, Using & Integrating the React Native SQLite Database

Getting started with SQLite in React-Native

React native sqlite: React Native apps come with a simple user interface, code reusability, and allows for the production of stable apps. With React-Native being one of the most popular and ideal frameworks for creating cross-platform mobile applications, the vast majority of the developers and engineers depend on the structure of the framework to deliver high-performing local applications.

Because of this, it’s often challenging for developers to choose the right technology stack (including the appropriate database for React Native). In this article, we will be discussing SQLite as a local database for React-Native, and work on how to pre-populate data into the database so as to use it in the application.

React Native SQLite Database

Sqlite react native: The word “lite” in SQLite describes it as being a lightweight library-based database that requires minimal setup. SQLite can be coordinated with a versatile application, allowing us to get to the database in an easy, straightforward manner. It’s also helpful to note that SQLite was designed to provide local storage to mobile apps.

The two main benefits of using SQLite database are:

  1. It’s ACID-compliant (an acronym for atomicityconsistencyisolation, and durability)
  2. Its offline persistence (which means that it works even when the device is offline)

Also Check:

Creating a Database

Sqlite react native: First, we need to create a database and store some data in it. SQLite Online can help in creating an SQLite database.

CREATE TABLE table_name (
 column1 datatype,
 column2 datatype,
 column3 datatype,
 ….
);

For example-

CREATE TABLE Users(
Title varchar(20),
Age number
);

Now we need to insert values to this table structure:

INSERT INTO table_name (column1, column2, column3, ...)
VALUES (value1, value2, value3, ...);

For example:

INSERT INTO Users(Title,Age)
VALUES ("Rohit" , 42);

Now your database is ready and you can download the user.db that you have created. For now, store the file in a temporary location.

How to Use React-native-SQLite-storage?

First, we have to import the library like shown below:

import { openDatabase } from 'react-native-sqlite-storage';

Then, open the database with the help of the below code

var db = openDatabase({ name: 'UserDatabase.db' });

Now, whenever you want to execute some database calls, you can utilize db variable to perform the database

query.db.transaction(function(txn)
{
txn.executeSql(
query, //Query to execute as prepared statement
argsToBePassed[], //Argument to pass for the prepared statement
function(tx, res) {} //Callback function to handle the result
);
});

Integrating the database with react-native

Step 1: After setting up your react native environment install the SQLite package

npm install react-native-sqlite-storage
react-native link

Step 2:

For iOS:

open ./ios/podfile
pod 'react-native-sqlite-storage', :path => '../node_modules/react-native-sqlite-storage'
cd ./ios && pod install

For Android:

Open and modify android/settings.gradle file as follows:

rootProject.name = 'react_native_sqlite_storage_exercise'
...
 include ':react-native-sqlite-storage'
 project(':react-native-sqlite-storage').projectDir = new    
 File(rootProject.projectDir, '../node_modules/react-native-sqlite-          storage/src/android')
...
include ':app'

Modify android/app/build.gradle file as follows:

...   
dependencies {    
implementation fileTree(dir: "libs", include: ["*.jar"])    implementation"com.android.support:appcompatv7:${rootProject.ext.supportLibVersion}"    
implementation "com.facebook.react:react-native:+"  
...    
implementation project(':react-native-sqlite-storage')   \
} 
...

Open and modify MainApplication.java file as below:

...   
import org.pgsqlite.SQLitePluginPackage;   
...   
public class MainApplication extends Application implements ReactApplication { 
...   
...  
@Override
protected List<ReactPackage> getPackages() {
return Arrays.<ReactPackage>asList(
...
new SQLitePluginPackage(),
...
new MainReactPackage()
  );
 }
}

Step 3: Adding the database file to the correct location

For iOS:

Create ios/[project name]/www folder and copy the database on it.

For Android:

Create www folder in the main project directory and copy the database on it.

Step 4: Create a constructor and add these lines of code:

constructor(props) {
    super(props);
    this.state={
      userList:[],
    }
    db = SQLite.openDatabase(
      {
        name: 'user.db',
        createFromLocation : 1,
      },
      this.success.bind(this),  //okCallback
      this.fail                // error callback
    );
    }

The constructor consists of four parts:

  1. The state — which is initially declared as an empty array (this will later be populated with data from the database).
  2. SQLite is imported and openDatabase function is called where the argument it takes is the name of the database and the location of the database.
  3. The success callback function ( which is called if there are no errors).
  4. The error callback function ( which is executed if there is an error).

Step 5:

Now we have to add the success and the fail call back functions:

success=()=>{
      db.transaction(tx => {
        tx.executeSql('SELECT * FROM user', [], (tx, results) => {  // sql query to get all table data and storing it in 'results' variable
          let data = results.rows.length;                          
          let users = [];    //creating empty array to store the rows of the sql table data
  
          for (let i = 0; i < results.rows.length; i++) {
            users.push(results.rows.item(i));                   //looping through each row in the table and storing it as object in the 'users' array
          }
  
           this.setState({ userList:users});         //setting the state(userlist) with users array which has all the table data
        });
      });
      // alert("ok")
    }
  
    fail=(error)=>{ 
      console.error(error) // logging out error if there is one
    }

In the success function, we declare a function db.transaction wherein the first argument we run the SQL query Select * from table_name (this selects all the rows in the SQL database). These rows are stored in a variable called “results”. Now we have to loop through each row of the “results” so that we can store data row by row in the array, thus we use the for loop. Now, after all the rows are pushed to the array, we use setState to update the state value.

In the fail function definition, we console.error the error so that debugging can be easier

Step 6: 

<ScrollView>
        {
           this.state.userList.map(function(item, i){  //map through each element of array(each row of the sql table)
             return(
               <View key={i} style={styles.card}>   //we display the name and age of the user
                <Text>{item.Title}</Text>  
                <Text>{item.age}</Text>   
               </View>
             )
           })
         }    
</ScrollView>

We use Scrollview to make a scrollable view of the list of all items we stored in the database. Now, since the rows are stored as an array of objects in the userList variable, we have to map through each element of the array and print the title and the age of the person.

Run and Test React Native and SQLite Offline Mobile App

In the first step, we have to run the React Native and SQLite app with the help of the below command.

react-native run-android
react-native run-ios

Once the new terminal window opens, simply go to the project folder then run this command.

react-native start

Finally, you will observe the whole application on the Android/iOS Device as shown in below image:

sqlite database run on android device

react native SQLite Offline Android

Conclusion

That’s it! In just six simple steps we have the basic setup of an SQLite database that is rendering its data to the front-end using React-Native. As discussed earlier, React-Native can be an incredibly helpful tool for developers and engineers, but knowing which technology stack is right for the task at hand can be a complicated process.

The CSS calc() function | Definition, Syntax & Example | Nested calc() with CSS Variables

The CSS calc() function

CSS calc variables: The calc() functions help us to perform the basic mathematic operations in the stylesheet itself. It specifically helps us to calculate, suppose, the size of the body except for the header and footer. Also, it supports us to subtract or add some absolute value with a percentage value. Just dive into this tutorial and get a good grip on the CSS calc() function. 

CSS calc() Function

The calc() function is an inbuilt function in CSS that is utilized to do calculations based on CSS property. It can be used anywhere a <length>, <frequency>, <angle>, <time>, <percentage>, <number>, or <integer> is allowed.

Syntax:

calc( Expression )

Parameters:

The CSS calc() function allows a mandatory single parameter Expression that results in a value. This parameter contains a mathematical expression that needs to implement. The following operators can be returned any expression by using standard operator precedence rules:

(+)Addition
(-)Subtraction
(*)Multiplication: At least one of the arguments must be a <number>.
(/)Division: The right-hand side must be a <number>.

The operands in the expression may be any <length> syntax value. You can use various units for each value in your expression if needed. Also, you may utilize parentheses to establish computation order when required.

Also Refer:

Example:

div {
    max-width: calc(80% - 100px)
}

This returns a length value.

Example Using calc() Function:

Below example code, illustrates the calc() function in CSS

<!DOCTYPE html>
<html>
    <head>
        <title>calc function</title>
        <style>
            .geeks {
                position: absolute;
                left: 50px;
                width: calc(100% - 20%);
                height:calc(500px - 300px);
                background-color: green;
                padding-top:30px;
                text-align: center;
            }
            .bg {
                font-size:40px;
                font-weight:bold;
                color:white
            }
            h1 {
                color:white;
            }
        </style>
    </head>
    <body>
        <div class = "geeks">
            <div class = "bg">BtechGeeks</div>
            <h1>The calc() Function</h1>
        </div>
    </body>
</html>

Formal syntax

calc( <calc-sum> )

where 
<calc-sum> = <calc-product> [ [ '+' | '-' ] <calc-product> ]*

where 
<calc-product> = <calc-value> [ '*' <calc-value> | '/' <number> ]*

where 
<calc-value> = <number> | <dimension> | <percentage> | ( <calc-sum> )

Useful points on calc() in CSS

  • The arithmetic operators add (+) and subtract (-) must constantly be surrounded by whitespace. Unless the expression will be addressed as an invalid expression. As an instance, calc(60%-4px) will be invalid because it is parsed as a percentage, accompanied by a negative length. At the same time, the expression calc(60% – 4px) will be parsed as a subtraction operator and a length.
  • Although the operators * and / does not needs whitespace, but it is urged to add it for consistency.
  • Nesting of calc() function can be possible.

Nested calc() with CSS Variables

By considering the following code, you can easily usecalc()function with CSS variables:

.foo {
  --widthA: 100px;
  --widthB: calc(var(--widthA) / 2);
  --widthC: calc(var(--widthB) / 2);
  width: var(--widthC);
}

Once all variables are expanded, widthC's value will be calc( calc( 100px / 2) / 2), then when it’s assigned to.foo'swidth property, all inner calc()s (no matter how deeply nested) will be grounded to just parentheses, so the width property’s value will be eventually calc( ( 100px / 2) / 2), i.e. 25px. In a nutshell: a calc() inside of a calc()is equal to just parentheses.

Categories CSS