
Selenium Python – Frames, Alerts, and Action Class
In this chapter, we will learn about the concept of the switch to( ) command associated with the driver object. Many times we come across applications that have a frame in them, if we have to handle the objects in a frame we need to first switch to the frame, and only then can we work on the objects of the page in the frame. Another usage of the switch is seen in handling alerts, JavaScript pop windows, which come up to ask for yes or no / ok and cancel decisions, to proceed. And lastly, we are going to talk about the action class, which allows us to automate various mouse and keyboard movements. It also allows us to automate composite action class.
Structure
- Working with frame
- Working with alerts
- Action class
Objective
The WebDriver element has a method called switch to( ). This method allows switching the focus to a frame, an alert, or a new window. In this chapter, we will see its usage. Another entity we will see is the Action class. This is used to automate keyboard and mouse actions. Sometimes, we may come across composite actions, and in those situations, actions class is helpful.
- Python Selenium Tutorial | Selenium Python Training for Beginners
- How to install Selenium in Python | Installing Selenium WebDriver Using Python and Chrome
- How To Locate Different Web Elements in Selenium Using Python?
Working with frame
A frame HTML element allows us to break an HTML window into multiple sections, where each section can contain its own HTML page. A frame tag is represented inside a frameset tag and looks like the following:
<frameset>
<frame name=”topframe” src=”topframe.htm”>
<frame name^’hot-frame” src=”botframe.htm”>
</frameset>
If we have to work with the HTML element which is available in the web page that lies inside a frame, we need to switch to the frame first, and only then we can interact with the HTML elements of the page inside the frame. To perform this task we need to use the switch_ to() command, using some attribute to identify the frame which contains the element. Let us take the following example of a page that contains nested frames: http://the-internet.herokuapp.com/ nested_frames.
If we look at the backend HTML of the page, we will find that the page contains a top frame and a bottom frame. The top frame further contains three frames: left, middle, and right. The following screenshot shows the frames HTML:
<frameset frameborder="1" rows="50%,50%">
  <frame src="/frame top" scrolling="no" name="frame-top">
   #document
    <html>
       <script src="chrome-extention://cdmedbnojkdahhdbjnemegb1hbaa1kbc/page/prompt.is">
       </script>
       <script src="chrome-extention://cdmedbnojkdahhdbjnemegb1hbaa1kbc/page/prompt.is"
       </script>
       <head>...</head>
       <frameset frameborder="1" name="frameset.middle" cols=*33%,33%,33%">
         <frame src="/frame left" scrolling="no" name = "frame=left">...</frame>
         <frame src="/frame middle" scrolling="no" name = "frame=middle">...</frame>==$o
         <frame src="/frame right" scrolling="no" name = "frame=right">...</frame>
    </frameset>
   </html>
  </frame>
<frame src="/frame bottom" scrolling="n0" name="frame-bottom">...</frame>
Now, let us suppose that in the preceding example we need to fetch the text associated with the page inside the middle frame, so how will we do that? To achieve this we will first need to switch to the top frame, and then from it, switch to the middle frame. Once we have switched to the middle frame we can fetch the text associated with it. The following program shows the working of the same.
from selenium import webdriver
import unittest

class FrameExample(unittest.TestCase):
     def setup(self):
         self.driver=webdriver.chrome(executable_path="D:\Eclipse\workspace\seleniumpython\seleniumpython\drivers\chromedriver.exe")
         self.driver.implicity_wait(30)
        self.base_url="http.ss//the.internet.herocomp.com/test_frame(self):

def test_frame(self):
    driver = self.driver
    driver.get(self.base_url)
    driver.switch_to_frame(driver.find_element_by_name("frame.top"))
    driver.switch_to_frame(driver.find_element_by_name("frame.middle"))
    print(driver.page_source)

def tearDown(self):
    self.driver.quit( )

if_name_ =="_main_":
   unittest.main( )
In the preceding program, we switch our focus to the first frame which is recognized by the name property frame-top, and then we switch our focus to another frame inside it which is recognized by the name property frame-middle. Once we have switched focus to the inner frame, we print the page source of it.
The output which we get when we run the program is as follows:
<html xmlns="http://www.w3.org/1999/xhtml"><head>
     </head>
     <body>
        <div id="content">MIDDLE</div>


</body></html>
Working with alerts
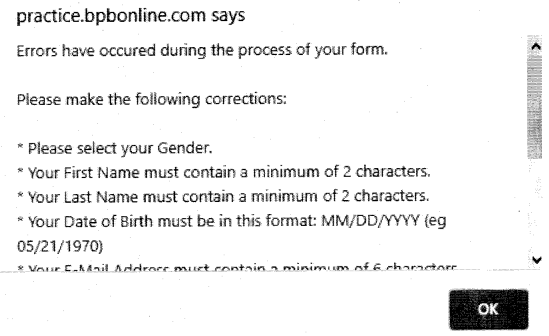
Alerts are JavaScript popup windows that prompt the user for an action or decision based on which an event is performed, or it displays some information to the user. For example, in our web i application http://practice.bpbonline.com/catalog/index.php, when we try to register the user, and while filling in the registration form, if we forget to fill in some mandatory field and we try to proceed with the process, we will see an alert prompting us to correct our entries.
Now to handle the preceding alert we have to click on the OK button. To perform the action we have a class available in Selenium called the Alert class. The details of it are available here: https://seleniumhq. github.io/selenium/docs/api/py/webdriver/selenium.webdriver. common.alert.html. This Alert class has four methods:
- accept (): It accepts the alert by clicking on the OK button.
- dismiss( ): It cancels the alert by clicking on the cancel button.
- Send_keys: It sends keys to the alert.
- Text: It fetches the text associated with the alert.
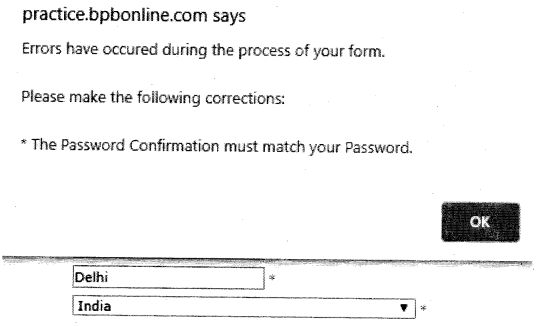
In the scenario from our application which we try to automate the user registration process. Here, we will first pass a bad combination of passwords and confirm passwords. This will cause the alert to popup:
So, we use the Alert class here, and its method accepts to handle it, as can be seen in the following code snippet:
#bad password and confirm password
browser.find_element_by_name("password").send_keys("123456")
browser.find_element_by_name("confirmation").send_keys("1234")
browser.find_element_by_xpath("//span[@class='ul-button-text'][contains(	text(), 'continue')]").click( )
time.sleep(3)
alert=browser.switch_to_alert( )
print(alert.text)
alert.accept( )#press ok button
time.sleep (3)
#provide correct owd and confirm owd
browser.find_element_by_name("password").clear( )
browser.find_element_by_name("password").send_keys("123456")
browser.find_element_by_name("confirmation").clear( )
The complete code of the preceding snippet is available in the codebase.
Action class
Selenium provides us with an action class, inits Python implementation is known as action chains. This class helps us to handle low-level keyboard and mouse actions as well as complex actions like drag and drop, mouse hover, and more. Using the Action class, you can either call one action at a time, or you can queue up the actions one after another and then use a method called as perform() to call them in order. We will take an example here for a website to perform drag and drop action. This example will also showcase the usage of frames.
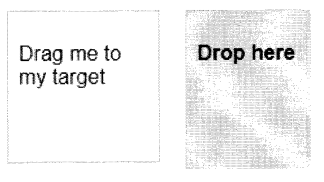
So the website we will be using here is: http://jqueiyui.com/ droppable/
There are two objects, where the left one has to be dropped on right. Refer to the following diagram:
As we inspect the element, we will find that these elements are inside the iframe tag. Let us have a look:
<iframe src="/resource/demos/droppable/default.html" class="demo-frame">
  #document
    <!doctype html>
    <html lang="en">
      <head>...</head>
      <body>
       <div id="draggable" class="ui-widget-content ui-draggable ui-draggable-handle" style="position: relative;">...</div>
       <div id="droppable" class="ui-widget-header ui-droppable">...</div>
     </body>
   </html>
 </iframe>
We want to drag the left object and drop it on the right object. The following code shows how we can do that:
driver=self.driver
driver.get(self.base_url)
actions = ActionChains(driver)
driver . switch_to_frame(driver.find_element_by_class_name("demo-frame"))
draggable=driver.find_element_by_id("draggable");
draggable=driver.find_element_by_id("draggable");
actions.drag_and_drop(draggable, droppable).perform( ):
time.sleep(3)
In the preceding program, we first switch to the iframe which contains the draggable and droppable objects. We then recognize the objects using their ID properties. Once the objects are created, we use the method available with the Action class, drag_and_drop(), which performs the required action and solves the scenario.
So to use the ActionChains class, we have to import it as well, so the following would be our import modules:
from selenium.web driver. common.action_chains import ActionChains
Conclusion
In this chapter, we saw how we will handle the frame HTML element, by using the switch command. Also, if we come across the JavaScript popups, how do we handle them using the alert interface available in Selenium. If we come across scenarios in applications that require composite actions like click and hold, drag and drop, double click, context-click, we have with us Action class, which we can use to handle mouse actions, keyboard actions, and composite actions as well.
In our next chapter, we will learn about the concept of Page Object Model (POM), where we will learn how we handle object information. The management of object information is important and is required for our test automation scripts.
Related Articles:
- Chapter 1 Introduction to Selenium
- Chapter 2 Selenium IDE
- Chapter 3 Locators in Selenium
- Chapter 4 Installation and setup
- Chapter 5 Understanding WebDriver, WebElement and By
- Chapter 6 Unittest in Python
- Chapter 7 Synchronizing Test
- Chapter 8 Concept of Parameterization
- Chapter 9 Working with Different Web Elements
- Chapter 11 Page Object Model
- Chapter 12 Selenium-Grid