Files in Python:
Python fileno: Python file handling is a way of saving program output to a file or reading data from a file. File handling is a crucial concept in the programming world. File management is used in almost every form of project. Assume you are constructing an inventory management system. You have data in the inventory management system related to sales and purchases, thus you must save that data somewhere. Using Python’s file management, you can save that data to a file. You must be given data in the form of a comma-separated file or a Microsoft Excel file if you wish to conduct data analysis. Using file handling, you can read data from a file and write output back into it.
fileno() Method in Python:
fileno python: The fileno() function is a built-in Python method that returns the file number, i.e. the file descriptor, as an integer of the stream. If the operating system does not use a file descriptor when the file is closed, it may return an error.
Syntax:
file.fileno()
Parameters: This method doesn’t accept any parameters
Return Value: This method’s return type is class ‘int’>; it returns an integer value that is the file descriptor of a file.
- Python Program to Capitalize the First Letter of Every Word in the File
- Python open() Function with Examples
- Python Program to Read First n Lines of a File
File fileno() Method with Examples in Python
Example1: (File in read-mode)
Approach:
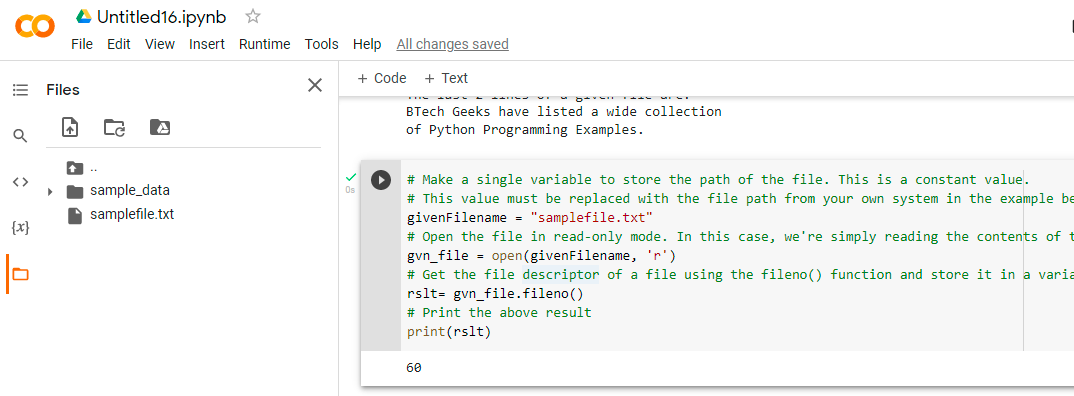
- Make a single variable to store the path of the file. This is a constant value. This value must be replaced with the file path from your own system in the example below.
- Open the file in read-only mode. In this case, we’re simply reading the contents of the file.
- Get the file descriptor of a file using the fileno() function and store it in a variable.
- Print the above result.
- The Exit of Program.
Below is the implementation:
# Make a single variable to store the path of the file. This is a constant value.
# This value must be replaced with the file path from your own system in the example below.
givenFilename = "samplefile.txt"
# Open the file in read-only mode. In this case, we're simply reading the contents of the file.
gvn_file = open(givenFilename, 'r')
# Get the file descriptor of a file using the fileno() function and store it in a variable
rslt= gvn_file.fileno()
# Print the above result
print(rslt)
Output:
60
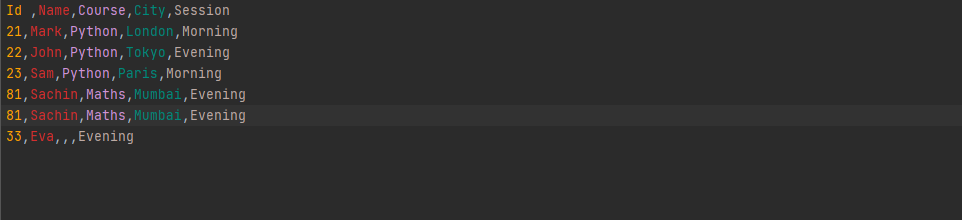
File Content:
hello this is btechgeeks
Example2: (File in write-mode)
Approach:
- Make a single variable to store the path of the file. This is a constant value. This value must be replaced with the file path from your own system in the example below.
- Open the file in write mode. In this case, we’re simply writing the contents into the file.
- Get the file descriptor of a file using the fileno() function and store it in a variable.
- Print the above result.
- The Exit of Program.
Below is the implementation:
# Make a single variable to store the path of the file. This is a constant value.
# This value must be replaced with the file path from your own system in the example below.
givenFilename = "samplefile.txt"
# Open the file in write mode. In this case, we're simply writing the contents into the file.
gvn_file = open(givenFilename, 'w')
# Get the file descriptor of a file using the fileno() function and store it in a variable
rslt= gvn_file.fileno()
# Print the above result
print(rslt)
Output:
60
Example3:
# Make a single variable to store the path of the file. This is a constant value.
# This value must be replaced with the file path from your own system in the example below.
givenFilename = "samplefile.txt"
# Open the file in write mode. In this case, we're simply writing the contents into the file.
gvn_file = open(givenFilename, 'w')
# Get the file descriptor of a file using the fileno() function and store it in a variable
rslt= gvn_file.fileno()
# Print the above result
print(rslt)
# Close the given file using the close() function
gvn_file.close()
# Again print the file descriptor of a file using the fileno() function
print(gvn_file.fileno())
Output:
ValueError                                Traceback (most recent call last)
<ipython-input-26-159a8df3b386> in <module>()
     11 gvn_file.close()
     12 # Again print the file descriptor of a file using the fileno() function
---> 13 print(gvn_file.fileno())

ValueError: I/O operation on closed file
Explanation:
It raises an error because when attempting to display the file descriptor
after closing the file, an error message will be returned.
Google Colab Images:
Files and Code: