SketchUp Keyboard Shortcuts: Owing to the progression of technology, the amount of computer users worldwide has grown drastically. Computers make up the functional unit of a society and, being the forerunners of technological progress, have entirely modified pre-existing ideas and global education.
While these jobs are of diverse nature, most of them expect crisp and clear work from the employees. The pressure in these sectors is massive, and the jobs offered are tedious. Since they are related to the most crucial aspect of the development of human life, there is a demand for top-quality work.
Wondering How to explore & learn Shortcut Keys for various Operating Systems, Computer Software Programs, Social media applications Keyboards? Here is the one-stop destination for all Keyboard Shortcuts, just take a look & memorize regularly for better performance in competitive exams & real-time situations.
To deliver such detailed quality work, users need to have their tactics clear. One such option is to use Keyboard Shortcut Keys while working on their daily tasks. These tools equip users with ways to complete their work faster than other conventional methods of complex computation.
SketchUp Keyboard Shortcuts
- What are Shortcuts Keys?
- A compilation of the common Sketchup Keyboard Shortcut Keys
- All essential Sketchup Keyboard Shortcut Keys you need to know
- Conclusion
What are Shortcuts Keys?
Sketchup web keyboard shortcuts: The keyboard contains a range of keys that users need to use for diverse purposes. These keys usually find usage in groups to make the standard computing process more efficient for worldwide computer users. In technological terms, computer developers have named these keys as ‘Keyboard Shortcut Keys.’
When users use these keys correctly, it prompts the system function to generate a specific as desired by the user and produce results by avoiding the long process of general computing ways.
Shortcut keys also make the process of computation much faster and free of strain while producing good quality content.
SketchUp Keyboard Shortcut Keys are specially designed to suit users in completing tasks successfully. This article explains the use of Shortcut Keys designed for the SketchUp software.
A Compilation of the Common Sketchup Keyboard Shortcut Keys
Sketchup shortcut keys: A list of all the necessary Short Keys for Sketchup that users should know are listed below in detail:

| Keystroke Shortcut Keys | Definition | Shortcut Menu |
| Esc Key | For escape command in SketchUp | Escape the current page |
| Del Key | To erase the content in SketchUp | Erase or Edit the page |
| Navigation Shortcut Keys | Definition | Shortcut Menu |
| Ctrl + D | To Deselect items | The edit tool used to deselect items |
| Ctrl + E | To zoom the Extents of the item | A camera tool used to zoom the extents |
| P | As the Pan Tool | A camera tool used as Pan |
| Q | As the Orbit Tool | A camera tool used as Orbit function |
| Spacebar | As the other Pan tool | A camera tool used as Pan |
| V | As the Select Tool | A tool used to select contents |
| Z | As the Zoom Window Tool | A camera Option used to zoom the window |
| Create Shortcuts | Definition | Shortcut Menu |
| Ctrl + B | To make the component or a block | An editing tool used to form a component block |
| Ctrl + G | To make a group of items | An editing tool used to form a group or component |
| L | To draw Line | Drawing tool used to draw a straight line |
| T | To draw Rectangle | Drawing tool used to draw a rectangle |
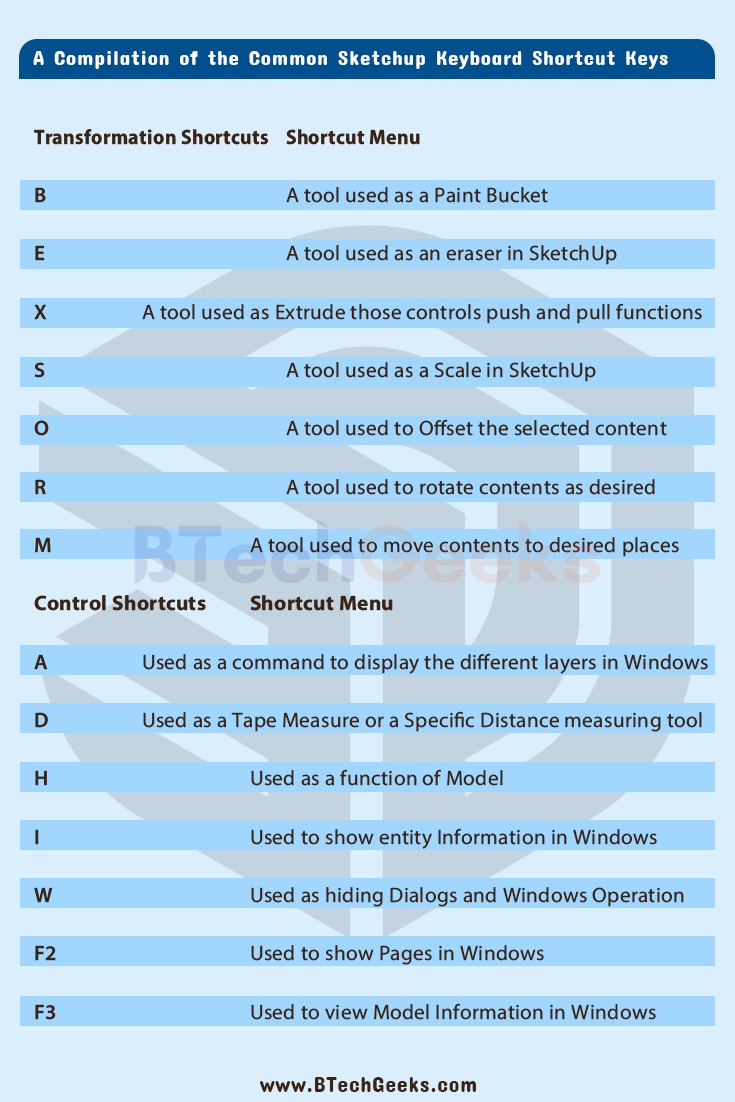
| Transformation Shortcuts | Definition | Shortcut Menu |
| B | As the Paint Bucket Tool | A tool used as a Paint Bucket |
| E | As the Erasing Tool | A tool used as an eraser in SketchUp |
| X | As the Push or Pull Tool | A tool used as Extrude those controls push and pull functions |
| S | As the Scaling Tool | A tool used as a Scale in SketchUp |
| O | As the Offset Tool | A tool used to Offset the selected content |
| R | As the Rotate Tool | A tool used to rotate contents as desired |
| M | As the Move Tool | A tool used to move contents to desired places |
| Control Shortcuts | Definition | Shortcut Menu |
| A | To show the layers | Used as a command to display the different layers in Windows |
| D | To Measure Distance | Used as a Tape Measure or a Specific Distance measuring tool |
| H | Used to hide the rest of the model | Used as a function of Model |
| I | To show Entity Information | Used to show entity Information in Windows |
| W | To Hide Dialogs | Used as hiding Dialogs and Windows Operation |
| F2 | To display window pages | Used to show Pages in Windows |
| F3 | To display Model Information | Used to view Model Information in Windows |
All Essential Sketchup Keyboard Shortcut Keys you Need to Know
| Key | Function |
| A | To use the Arc tool
|
| Arrow Keys | Lock Axis while moving or generating an element.
|
| C | To use the Circle tool.
|
| E | To use the Erasing tool.
|
| L | To use the Line tool.
|
| F | To use as perimeter objects or offset line
|
| Q | Used to rotate any selected element.
|
| S | Used to scale the size of a particular element up or down.
|
| Spacebar | Used to select elements with this particular tool.
|
| T | Used as the Tape Measure tool
|
| Z | Used to zoom out and in of the model view
|
| M |
|
| B | To use the Paint Bucket tool for changing or copying the Materials on Face elements.
|
| P | Used to pull or push a selected face on a specific object.
|
| O | Used to enable the orbit the view of the model.
|
| R | Used to generate a rectangle.
|
Advantages of Using Keyboard Shortcut Keys
- Boosted productivity: Using shortcut keys enhances productivity and improves work quality, helping to perform more than one task by using the keyboard solely. With time the user will acquire skills that keyboard shortcuts inculcate in them and achieve efficiency in their work life.
- Multitasking Advantages: Using a keyboard means holding the ability to save time and additionally help users to get more work done at a particular time. Users who are employed in full-time jobs in the industrial or technical sectors are very busy. By using shortcut keys, they are can have leisure for themselves.
- Medical problems: Using the mouse very often can cause RTI or Repetitive Syndrome Injury to daily users. It is advised by medical professionals for such individuals to use shortcut keys to diminish the risk of RSI.
- Exactness: If an individual is employed in a field that demands enhanced accuracy, it is more suitable for them to use keyboard shortcuts during work and finish their task quicker and more precisely.
Conclusion
According to the points mentioned above in this article, shortcut keys are beneficial to users of all sections of society. They not only make the work at hand stress-free and efficient but also helps users to complete their tasks much more precisely with the help of keyboard shortcut keys.
Uses employed in the technical sectors of the modern age always sought various tools that can help them produce quality content and make this computation process less stressful. It helps to save energy and makes the long method of computation very straightforward and less strained.
To conclude, it is in support of users to start applying shortcut keys while running the computer. It not only assists in quicker computation but also makes the user’s overall experience comfortable.