
What Is A Graphical User Interface (GUI)?
Graphical User Interface (GUI) is nothing but a desktop application which helps you to interact with the computers. They perform different tasks in the desktops, laptops and other electronic devices.
- GUI apps like Text-Editors create, read, update and delete different types of files.
- Apps like Sudoku, Chess and Solitaire are games which you can play.
- GUI apps like Google Chrome, Firefox and Microsoft Edge browse through the Internet.
They are some different types of GUI apps which we daily use on the laptops or desktops. We are going to learn how to create those type of apps.
Python offers multiple options for developing GUI (Graphical User Interface). Out of all the GUI methods, tkinter is the most commonly used method. It is a standard Python interface to the Tk GUI toolkit shipped with Python. Python with tkinter is the fastest and easiest way to create the GUI applications. Creating a GUI using tkinter is an easy task.
- Python Project Ideas & Topics for Beginners to Try in 2021 | Interesting Python Projects List for Beginners, Intermediate, Advanced Level Students
- The Top 5 Python Plotting and Graphing Libraries
- How is Python Used in Education? | Python in Education | 5 Reasons Why Python is a Popular Teaching Language
What Is Tkinter?
Tkinter is actually an inbuilt Python module used to create simple GUI apps. It is the most commonly used module for GUI apps in the Python.
You don’t need to worry about installation of the Tkinter module as it comes with Python default.
To create a tkinter app:
- Importing the module – tkinter
- Create the main window (container)
- Add any number of widgets to the main window
- Apply the event Trigger on the widgets.
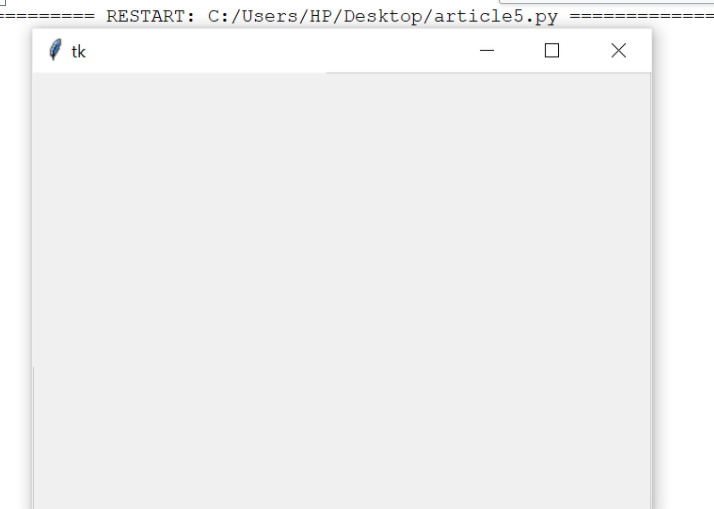
Importing tkinter is same as importing any other module in the Python code. Note that the name of the module in Python 2.x is ‘Tkinter’ and in Python 3.x it is ‘tkinter’.
import tkinter
There are two main methods used which the user needs to remember while creating the Python application with GUI.
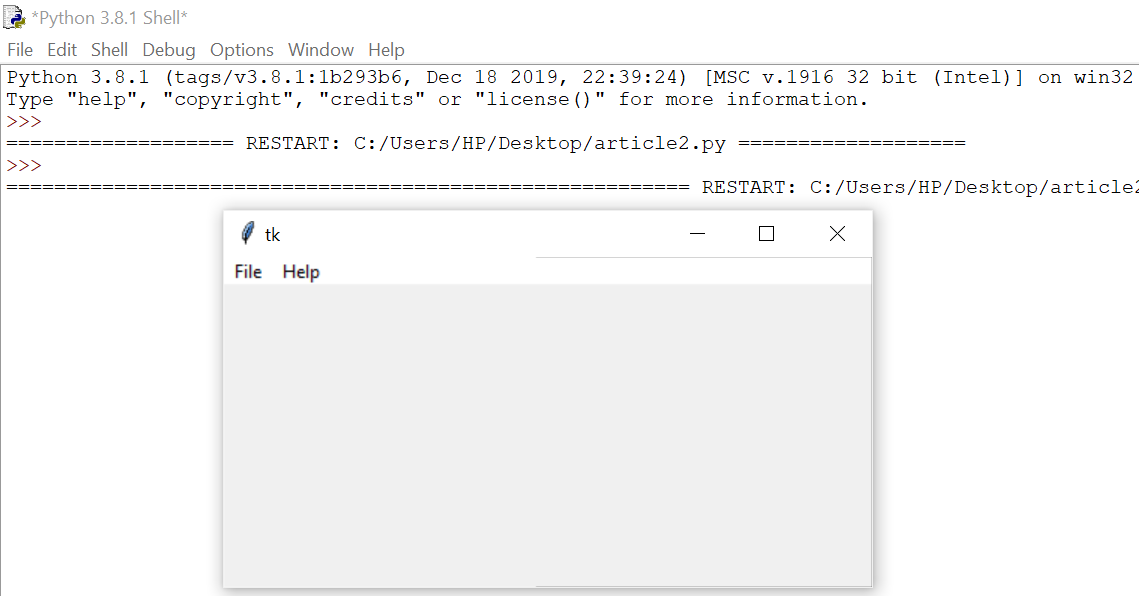
1.Tk(screenName=None, baseName=None, className=’Tk’, useTk=1):
To create a main window, tkinter offers a method ‘Tk(screenName=None, baseName=None, className=’Tk’, useTk=1)’. To change the name of the window, you can change the className to the desired one. The basic code used to create the main window of the application is:
m=tkinter.Tk() where m is the name of the main window object
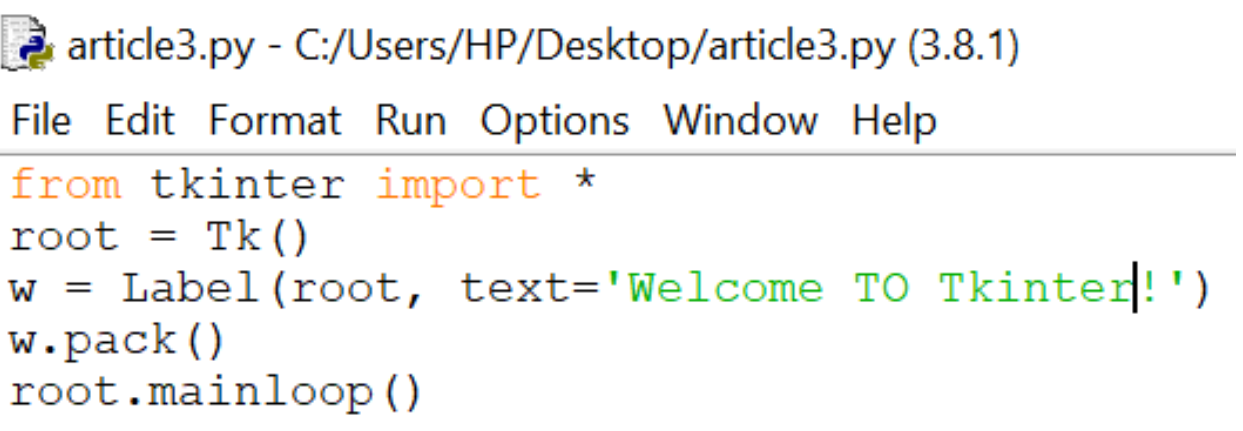
2.mainloop():
There is a method known by the name mainloop() is used when your application is ready to run. mainloop() is an infinite loop used to run the application, wait for an event to occur and process the event as long as the window is not closed.
m.mainloop()
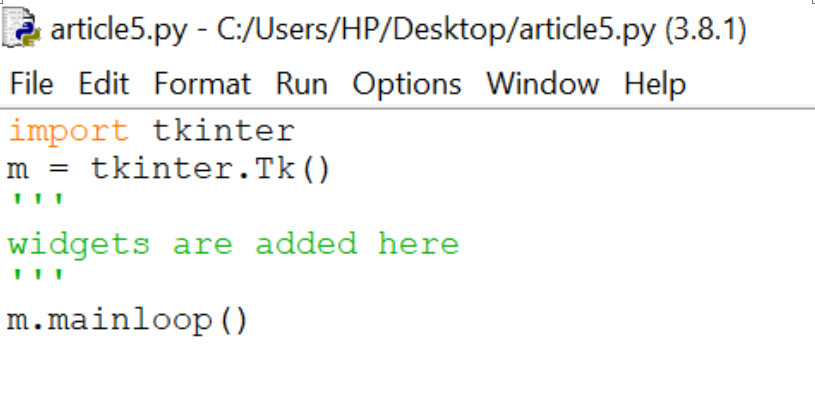
Output:
tkinter also offers access to the geometric configuration of the widgets which can organize the widgets in the parent windows. There are mainly three geometry manager classes class.
- pack() method:It organizes the widgets in blocks before placing in the parent widget.
- grid() method:It organizes the widgets in grid (table-like structure) before placing in the parent widget.
- place() method:It organizes the widgets by placing them on specific positions directed by the programmer.
There are a number of widgets which you can put in your tkinter application. Some of the major widgets are explained below:
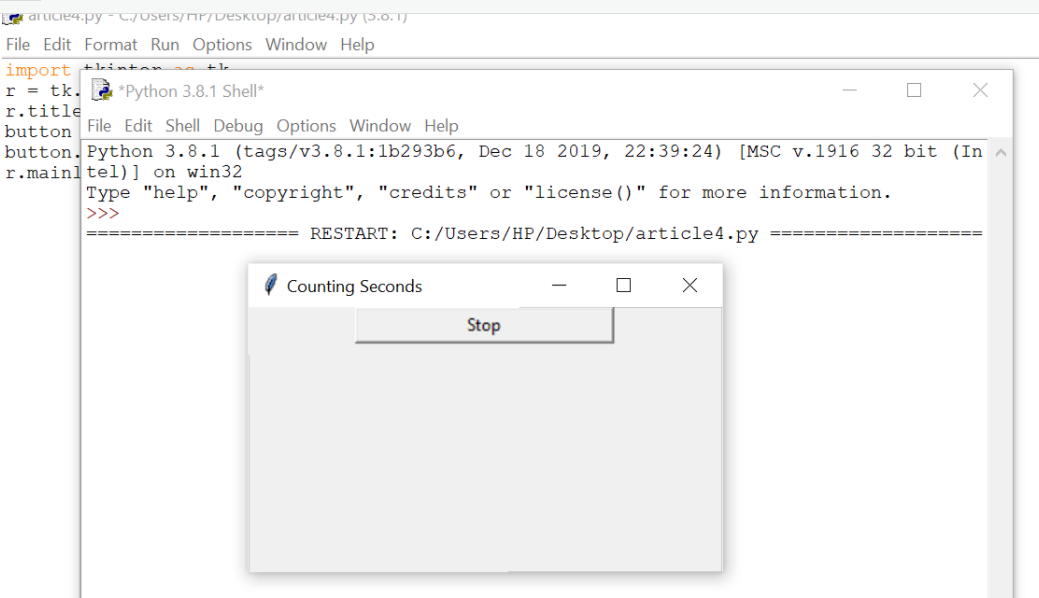
1.Button:
To add a button in your application, this widget is used.
The general syntax is:
w=Button(master, option=value)
master is the parameter used to represent the parent window.
There are number of options which are used to change the format of the Buttons. Number of options can be passed as parameters separated by commas. Some of them are listed below.
- activebackground: to set the background color when button is under the cursor.
- activeforeground: to set the foreground color when button is under the cursor.
- bg: to set he normal background color.
- command: to call a function.
- font: to set the font on the button label.
- image: to set the image on the button.
- width: to set the width of the button.
- height: to set the height of the button.
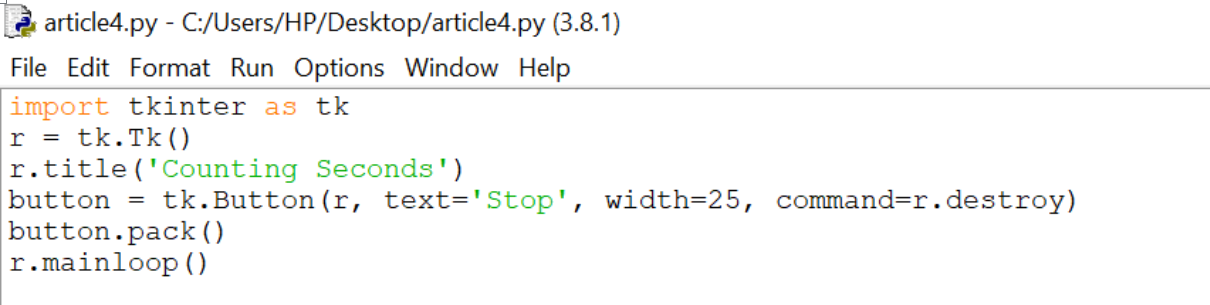
Output:
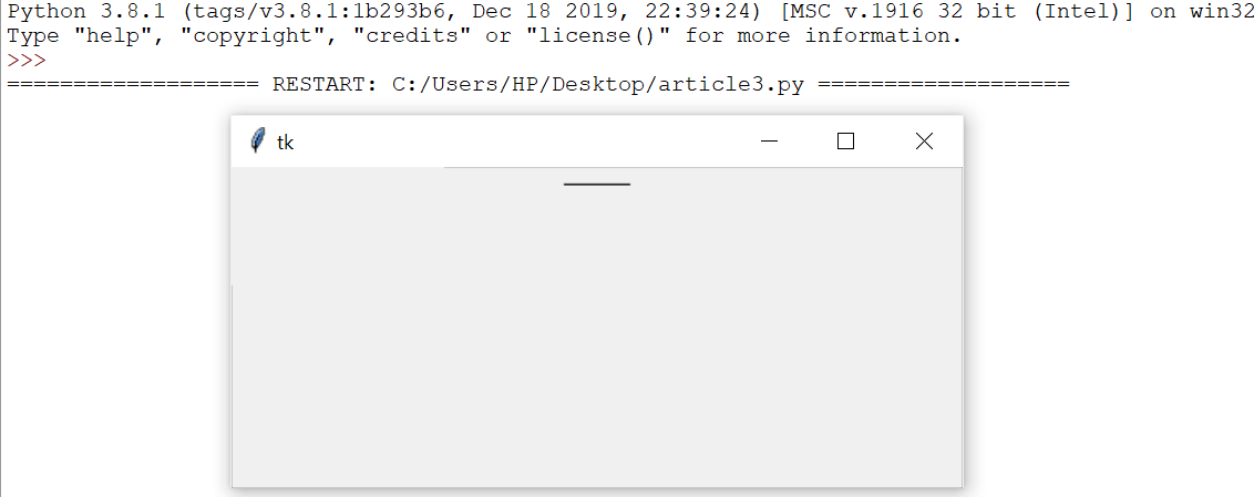
2.Canvas:
It is used to draw pictures and other complex layout like graphics, text and widgets.
The general syntax is:
w = Canvas(master, option=value)
master is the parameter used to represent the parent window.
There are number of options which are used to change the format of the widget. Number of options can be passed as parameters separated by commas. Some of them are listed below.
- bd: to set the border width in pixels.
- bg: to set the normal background color.
- cursor: to set the cursor used in the canvas.
- highlightcolor: to set the color shown in the focus highlight.
- width: to set the width of the widget.
- height: to set the height of the widget.
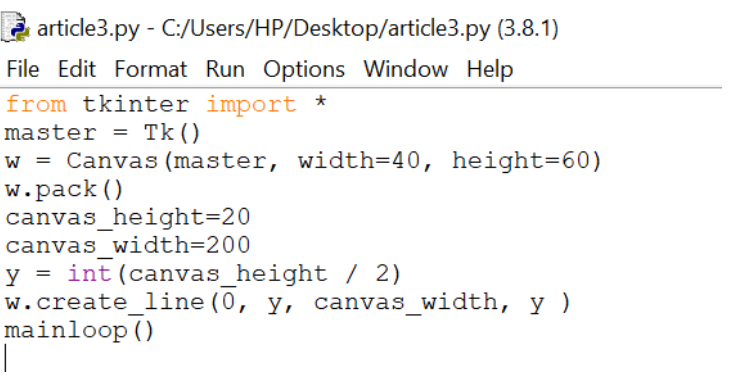
Output:
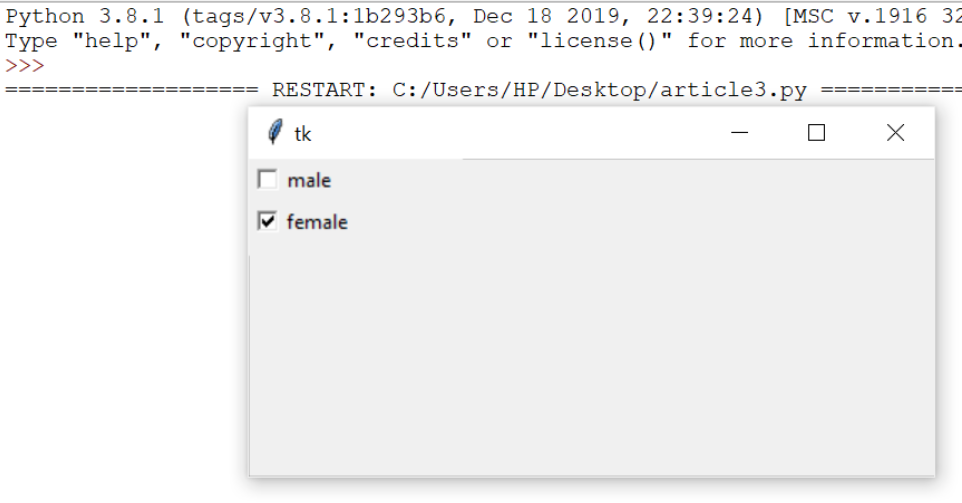
3.CheckButton:
To select any number of options by displaying a number of options to a user as toggle buttons. The general syntax is:
w = CheckButton(master, option=value)
There are number of options which are used to change the format of this widget. Number of options can be passed as parameters separated by commas. Some of them are listed below.
- Title: To set the title of the widget.
- activebackground: to set the background color when widget is under the cursor.
- activeforeground: to set the foreground color when widget is under the cursor.
- bg: to set he normal backgrouSteganographyBreakSecret Code:Attach a File:nd color.
- command: to call a function.
- font: to set the font on the button label.
- image: to set the image on the widget.
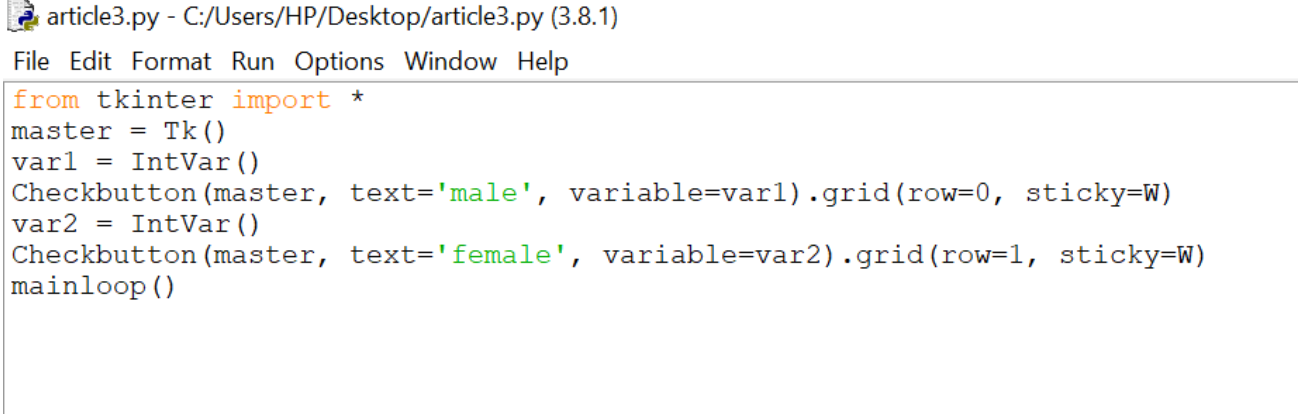
Output:
4.Entry:
It is used to input the single line text entry from the user.. For multi-line text input, Text widget is used.
The general syntax is:
w=Entry(master, option=value)
master is the parameter used to represent the parent window.
There are number of options which are used to change the format of the widget. Number of options can be passed as parameters separated by commas. Some of them are listed below.
- bd: to set the border width in pixels.
- bg: to set the normal background color.
- cursor: to set the cursor used.
- command: to call a function.
- highlightcolor: to set the color shown in the focus highlight.
- width: to set the width of the button.
- height: to set the height of the button.
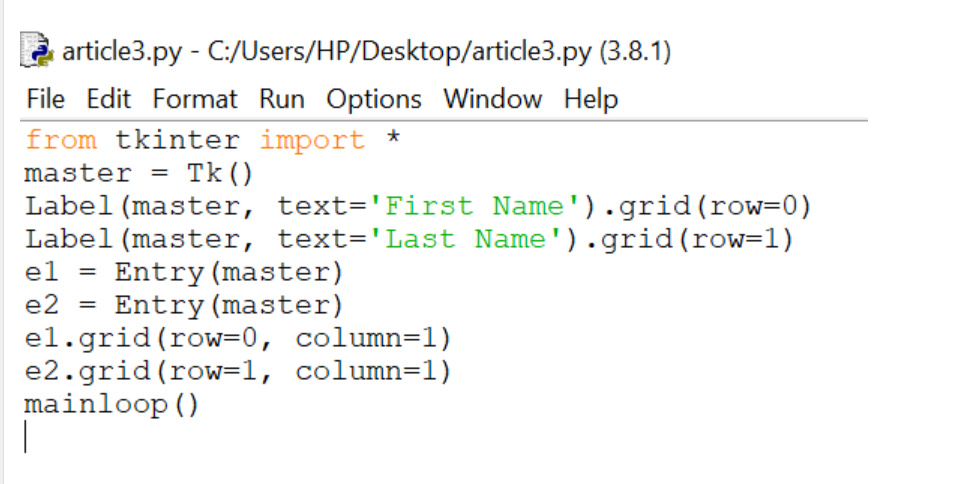
Output:
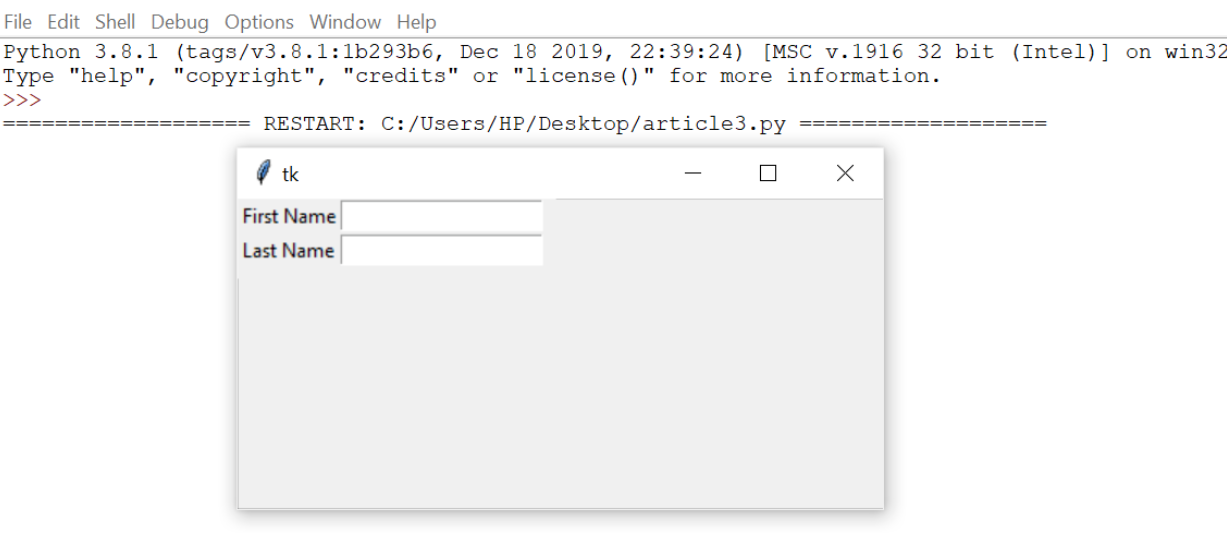
5.Frame:
It acts as a container to hold the widgets. It is used for grouping and organizing the widgets. The general syntax is:
w = Frame(master, option=value)
master is the parameter used to represent the parent window.
There are number of options which are used to change the format of the widget. Number of options can be passed as parameters separated by commas. Some of them are listed below.
- highlightcolor: To set the color of the focus highlight when widget has to be focused.
- bd: to set the border width in pixels.
- bg: to set the normal background color.
- cursor: to set the cursor used.
- width: to set the width of the widget.
- height: to set the height of the widget.
Output:

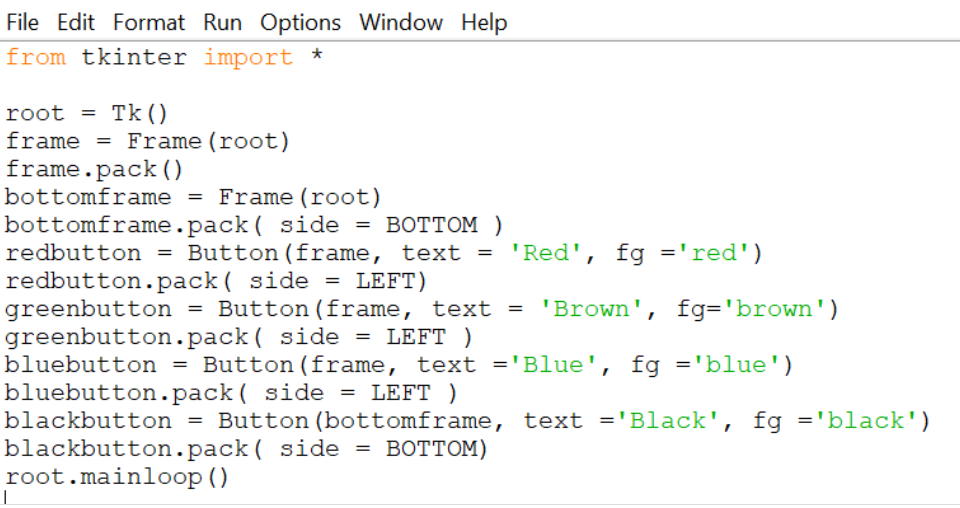
6.Label:
It refers to the display box where you can put any text or image which can be updated any time as per the code.
The general syntax is:
w=Label(master, option=value)
master is the parameter used to represent the parent window.
There are number of options which are used to change the format of the widget. Number of options can be passed as parameters separated by commas. Some of them are listed below.
- bg: to set he normal background color.
- bg to set he normal background color.
- command: to call a function.
- font: to set the font on the button label.
- image: to set the image on the button.
- width: to set the width of the button.
- height” to set the height of the button.
Output:

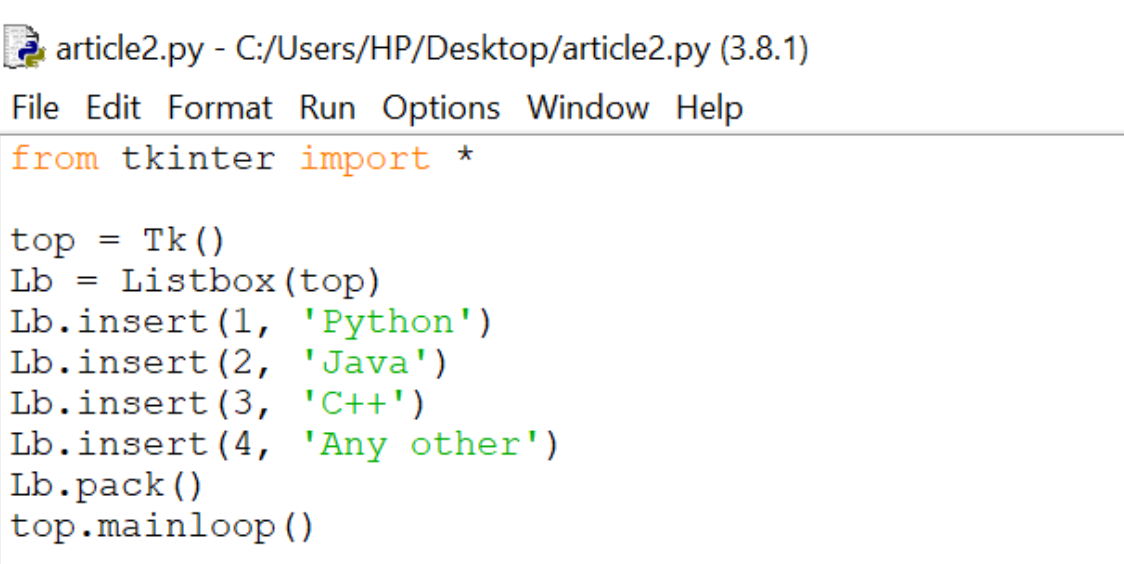
7.Listbox:
It offers a list to the user from which the user can accept any number of options.
The general syntax is:
w = Listbox(master, option=value)
master is the parameter used to represent the parent window.
There are number of options which are used to change the format of the widget. Number of options can be passed as parameters separated by commas. Some of them are listed below.
- highlightcolor: To set the color of the focus highlight when widget has to be focused.
- bg: to set he normal background color.
- bd: to set the border width in pixels.
- font: to set the font on the button label.
- image: to set the image on the widget.
- width: to set the width of the widget.
- height: to set the height of the widget.
Output:
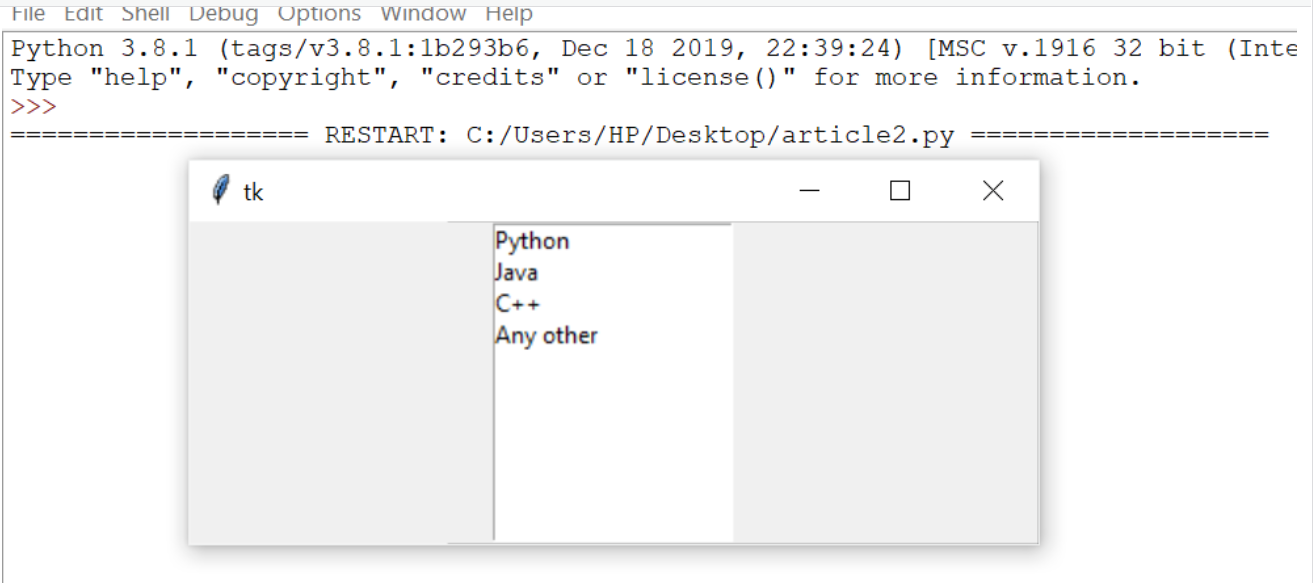
8.MenuButton:
It is a part of top-down menu which stays on the window all the time. Every menubutton has its own functionality. The general syntax is:
w = MenuButton(master, option=value)
master is the parameter used to represent the parent window.
There are number of options which are used to change the format of the widget. Number of options can be passed as parameters separated by commas. Some of them are listed below.
- activebackground: To set the background when mouse is over the widget.
- activeforeground: To set the foreground when mouse is over the widget.
- bg: to set he normal background color.
- bd: to set the size of border around the indicator.
- cursor: To appear the cursor when the mouse over the menubutton.
- image: to set the image on the widget.
- width: to set the width of the widget.
- height: to set the height of the widget.
- highlightcolor: To set the color of the focus highlight when widget has to be focused.
9.Menu:
9.Menu: It is used to create all kinds of menus used by the application.
The general syntax is:
w = Menu(master, option=value)
master is the parameter used to represent the parent window.
- title: To set the title of the widget.
- activebackground: to set the background color when widget is under the cursor.
- activeforeground: to set the foreground color when widget is under the cursor.
- bg: to set he normal background color.
- command: to call a function.
- font: to set the font on the button label.
- image: to set the image on the widget.
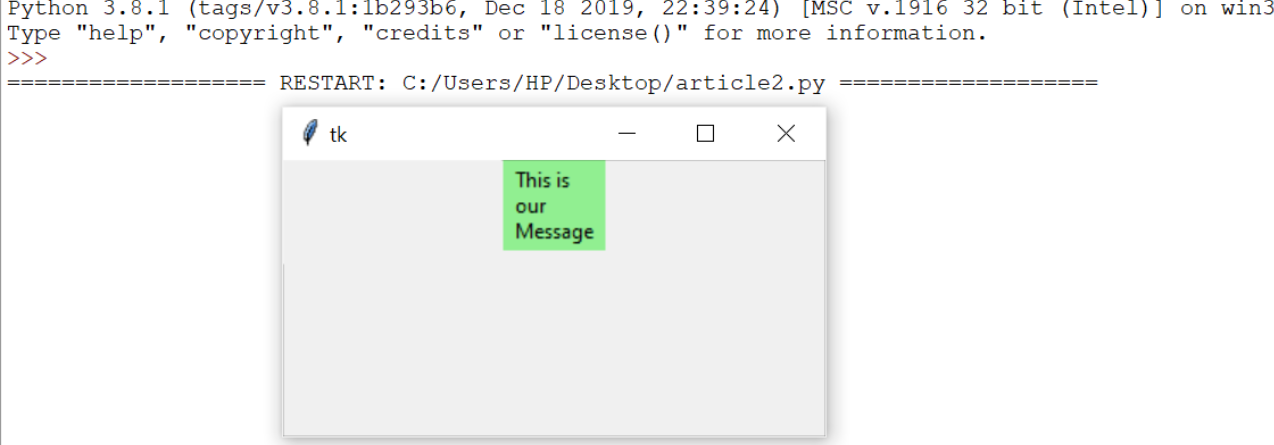
10.Message:
It refers to the multi-line and non-editable text. It works same as that of Label.
The general syntax is:
w = Message(master, option=value)
master is the parameter used to represent the parent window.
There are number of options which are used to change the format of the widget. Number of options can be passed as parameters separated by commas. Some of them are listed below.
- bd: to set the border around the indicator.
- bg: to set he normal background color.
- font: to set the font on the button label.
- image: to set the image on the widget.
- width: to set the width of the widget.
- height: to set the height of the widget.
main = Tk()
ourMessage =’This is our Message’
messageVar = Message(main, text = ourMessage)
messageVar.config(bg=’lightgreen’)
messageVar.pack( )
main.mainloop( )
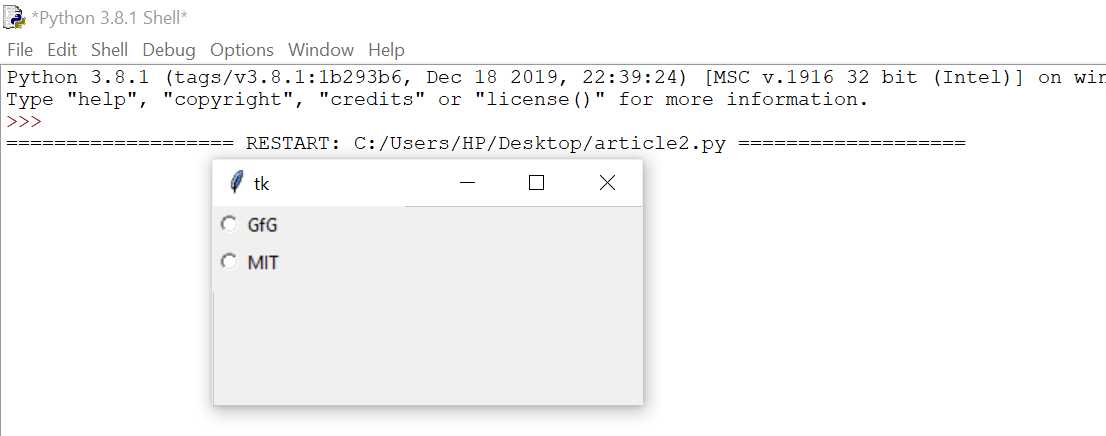
11.RadioButton:
It is used to offer multi-choice option to the user. It offers several options to the user and the user has to choose one option.
The general syntax is:
w = RadioButton(master, option=value)
There are number of options which are used to change the format of this widget. Number of options can be passed as parameters separated by commas. Some of them are listed below.
- activebackground: to set the background color when widget is under the cursor.
- activeforeground: to set the foreground color when widget is under the cursor.
- bg: to set he normal background color.
- command: to call a function.
- font: to set the font on the button label.
- image: to set the image on the widget.
- width: to set the width of the label in characters.
- height: to set the height of the label in characters.
|
from tkinter import *
root = Tk() v = IntVar() Radiobutton(root, text=’GfG’, variable=v, value=1).pack(anchor=W) Radiobutton(root, text=’MIT’, variable=v, value=2).pack(anchor=W) mainloop() |
Output:
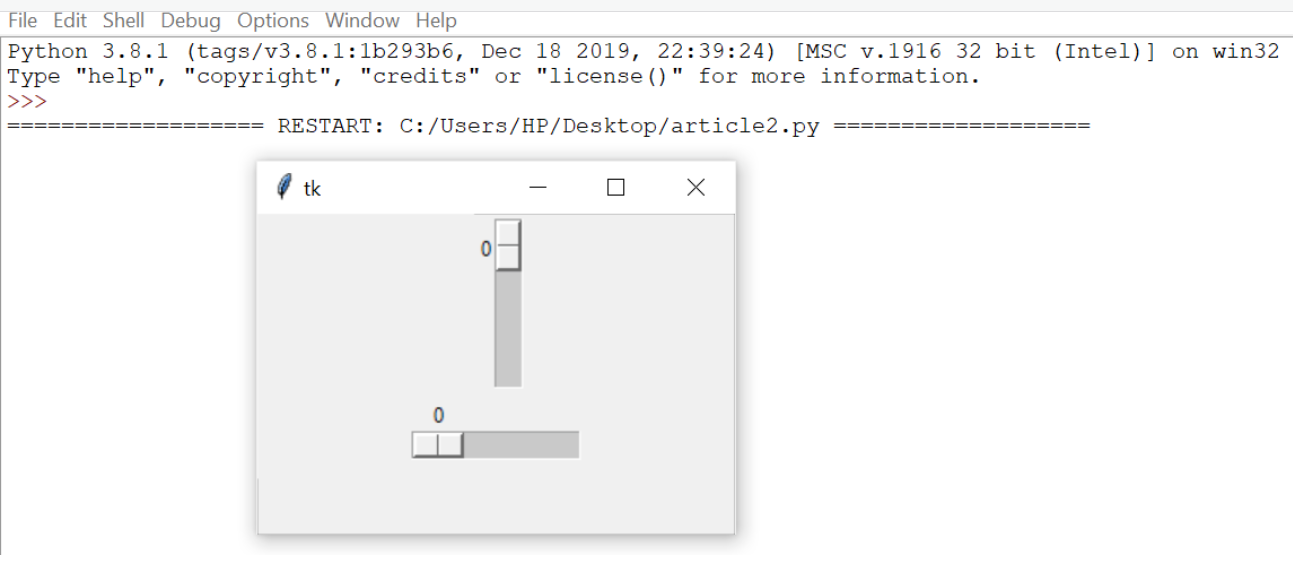
12.Scale:
It is used to provide a graphical slider that allows to select any value from that scale. The general syntax is:
w = Scale(master, option=value)
master is the parameter used to represent the parent window.
There are number of options which are used to change the format of the widget. Number of options can be passed as parameters separated by commas. Some of them are listed below.
- cursor: To change the cursor pattern when the mouse is over the widget.
- activebackground: To set the background of the widget when mouse is over the widget.
- bg: to set he normal background color.
- orient: Set it to HORIZONTAL or VERTICAL according to the requirement.
- from_: To set the value of one end of the scale range.
- to: To set the value of the other end of the scale range.
- image: to set the image on the widget.
- width: to set the width of the widget.
|
from tkinter import *
master = Tk() w = Scale(master, from_=0, to=42) w.pack() w = Scale(master, from_=0, to=200, orient=HORIZONTAL) w.pack() mainloop() |
Output:
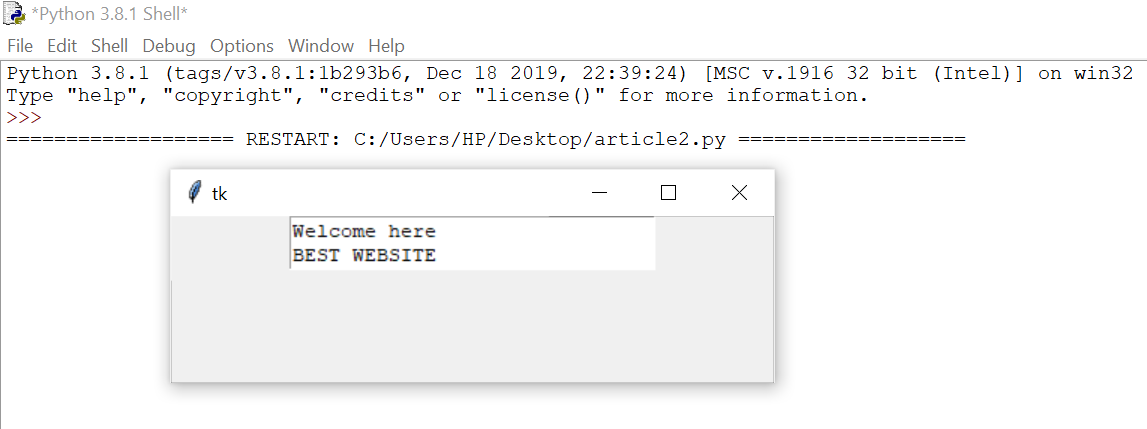
13.Text:
To edit a multi-line text and format the way it has to be displayed.
The general syntax is:
w =Text(master, option=value)
There are number of options which are used to change the format of the text. Number of options can be passed as parameters separated by commas. Some of them are listed below.
- highlightcolor: To set the color of the focus highlight when widget has to be focused.
- insertbackground: To set the background of the widget.
- bg: to set he normal background color.
- font: to set the font on the button label.
- image: to set the image on the widget.
- width: to set the width of the widget.
- height: to set the height of the widget.
|
from tkinter import *
root = Tk() T = Text(root, height=2, width=30) T.pack() T.insert(END, ‘GeeksforGeeks\nBEST WEBSITE\n’) mainloop() |
Output:
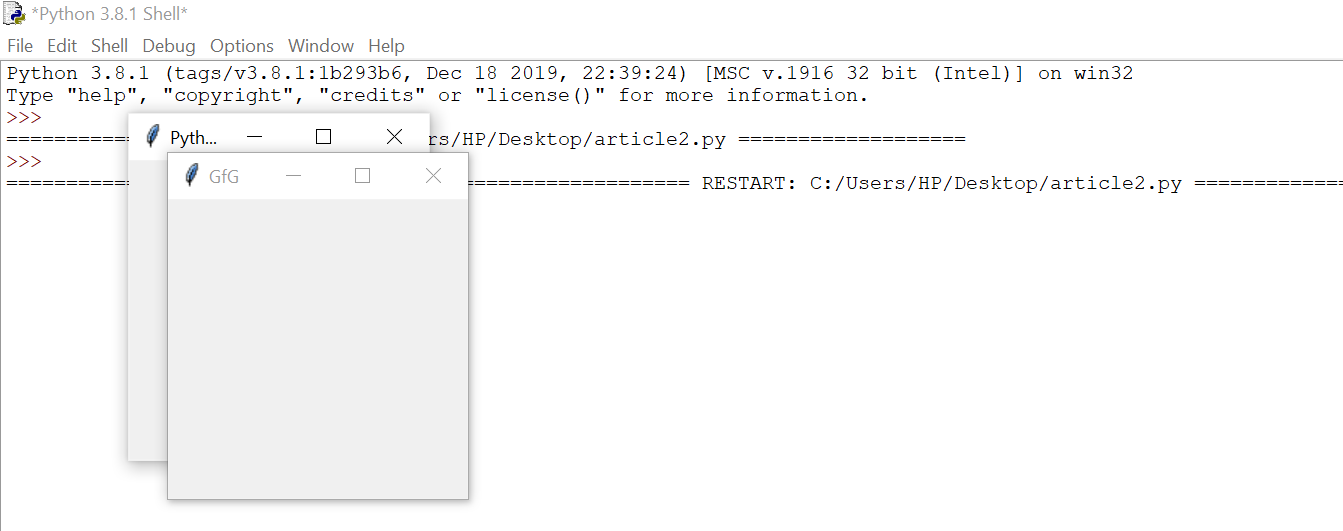
14.TopLevel:
This widget is directly controlled by the window manager. It don’t need any parent window to work on.The general syntax is:
w = TopLevel(master, option=value)
There are number of options which are used to change the format of the widget. Number of options can be passed as parameters separated by commas. Some of them are listed below.
- bg: to set he normal background color.
- bd: to set the size of border around the indicator.
- cursor: To appear the cursor when the mouse over the menubutton.
- width: to set the width of the widget.
- height: to set the height of the widget.
from tkinter import *
root = Tk()
root.title(‘GfG’)
top = Toplevel()
top.title(‘Python’)
top.mainloop()
Output:
Conclusion:
In this tutorial, you learned how to get started with Python GUI programming. Tkinter is a compelling choice for a Python GUI framework because it’s built into the Python standard library, and it’s relatively painless to make applications with this framework.