About Us

BTechGeeks.com provides e-learning solutions for K-12 students in form of downloadable PDFs, online tests, practice sets, videos and homework help. It is one of the most trusted websites among BTech students and teachers.

BTechGeeks.com provides solutions for the web-based education system and develops e-learning software products for the virtual education market in India. The content in BTech Geeks has been prepared by teachers with more than 10 years of teaching experience in schools.

BTechGeeks.com is a student-centric educational web portal that provides quality test papers and study materials for the students preparing for Board Exams or targeting various entrance exams. During the past few years, a number of surveys on students were made to better understand their problems regarding their studies and their basic requirement. This website is basically a conclusive solution to the surveys. Test and study materials are according to the student’s needs.

We are working for free education so that all the students can have access to the content and use it to get successful in their lives. We are trying to provide maximum help in the field of BTech Syllabus Solutions, Material, Test Papers, Assignments, Study material of different subjects. Till now we are providing free study material, book solutions, notes, sample papers and much more.

Thread interview questions – Python Interview Questions on Python Thread Management

Python Interview Questions on Python Thread Management

Thread interview questions: We have compiled most frequently asked Python Interview Questions which will help you with different expertise levels.

You can also find out what is multithreading in python, Multithreading in c interview questions, Python interview questions for managers, Python loops interview questions, Multithreading interview questions c, Python multithreading subjective question, Python architect interview questions, Python concurrency interview questions, Multithreading in c# interview questions, multithreading interview questions c++, python interview questions on multithreading, python thread interview questions, Python threading questions, python multithreading interview questions.

Python Interview Questions on Python Thread Management

Question 1.
What are Python threads?
Answer:
Multiple streams of execution. Often used to handle multiple simultaneous requests or processing tasks. 1

122: What is a race condition?
Answer:
A race condition occurs when two or more threads are competing for the same resource, and cannot continue without \ it. This is also called a deadlock.

Question 3.
How is a new thread started?
Answer: :
By invoking the .start _new_thread( ) method of the thread module.

Question 4:
What happens to other threads if a thread in a program encounters an exception?
Answer:
A stack trace is dumped for the thread with the exception, but other threads will continue to run.

Question 5:
What is the difference between the threading and the thread modules?
Answer:
The threading module was introduced in Python 2.4 and is a higher-level manager of thread processes. Threading is a little more complex to initialize but provides better control.

Question 6:
How are threads synchronized, to prevent race and deadlock conditions?
Answer:
Using the.Lock( ) method of the threading module to create a lock object, then using .acquire( ) and .release( ) on that lock.

Question 7:
What is a timer interrupted thread, and when would it be used?
Answer:
Timer threads are created using the.Timer( ) method of the threading module. They are used for periodic cleanups, status reporting, etc.

Question 8:
Illustrate creating a timer thread that executes every 10 minutes.
Answer:
import threading
myTimer = threading.Timer(600, myFunction)
myTimer.start( )

Question 9:
How is a timer interrupted thread stopped?
Answer:
By using the .cancel( ) method of the timer thread object.

Question 10:
What is the Queue module and when is it used?
Answer:
The Queue module is a device to handle a multithreaded prioritized queue of processing tasks. It is useful when there are a number of incoming requests, with different priorities that need to be allocated processing resources.

Question 11:
How are objects added to a queue?
Answer:
Using the .put( ) method of the queue object.

Question 12:
How are objects retrieved from a queue?
Answer:
Using the .get( ) method of the queue object.

Question 13:
What are some useful methods and properties of the queue?
Answer:
.empty( ), .full( ) and .qsize( ) are useful for determining the state of the queue. .get() and .put() are used to add and remove items from the queue.

Question 14:
When using the .acquire!) method of the threading. Lock object, what does the addition of the blocking parameter do?
Answer:
The blocking parameter prevents return to the calling process until the lock can be acquired. If acquire is called without a parameter, or with 0 or false, it will immediately return with a 0 value if the lock cannot be acquired. If blocking is true, the thread will stop execution until the lock is acquired.

Question 15:
What is the difference between the .start( ) and, run() methods of the new thread object?
Answer:
.start starts the activity of a thread, .run is a method representing the thread’s activity that may be overridden in a subclass.

Question 16:
When is .isAlive( ) true?
Answer:
From when the start method is called until the run method terminates on a particular thread.

Question 17:
How is the .join() method useful for thread synchronization?
Answer:
.join() is used to block the current thread’s execution until the thread the .join is being called on terminates, or a timeout expires, at which time the calling thread’s execution resumes.

Question 18:
How is the current thread retrieved?
Answer:
By calling the .currentThread( ) method of the thread module.

Question 19:
How is the number of threads that are currently running retrieved?
Answer:
Using the threading.activeCount( ) method.

Question 20:
What is a semaphore object?
Answer:
It is a method of synchronizing activity between multiple threads.

Inserting into an array java – Java Program to Insert an Element in Array at Given Position

Inserting into an array java: Guys who are serious about learning the concepts of the java programming language should practice this list of programs in java and get a good grip on it for better results in exams or interviews.

Java Program to Insert an Element in Array at Given Position

  • Write a java program to insert an element in array at any given index using for loop.

In this java program, given an array of N elements, we have to insert an element at index i (0 <= i <= N-1) without using extra memory space. After insertion, the number of elements in array will increase by one. To insert an element at index i in array we have to shift all elements from index i to N-1 to next index.

For Example,
Input Array : [2 5 3 4 6 1 7]
Inserting 9 at index 4
Output Array : [2 5 3 4 9 6 1 7]
Algorithm to insert an element in an array
Let inputArray is an integer array of length N, which contains M (M<N) elements and S is the element that we want to insert at index I.

  • Move all elements between index I to M-1 to next index(including index I and M-1).
  • Move inputArray[j] to inputArray[j + 1], I <= j <= M-1.
  • Insert S at inputArray[I].
  • Now, inputArray contains M+1 elements from index 0 to M.

Time Complexity : O(n)

Java program to insert an element in array at given index

In this java program, we first take number of elements in array as input fro user and store it in variable “count”. Then we ask user to enter “count” numbers and store it in integer array “input”. Then we ask user to enter number to be inserted(num) and at what position(index). By implementing above mentioned algorithm we insert “num” at “index” and print the array on screen using a for loop.
Java program to insert an element in array at given index

package com.tcc.java.programs;
 
import java.util.Scanner;
 
/**
 * Java Program to insert an element in array
 */
public class InsertArrayElement {
 
    public static void main(String[] args) {
        int count, i, num, index;
        int input[] = new int[100];
 
        Scanner scanner = new Scanner(System.in);
        System.out.println("Enter Number of Elements in Array");
        count = scanner.nextInt();
 
        /*
         * Take array input from user
         */
        System.out.println("Enter " + count + " Numbers");
        for (i = 0; i < count; i++) {
            input[i] = scanner.nextInt();
        }
 
        System.out.println("Enter Number to be Inserted");
        num = scanner.nextInt();
        System.out.println("Enter Index of Insertion");
        index = scanner.nextInt();
 
        /*
         * Insert "num" at index. First shift all element right of index by one
         * position
         */
        for (i = count; i > index; i--) {
            input[i] = input[i - 1];
        }
        // inserting num at position "index"
        input[index] = num;
        // increment size of array
        count++;
 
        System.out.println("Final Array");
        for (i = 0; i < count; i++) {
            System.out.print(input[i] + " ");
        }
    }
}

Output

Enter Number of Elements in Array
7
Enter 7 Numbers
1 2 3 4 5 6 7
Enter Number to be Inserted
9
Enter Index of Insertion
4
Final Array
1 2 3 4 9 5 6 7

dict_keys’ object does not support indexing – Solved- TypeError: dict_keys object does not support indexing

Getting and resolving ‘TypeError: dict_keys object does not support indexing in Python’.

dict_keys’ object does not support indexing: In this article we will discuss about

  • Reason of getting ‘TypeError: ‘dict_keys’ object does not support indexing’
  • Resolving the type error.

So let’s start exploring the topic.

To fetch keys, values or key-value pair from a dictionary in python we use functions like keys(), values() and items() which return view object so that we get a dynamic view on the dictionary entries.

The important point is that when dictionary changes then these views reflects these changes and we can iterate over it also. But when we want to use indexing on these objects then it causes TypeError.

Getting TypeError :

#Program :

# Dictionary created of string and int
word_freq = {
    'Aa' : 56,
    "Bb"    : 23,
    'Cc'  : 43,
    'Dd'  : 78,
    'Ee'   : 11
}

# Here, fetching a view object 
# by pointing to all keys of dictionary
keys = word_freq.keys()
print('dict_keys view object:')
print(keys)
print('Try to perform indexing:')

# Here, trying to perform indexing on the key's view object 
# Which will cause error
first_key = keys[0]
print('First Key: ', first_key)
Output :

Try to perform indexing:
Traceback (most recent call last):
File “temp.py”, line 18, in <module>
first_key = keys[0]
TypeError: ‘dict_keys’ object does not support indexing

Here, in the above example we got Type error as because we tryied to select value at index 0 from the dict_keys object, which is a view object and we know view object does not support indexing.

Resolving TypeError :

dict_keys python: The solution to TypeError: dict_keys object does not support indexing is very simple. We just need to convert these view object dict_keys into a list and then we can perform indexing on that. Means we will cast the dict_keys object to list object and then selecting elements at any index position.

#Program :

# Dictionary created
word_freq = {
    'Aa' : 10,
    "Bb" : 20,
    'Cc' : 30,
    'Dd' : 40,
    'ee' : 50
}
# Here, fetching a view object 
# by pointing to all keys of dictionary
keys = list(word_freq.keys())
print('List of Keys:')
print(keys)

# Selecting 1st element from keys list
first_key = keys[0]
print('First Key: ', first_key)
Output :
List of Keys:
['Aa', 'Bb', 'Cc', 'Dd', 'Ee']
Second Key: Aa
In this example we converted all the keys of the dictionary to list and then we selected 1st element from the list which is present at index position 0 and it also returned the first key which is present at index position 0.

Pandas dataframe iterrows – Python Pandas DataFrame iterrows() Function

Python Pandas DataFrame iterrows() Function

Pandas DataFrame iterrows() Function:

Pandas dataframe iterrows: Iterate through the DataFrame rows with the iterrows() function of the Pandas DataFrame, which returns a tuple with the row index and the row data as a Series.

Syntax:

DataFrame.iterrows()

Parameters: This method doesn’t accept any parameters

Return Value:

Gives the following:

index: label or a tuple of label

This is required. The row’s index number. A tuple for a MultiIndex.

data: Series

This is required. It is the data of the row as a Series.

it: generator

This is required. A generator that loops across the rows of the frame.

Pandas DataFrame iterrows() Function in Python

Approach:

Below is the implementation:

Output:

# Import pandas module using the import keyword.
import pandas as pd
# Import NumPy module using the import keyword.
import numpy as np
# Pass some random key-value pair(dictionary), index list as arguments to the 
# DataFrame() function of the pandas module to create a dataframe
# Store it in a variable.
data_frme = pd.DataFrame({
  "emp_name": ["john", "nick" , "jessy", "mary"],
  "emp_age": [25, 35, 38, 22],
  "emp_salary": [25000, 40000, 22000, 80000]},
  index= [1, 2, 3, 4]
)

print("The given DataFrame:")
print(data_frme)
print()

for label, data in data_frme.iterrows():
  print(f'label: {label}')
  print(f'data: \n{data}')
  print()


MySQL string replace – MySQL: Remove characters from string

MySQL string replace: In this article we are going to discuss how to remove characters from string in MySQL table.

MySQL: Remove characters from string

Here we are going to discuss three methods to remove characters from a database table in MySQL

Lets first make a database table in MySql,

CREATE TABLE student_data (
student_id INT,
student_name VARCHAR(50),
enroll_date DATE,
student_roll_no BIGINT,
fee_submitted DECIMAL(10,2)
);

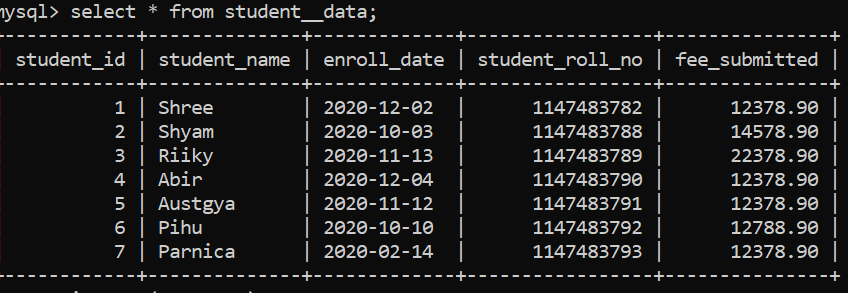
Insert values in student_data,

INSERT INTO student__data(student_id,student_name,enroll_date,student_roll_no,fee_submitted) 
VALUES(1,"DShr-tht-ee,",'2020-12-02',1147483782,12378.90),
(2,"SShy-tht-am,",'2020-10-03',1147483788,14578.90),
(3,"RRi-tht-iky,",'2020-11-13',1147483789,22378.90),
(4,"JAb-tht-ir," ,'2020-12-04',1147483790,12378.90),
(5,"AAust-tht-gya,",'2020-11-12',1147483791,12378.90),
(6,"GPi-tht-hu,",'2020-10-10',1147483792,12788.90),
(7,"VPar-tht-nica,",'2020-02-14',1147483793,12378.90);
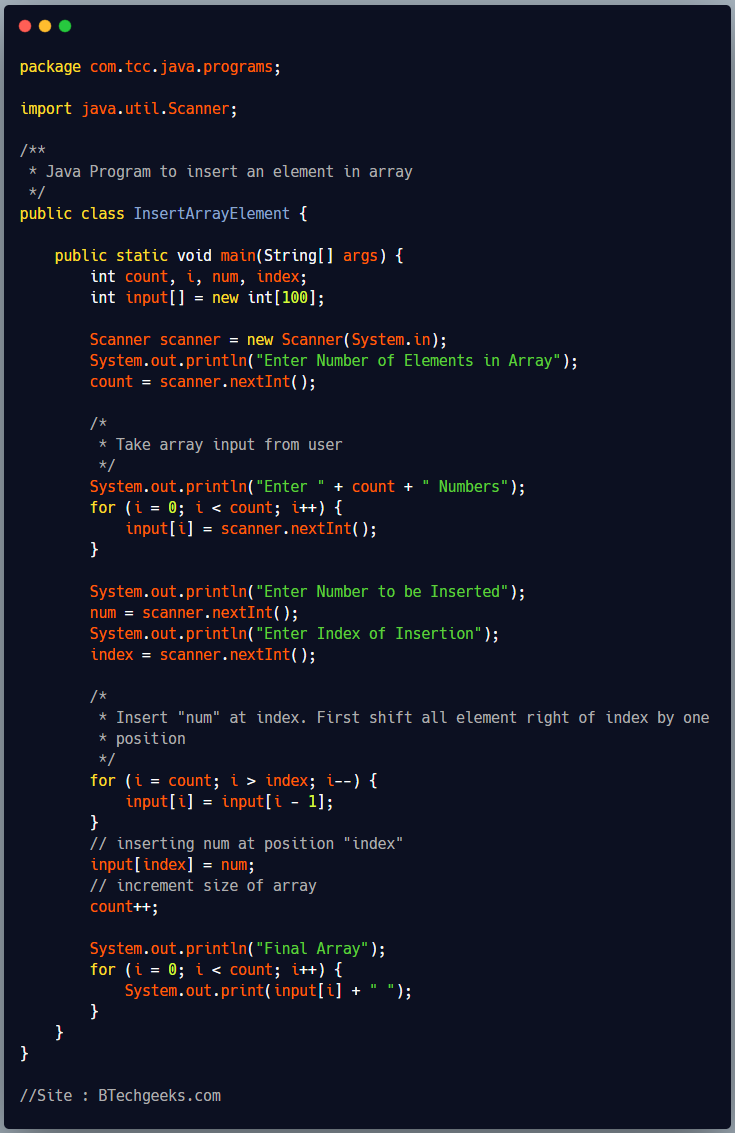
Output:

Remove chara from string in sql

Remove characters from string using REPLACE()

Here we are going to remove unwanted character from string using REPLACE() function.

Syntax:

UPDATE tableName SET columnName = REPLACE(columnName, 'charactersToBeReplaced', 
'charactersToBeReplacedWith');

Explanation:

tableName- Name of the given table

columnName: Column name whose value has to chnage

charactersToBeReplaced:Characters which we want to replaced

charactersToBeReplacedWith:New characters which we want to put instead of replaced one

Now we are going to remove “tht” from our string in column “student_name”,

UPDATE student_enroll_data SET student_name = REPLACE(student_name, '-tht-', '');

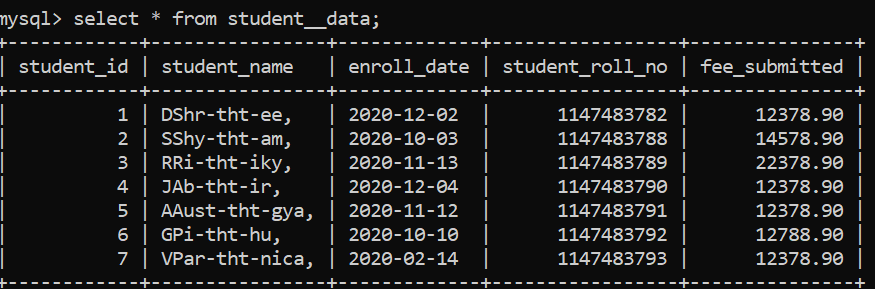
In above code you can see that we have given “-tht-” in place of characterToBeReplaced,which replaced the character and give us below output.

Output:

Remove char from string2

Remove characters from string using TRIM()

Here we are going to remove unwanted character from string using TRIM() function.TRIM() function are very helpful in removing char from string.It deletes special characters  or any characters given in start or end of table,

Syntax:

UPDATE tableName SET columnName = TRIM([{BOTH | LEADING | TRAILING} [charactersToBeRemoved] FROM ] columnName);

Explanation:

tableName- Name of the given table

columnName: Column name whose value has to chnage

charactersToBeRemoved:Characters which we want to replaced

BOTH,:When we want to remove char from start and end.

LEADING: Remove character from starting.

TRAILING: Remove characters from the end.

Now we are going to remove character ‘,’  from end for this will use below query;

UPDATE student_enroll_data SET student_name = TRIM(TRAILING ',' FROM student_name);
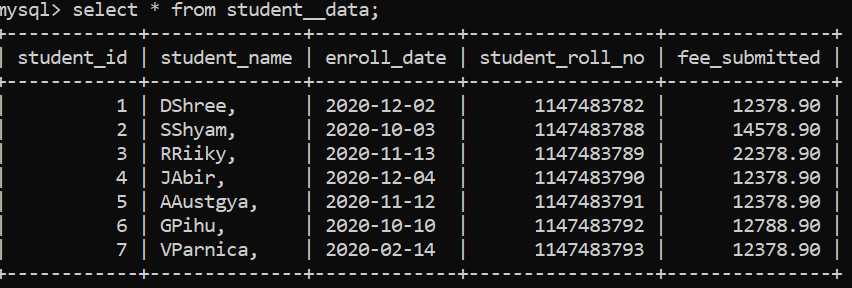
Output:

Remove char from string3png

So you can see that all “,” removed from end in Table student__data.

Remove characters from string using SUBSTRING()

Here we are going to remove unwanted character from string using SUBSTRING() function.It will remove substring from table in MySql.

Syntax:

UPDATE tableName SET columnName = SUBSTRING(columnName,pos);

Explanation:

tableName- Name of the given table

columnName: Column name whose value has to chnage

pos:position from where the substring will start.

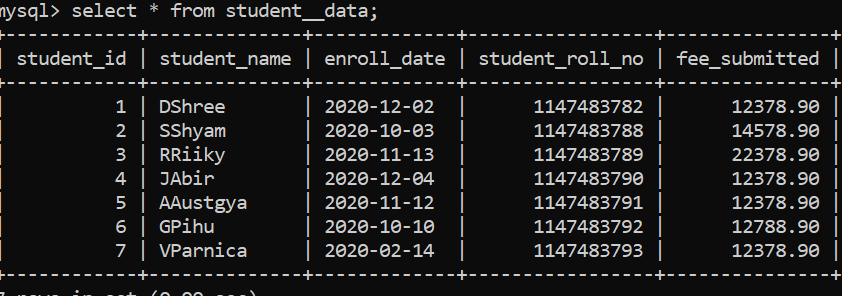
Here I am going to remove first character of column “student_name”,

UPDATE student_enroll_data SET student_name = SUBSTRING(student_name,2);

Output:

Remove char from string4
Conclusion:

In this article we have discussed how to remove characters from string in MySQL table.Thank You!

Remove first column pandas – Pandas: Delete First Column of Dataframe in Python

Methods to delete the first column of a dataframe using Python

Remove first column pandas: In this article, we discuss different ways to delete the first column of a dataframe in pandas using python.

  • Method 1-Using drop() method

Drop first column pandas: This is one of the methods to delete the first columns of a dataframe in pandas using pandas.drop() method is used to delete or drop specified labels from rows or columns. Let see how the drop method works.

Syntax: DataFrame.drop(self, labels=None, axis=0, index=None, columns=None, level=None, inplace=False, errors=’raise’).

As our main task is to delete columns using this method so we have to remember some points. The first point is that the column we want to delete is to be given in the columns parameter of the drop() method. The second point is that we have to assign axis value 1 if we want to work with columns. Inplace is used if we want to make changes in the existing dataframe. If inplace is true changes will be made in the existing dataframe otherwise we have to store the dataframe in another variable. Let see this with an example.

import pandas as pd
import numpy as np
students = [('Raj', 24, 95) ,
            ('Rahul', 22,97) ,
            ('Aadi', 22,81) ,
            ('Abhay', 21,87) ,
            ('Ajjet', 21,74),
            ('Amar',22,76),
            ('Aman',20,76)]
# Create a DataFrame object
df = pd.DataFrame(  students, 
                    columns=['Name', 'Age','Marks'])
print("Original Dataframe\n")
print(df,'\n')
#Drop first column
df.drop(columns=df.columns[0], 
        axis=1, 
        inplace=True)
print("New Dataframe\n")
print(df)

Output

Original Dataframe

    Name  Age  Marks
0    Raj   24     95
1  Rahul   22     97
2   Aadi   22     81
3  Abhay   21     87
4  Ajjet   21     74
5   Amar   22     76
6   Aman   20     76 

New Dataframe

   Age  Marks
0   24     95
1   22     97
2   22     81
3   21     87
4   21     74
5   22     76
6   20     76

Here we see that we pass our first column by index in the drop method and the first column is successfully deleted. As we give inplace=True that’s why changes are made in the original dataframe.

  • Method 2- Using del keyword

Pandas remove first column: del keyword in python is used to delete objects. Objects can be variables, lists, etc. Here we normally use                    del df[df.columns[0]] to delete first column in dataframe. df. columns[0] give the name of the column at index 0 which is our column 1.As we get our column name so it is very easy to delete it using the del keyword. Here point to remember that df is our dataframe name. It is not compulsory to use df as a dataframe name. We can name the dataframe as per our wish Let see this with the help of an example.

import pandas as pd
import numpy as np
students = [('Raj', 24, 95) ,
            ('Rahul', 22,97) ,
            ('Aadi', 22,81) ,
            ('Abhay', 21,87) ,
            ('Ajjet', 21,74),
            ('Amar',22,76),
            ('Aman',20,76)]
# Create a DataFrame object
df = pd.DataFrame(  students, 
                    columns=['Name', 'Age','Marks'])
print("Original Dataframe\n")
print(df,'\n')
#Drop first column
del df[df.columns[0]]
print("New Dataframe\n")
print(df)

Output

Original Dataframe

    Name  Age  Marks
0    Raj   24     95
1  Rahul   22     97
2   Aadi   22     81
3  Abhay   21     87
4  Ajjet   21     74
5   Amar   22     76
6   Aman   20     76 

New Dataframe

   Age  Marks
0   24     95
1   22     97
2   22     81
3   21     87
4   21     74
5   22     76
6   20     76
  • Method 3-Using pop() method

Pandas drop first column: In Pandas, the dataframe provides a function pop(column_name). It expects a column name as an argument and deletes that column from the calling dataframe object. It also returns the deleted column as a series. Let’s use this to delete the first column of the dataframe. Let see this with the help of an example.

import pandas as pd
import numpy as np
students = [('Raj', 24, 95) ,
            ('Rahul', 22,97) ,
            ('Aadi', 22,81) ,
            ('Abhay', 21,87) ,
            ('Ajjet', 21,74),
            ('Amar',22,76),
            ('Aman',20,76)]
# Create a DataFrame object
df = pd.DataFrame(  students, 
                    columns=['Name', 'Age','Marks'])
print("Original Dataframe\n")
print(df,'\n')
#Drop first column
df.pop(df.columns[0])
print("New Dataframe\n")
print(df)

Output

Original Dataframe

    Name  Age  Marks
0    Raj   24     95
1  Rahul   22     97
2   Aadi   22     81
3  Abhay   21     87
4  Ajjet   21     74
5   Amar   22     76
6   Aman   20     76 

New Dataframe

   Age  Marks
0   24     95
1   22     97
2   22     81
3   21     87
4   21     74
5   22     76
6   20     76

So these are the methods to delete the first column of the dataframe in pandas using python. These methods can be used to remove some other columns also.

Require not defined javascript – How to Fix ReferenceError require is not defined in JavaScript?

How to Fix ReferenceError require is not defined in JavaScript

Require not defined javascript: The “ReferenceError: require is not defined” error can arise for several reasons:

  • When we use the require() function in a browser environment.
  • When we use the require() function in a Node.js project, where type is set to module in the package.json file.
  • When we use the require() function in Node.js, where files have a .mjs extension.

Fixing the ReferenceError require is not defined in JavaScript

Use the ES6 module import and export syntax to resolve the “ReferenceError need is not defined” error.

index.html:

<!DOCTYPE html>
<html lang="en">
  <head>
    <meta charset="UTF-8" />
  </head>

  <body>
    <!-- Write your HTML elements here  -->

    <!-- adding type as module in the script   -->
    <script type="module" src="index.js"></script>
    <script type="module" src="anotherFile.js"></script>
  </body>
</html>
  • Now we can use the ES6 imports/exports syntax in index.js and anotherFile.js.
  • The index.js file exports a variable and a function.

index.js:

// Create a default export function say multiply which accepts
// two numbers as arguments and returns their multiplication result
export default function multiply(x, y) {
  // Returns the multiplication result of the passed two numbers
  return x * y;
}

// This is named export
export const id = 50;

Now we import the above index.js file into another file and can be accessed there.

index.js:

// Here we are importing the default and named export from the
// index.js file using the import keyword
import multiply, {id} from './index.js';

// Passing two numbers as arguments to the multiply() function
// (of index.js file) to get the multiplication of two numbers and
// print the result
console.log(multiply(3, 4)); // Output => 12
// Printing the 'id' variable value (of index.js file)
console.log(id); // Output => 50

Output:

12
50

NOTE:

Please keep in mind that each file can only have one default export.
In the browser, use this syntax (ES6 Modules) rather than the 'require()' function.

Alternatively, you can insert the index.js file’s script above the anotherFile.js file’s script, and the function and variables from the index.js file will be made available to anotherFile.js without exporting and importing them.

Here’s an example that doesn’t include any imports or exports.

index.js:

<!DOCTYPE html>
<html lang="en">
  <head>
    <meta charset="UTF-8" />
  </head>

  <body>

    <!--Here the index.js file is loaded first, hence we can use the functions of it in anotherFile.js file-->
    <script src="index.js"></script>
    <script src="another-file.js"></script>
  </body>
</html>

The index.js file just defines a function and a variable.

index.js:

// Create a default export function say multiply which accepts
// two numbers as arguments and returns their multiplication result
export default function multiply(x, y) {
  // Returns the multiplication result of the passed two numbers
  return x * y;
}

// This is named export
export const id = 50;

We can now utilize the function and variable in our other code without even having to import them.

anotherFile.js:

// Passing two numbers as arguments to the multiply() function
// (of index.js file) to get the multiplication of two numbers and
// print the result
console.log(multiply(3, 4)); // Output => 12
// Printing the 'id' variable value (of index.js file)
console.log(id); // Output => 50

Output:

12
50

Fixing the ERROR

If the require() function of the server is not specified/defined, we have set the type attribute/property to module in our package.jsonfile, or all files that have an extension of .mjs instead of .js.

To resolve the “ReferenceError require is not defined” error, remove the type property from your package.json file if it is set to the module and rename any files with file.mjs extension to have file.js extension.

package.json:

{
  // It should be removed if we want to use require
   "type": "module",
   
  // Write the rest of the code.....
}

You may also utilize the ES6 module syntax with the import and export keywords.

Set the type property in your package.json file to module if you wish to utilize the import/export syntax to import and export modules.

package.json:

{
  // Here we must add this below one
  "type": "module",
   // Write the rest of the code.....
}

We must have to replace the require and module.exports syntax with the import and export keywords.

Let us see an example where we define a function and a variable, and then export the function as a default export and the variable as a named export.

index.js:

// Create a function(default export) say multiply which accepts
// two numbers as arguments and returns their multiplication result
export default function multiply(x, y) {
  // Returns the multiplication result of the passed two numbers
  return x * y;
}

// This is named export
export const id = 50;

Now we are importing them into anotherFile.js from the above index.js file

anotherFile.js:

// Here we are importing the default and named import from the
// index.js file using the import keyword
import multiply, {id} from './index.js';

// Passing two numbers as arguments to the multiply() function
// (of index.js file) to get the multiplication of two numbers and
// print the result
console.log(multiply(2, 10)); // Output => 20
// Printing the 'id' variable value (of index.js file)
console.log(id); // Output => 50

Output:

20
50

NOTE:

  • As said earlier, please keep in mind that you can only use 1 default export per file.
  • You cannot use the require() function in combination with the ES6 Module import/export syntax. You must use one or the other on a consistent basis.


For loop with two variables c++ – For loop with 2 variables in C++ and Java

How to create for loop with two variables in C++ and Java ?

For loop with two variables c++: For loop is used as a looping statement, and we use this for loop when we want to iterate over something.

General for() loop syntax

Syntax :  for (initialization_statement; condition_statement; update_statement)          {            Body that to be executed if the condition_statement satisfies          }

where,

  • intialize_statement executed only once.
  • condition_statement checked every time if condition satisfies then body executes.
  • update-statement refers to the increment or decrement.

But many times we have faced such a situation where we want to increment or decrement two variables.

For example I want to increment i to 10 to 15 and similarly decrement j from 15 to 10 in a single for loop.

For Loop with two variables in C++ :

For loop with two variables java: Let’s see the implementation of two variables in for loop in C++

//Program :

#include <iostream>
int main()
{
// two variables i and j
// i will increment from 10 to 15
// j will decrement from 15 to 10
for (int i = 10, j = 15; i <= 15 && j >=10; i++, j--)
{
std::cout << "i = " << i << " :: " << "j = " << j << std::endl;
}
return 0;
}


Output :
i=10 : j=15
i=11 : j=14
i=12 : j=13
i=13 : j=12
i=14 : j=11
i=15 : j=10

For Loop with two variables in Java :

C++ for loop with multiple variables: Let’s see the implementation of two variables in for loop in C++

//Program :

public class Main {
    public static void main(String[] args) {
// two variables i and j
// i will increment from 10 to 15
// j will decrement from 15 to 10
        for (int i = 10, j = 15; i <= 15 && j >= 10; i++, j--) {
            System.out.println("i = " + i + " :: " + "j = " + j);
        }
    }
}
Output :
i=10 : j=15
i=11 : j=14
i=12 : j=13
i=13 : j=12
i=14 : j=11
i=15 : j=10


Numpy loadtxt – Python NumPy loadtxt() Function

Python NumPy loadtxt() Function

NumPy loadtxt() Function:

Numpy loadtxt: To load data from a text file, use the loadtxt() function of the NumPy module. In a text file, each row of the text file must have the same number of values.

Syntax:

numpy.loadtxt(filename, dtype=<class 'float'>)

Parameters

filename: This is required. The file, filename, or generator to read is specified by this argument. If the filename extension is.gz or.bz2, we’ll start by decompressing the file. After that, the generators will return Python 3k byte strings. It’s important to note that generators should only return byte strings.

dtype: This is optional. The datatype of the output array is indicated by this argument. float is the default value.

Return value

np loadtext: The data read from the text file is returned.

NumPy loadtxt() Function in Python

Example1

Approach:

  • Import numpy module using the import keyword
  • Pass some random list as an argument to the array() function
    of the Numpy module to create an array.
  • Store it in a variable.
  • Save the above-given array as a text file with some random filename using the savetxt() function of the Numpy module
  • Load the above textfile using the loadtxt() function of the Numpy module
  • Print the above file content.
  • The Exit of the Program.

Below is the implementation:

# Import numpy module using the import keyword
import numpy as np
# Pass some random list as an argument to the array() function
# of the Numpy module to create an array. 
# Store it in a variable.
gvn_arry = np.array([1, 12, 35, 20, 70])                     

# Save the above given array  as a text file with some random filename
# using the savetxt() function of the Numpy module
np.savetxt("samplefile", gvn_arry)

# Load the above textfile using the loadtxt() function of the Numpy module
file_content = np.loadtxt("samplefile")
print()
# Print the above file content
print("The above file content:")
print(file_content)

Output:

The above file content:
[ 1. 12. 35. 20. 70.]