Change chrome shortcuts – Change Chrome Keyboard Shortcuts | How To Customize Google Chrome Shortcuts?

Change Chrome Keyboard Shortcuts

Change Chrome Keyboard Shortcuts: One can easily change their Chrome shortcuts as per their convenience. Google Chrome has plenty of hotkeys or keyboard shortcuts that they can press to quickly enter their options. Though the Chrome browser has a limited number of built-in hotkeys in the customization option, one can add many more to Chrome so that they can further configure its keyboard shortcuts.

  1. It is not difficult to create your keyboard shortcuts on their computer. They can create it with the following steps.
  2. But if they want to change the default shortcuts, they need to access the task manager to use an alternative search tool called the AutoHotKey.

Adding chrome Keyboard shortcuts or modifying them can make you skilled in using the search engine. One can quickly navigate through the pages and do their job in lesser time if they learn to add new Chrome Keyboard Shortcuts as per their liking.

Wondering How to explore & learn Shortcut Keys for various Operating Systems, Computer Software Programs, Social media applications Keyboards? Here is the one-stop destination for all Keyboard Shortcuts, just take a look & memorize regularly for better performance in competitive exams & real-time situations.

Table of Content

How to Change Chrome Keyboard Shortcuts

Change chrome shortcuts: One can quickly customize their shortcuts with their keyboards by checking out the link chrome://extensions/shortcuts. All they are required to actually do is type it into their browser and press enter.

Shortcut manager is the free extension for Google Chrome that lets one edit the browser’s default keyboard shortcuts and create new ones that can perform various operations and can execute bookmark code or JavaScript. If one already has Shortcut Manager installed, they can add an icon to the toolbar. When they click it, they can see all the currently active hotkeys. If they navigate onto the advanced configuration page, they can get the option to create and edit new shortcuts.

  1. A distinctive trait of this tool is that one can assign site-specific hotkeys for a site.
  2. It means that one can add a hotkey that performs a function on one side, while the same on a different site can do another task or nothing at all.
  3. A shortcut page with open immediately and there will be many options available to close or opens the tabs.
  4. They can navigate through the pages, scroll through them, open new windows and perform much more tasks.
  5. One can find out what they need to do before downloading any extensions.

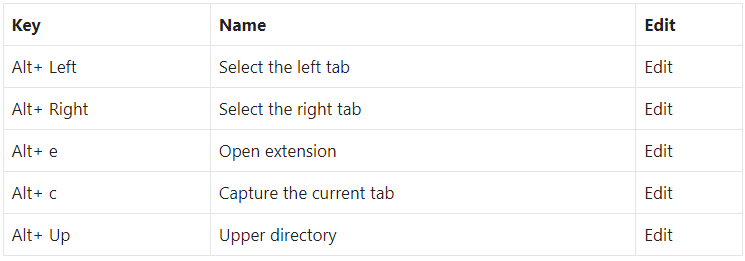
An example of the default available shortcuts on Google Chrome is as follows

Key Name Edit
Alt+ Left Select the left tab Edit
Alt+ Right Select the right tab Edit
Alt+ e Open extension Edit
Alt+ c Capture the current tab Edit
Alt+ Up Upper directory Edit

Shortcuts on Google Chrome

Extensions for Changing and Creating New Hotkeys and Shortcuts

Edit chrome shortcuts: Chrome has a popular shortkeys option with the help of which people can customize the hotkeys.

  1. Step 1: One can check it out and download it from the Shortkeys extension page.
  2. Step 2: Once they find an option they like, they can add it to the browser by tapping on the Add to Chrome option provided beside it.
  3. Step 3: Next, they can find a Shortkeys button on the toolbar on the top right corner of the page.
  4. Step 4: Then, they can press the Manage Extensions button or type chrome://extensions into the browser search bar and hit enter. Then they will be able to see a new page.
  5. Step 5: On the new page, one can click the Details button for the Shortkeys extension and a new page will open.
  6. Step 6: If one scrolls down the page, they can see the Extension options and click on them. A new window will open again.
  7. Step 7: The shortkeys extension page has a list of all the saved Shortkeys keyboard shortcuts. One has the ability to create new ones and import or expertise them as keyboards shortcuts.
  8. Step 8: Before pressing the Add shortcut button, one needs to enter their desired keyboard shortcut. For example, one can input Ctrl+j as a shortcut.
  9. Step 9: Then, they have to click inside the Label text box to name the shortcut they just input.
  10. Step 10: Finally, by clicking on the dropdown menu to open a list of potential options as the hotkey, they can select any option such as Open Settings Page, Open History Page, etc. and press the Add Shortcut button to save the hotkey and its function and Save Shortcuts to save it.

Note: After they have saved a new shortcut, they can try out the new hotkeys in any of the page tabs. It’s worth noting, though, that one has to refresh the page tabs that were already open in the Chrome browser for the new hotkeys to work in them.

  1. Another important point is that a hotkey might not work if it is a default hotkey in the Chrome keyboard shortcut.
  2. If one wants to use a default shortcut for other purposes, then they need to delete the pre-existing ones by pressing the Delete button beside them on the Shortkeys Option tab from earlier.
  3. Now, one can quickly set up customized Hotkeys for a variety of Chrome options with the Shortkeys extension.

Auto Control in Shortcut Manager

How to edit chrome shortcuts: Google Chrome has another extension called Auto Control Shortcut Manager for customization of the browser’s hotkeys. It is similar to the extension we discussed above, but this one allows for all kinds of hotkeys and mice to be customized. The steps to control it are:

  1. One can select the Add to Chrome button to download the extension.
  2. Some antivirus programs can flag this as a harmful program, but you can decide for yourself about the warning.
  3. The procedure is nearly comparable to the process we mentioned above. Hence, you can go over the topic above for further details.
  4. An added bonus that complements this process is that one can gain almost complete control of their browser shortcuts with this extension.
  5. Even if you are not a pro coder, you can easily modify and improve the browser settings.
  6. The efficiency of your work will increase greatly if you can handle it.
  7. Regardless of how you want to customize the Google Chrome hotkeys, you have an option available for you.
  8. You can check out your browser settings or the Google Chrome extensions to get started on the project.
  9. If the hotkey one has chosen is already saved in the shortcut manager or already exists, then you will be notified with a warning message stating that there might be some undesired effect.
  10. The extension also has an export option with which one can import all their hard-worked customization setting onto another computer. Shortcut manager is a great extension for keyboard shortcuts.

AutoHotKey

Chrome keyboard shortcuts extension: It is another process of using shortcuts and adding new ones in Windows 10. You have to create scripts for every shortcut key that you wish to replace. The process has become pretty easy, thanks to AutoHotKey. It is a script creator tool that people can use for all kinds of creative purposes and especially to change the default Windows shortcuts.

  1. Once you have found out the basic Auto Hotkey representations, you can click on the Windows desktop, right-click any empty space and select New and Auto Hotkey script.
  2. Then you can right-click the script you created and click Edit Script. You can now enter the shortcut you want.
  3. First, enter the shortcut you want to use and then follow it with Send.
  4. Then you can press space and the shortcut you want as your custom shortcut to replace.
  5. Since the Esc key is a command rather than a standard key, it is different.
  6. With any of the keyboard shortcut replacements, it is best to add a second line to the script with the text. It will block the Auto Hotkey tray icon from popping up and ensure that the entire process remains in the background.

Once the script is ready, you can close and save it, then double click on the script to run it and test the keyboard shortcuts and see if it does what you want it to do.

Change Program Shortcut

We can try to redirect the default Windows Search Shortcut by pressing Win + S to an alternative search tool called Search Everything. For example, in s:: run, C: Program Files EV, the:: separates the hotkey from the action you want it to perform. The portion before it is the hotkey that one enters, which is Win + S in this case, and the portion after run is the command we want to open in the Search Everything app.

Run Shortcuts During Windows Start up

It is a fact that the shortcuts can start working as soon as one boots their Windows and moves the .ahk script to their system startup folder in the file explorer-

C: Program Data Microsoft Windows Start Menu Program Startup

If one does the same for all their keyboard shortcut replacements, then these will all start working as soon as they boot their PC. Though it takes a bit of effort to do it for all the shortcuts, it certainly works marvellously to change the default keyboard shortcuts in Windows. Another plus point is that one can learn the absolute basics of the Auto Hotkey, which is a handy tool capable of running scripts that are more complex than the ones we mentioned before.

Adobe premiere ripple delete shortcut – Premiere Pro Keyboard Shortcuts | List of Keyboard Shortcuts for Premiere Pro

Premiere Pro Keyboard Shortcuts

Premiere Pro Keyboard Shortcuts: If you are a professional editor or a newbie who works with video editing or want to learn video editing, then knowing about Adobe Premiere Pro keyboard shortcuts is absolutely necessary. Understanding all of these different commands will help you work faster and become a more productive editor.

This article will help you learn the different keyboard shortcuts to speed up your workflow with a few compressive Premiere Pro keyboard shortcuts lists. The basic shortcuts lists and the manual changes that you can make in this software, which are discussed in this article, will make you a pro editor in no time.

Wondering How to explore & learn Shortcut Keys for various Operating Systems, Computer Software Programs, Social media applications Keyboards? Here is the one-stop destination for all Keyboard Shortcuts, just take a look & memorize regularly for better performance in competitive exams & real-time situations.

Premiere Pro Keyboard Shortcuts

Some of the Most Useful Premiere Pro Keyboard Shortcuts

Adobe premiere ripple delete shortcut: If you are a Premiere Pro user, these basic yet the most useful keyboard shortcuts in Premiere Pro will surely make your life a lot easier. The list of the most common and useful shortcuts which will make your video editing journey smoother is given below:

Functions For Windows For Mac OS
New Project Ctrl + Alt + N Opt + Cmd + N
New Sequence Ctrl + N Cmd + N
Import Media Ctrl + I Cmd + I
Export Media Ctrl + M Cmd + M
Save Ctrl + S Cmd + S
Save As Ctrl + Shift + S Cmd + Shift + S
Play/Stop Space Space
Shuttle Left J J
Shuttle Right K K
Render Effects in Work Area Enter Return
Selection Tool V V
Razor Tool C C
Ripple Edit Tool B B
Ripple Trim Previous Q Q
Ripple Trim Next W W
Ripple Delete Shift + Del Shift + Del
Extend Selected Edit to Play head E E
Speed/Duration Ctrl + R Cmd + R
Zoom In = =
Zoom Out
Undo Ctrl + Z Cmd + Z
Redo Ctrl + Shift + Z Shift + Cmd + Z
Copy Ctrl + C Cmd + C
Cut Ctrl + X Cmd + X
Paste Ctrl + V Cmd + V
Insert , ,
Overwrite . .

Premiere Pro Keyboard Shortcuts

Shortcuts for Tools in Premiere Pro

Premiere pro shortcut cheat sheet pdf: For editing a video in the Premiere Pro, the shortcuts listed below come extremely handy for creating the high-quality videos that you want to get. These are even more useful as all the shortcuts are the same for both Windows and Mac OS users, so even if you switch your computer system or OS, you don’t have to memorize it all over again. The list for the tools shortcuts is given below:

Functions For Windows For Mac OS
Selection Tool V V
Track Select Forward Tool A A
Track Select Backward Tool Shift + A Shift + A
Ripple Edit Tool B B
Rolling Edit Tool N N
Rate Stretch Tool R R
Razor Tool C C
Slip Tool Y Y
Slide Tool U U
Pen Tool P P
Hand Tool H H
Zoom Tool Z Z

Premiere Pro Keyboard Shortcuts 2

Shortcuts for Commands in Premiere Pro

Premiere pro shortcuts pdf: The command shortcuts in Adobe Premiere Pro are related to the File menu options (the list below the Window title bar). Without having to click and scroll through the File dropdown menu, you can quickly press a combination of keys to get your job done. Using these existing shortcuts, which are listed below, you will not have to go through the File menu every time, and that will save up a lot of your time.

Functions For Windows For Mac OS
New Project/Production Ctrl + Alt + N Opt + Cmd + N
New Sequence Ctrl + N Cmd + N
New Bin Ctrl + B Cmd + B
Title Ctrl + T Cmd + T
Open Project/Production Ctrl + O Cmd + O
Browse in Adobe Bridge Ctrl + Alt + O Opt + Cmd + O
Close Project Ctrl + Shift + W Shift + Cmd + W
Close Ctrl + W Cmd + W
Save Ctrl + S Cmd + S
Save As Ctrl + Shift + S Shift + Cmd + S
Save a Copy Ctrl + Alt + S Opt + Cmd + S
Import from Media Browser Ctrl + Alt + I Opt + Cmd + I
Import Media Ctrl + I Cmd + I
Export Media Ctrl + M Cmd + M
Get Properties for Selection Ctrl + Shift + H Shift + Cmd + H
Exit/Quit Adobe Premiere Pro Ctrl + Q Cmd + Q

Shortcuts for Navigation in Premiere Pro

In Premiere Pro, the navigation shortcuts let you review the playback and move through a video. You will need these shortcuts a lot of time while reviewing the edits. These shortcuts, too, just like the shortcuts for tools, are the same for both Windows and Mac OS users.

Functions For Windows For Mac OS
Play/Stop Toggle Space Space
Step Back Left (←) Left (←)
Step Forward Right (→) Right (→)
Go to Next Edit Point Down Down
Go to Previous Edit Point Up Up
Mark In Point I I
Mark Out Point O O
Clear In & To Out Ctrl + Shift + X Opt + X
Go to In Point Shift + I Shift + I
Go to Out Point Shift + O Shift + O
Shuttle Left J J
Stop K K
Shuttle Right L L
Snap (Turn On/Off) S S

Shortcuts for Clipboard in Premiere Pro

Keyboard shortcuts premiere pro: In Premiere Pro, when you need to make a bulk change or copy something throughout your project, these shortcuts will be your best buddy to get the job done. Primarily, clipboard shortcuts make editing a little easier and are very similar to the functions on a word document. These shortcuts are easy to remember, and they are listed below:

Functions For Windows For Mac OS
Undo Ctrl + Z Cmd + Z
Redo Ctrl + Shift + Z Shift + Cmd + Z
Cut Ctrl + X Cmd + X
Copy Ctrl + C Cmd + C
Paste Ctrl + V Cmd + V
Paste Insert Ctrl + Shift + V Shift + Cmd + V
Paste Attributes Ctrl + Alt + V Opt + Cmd + V
Clear Delete Forward Delete
Clear In & Out Ctrl + Shift + X Opt + X
Ripple Delete Shift + Delete Shift + Forward Delete
Duplicate Ctrl + Shift + / Shift + Cmd + /
Select All Ctrl + A Cmd + A
Deselect All Ctrl + Shift + A Shift + Cmd + A
Find Ctrl + F Cmd + F
Edit Original Ctrl + E Cmd + E

How to Add, Delete or Sync a Shortcut in Premiere Pro?

Along with the default shortcuts in Premiere Pro, you can also add your own shortcuts. The manual changes that can be done for shortcuts come in handy if you are left-handed or even if you want to have more control over your preferred workflows. Either way, this option is helpful, and adding custom shortcuts is so easy that even it has its own shortcut that is:

  • For Windows: Ctrl + Alt + K
  • For Mac: Cmd + Opt + K

After these commands, a virtual keyboard interface appears on the screen. You can add, change, sync, or delete shortcuts in this virtual keyboard. The user interface or virtual keyboard is very easy to use and comes with a drag and drop feature, which is pretty intuitive. You can easily modify the shortcuts according to your preferences and bring that flow to your editing.

Conclusion on Premiere Pro Keyboard Shortcuts

Finally, as you can see, these simple shortcut keys will save up a lot of your time and effort and make your video editing process seamless. This article will always help you overcome the difficulties while editing and make you fall in love with the process of editing even more.

PowerPoint Keyboard Shortcuts | How To Use Shortcut Keys for Powerpoint Presentation?

PowerPoint Keyboard Shortcuts

PowerPoint Keyboard Shortcuts: Owing to the advancement of technology, the number of computer users across the world has increased drastically. Computers being the vanguards of technological advancement have transformed the pre-existing communication and education system in today’s world.

The growth of computer technology has paved the way for creating new ideas and aided the improvement of artificial intelligence over the years. Being the most vital element that shapes society and its operations, the demand for computer-related careers has seen a steady rise.

Wondering How to explore & learn Shortcut Keys for various Operating Systems, Computer Software Programs, Social media applications Keyboards? Here is the one-stop destination for all Keyboard Shortcuts, just take a look & memorize regularly for better performance in competitive exams & real-time situations.

These jobs demand the need for application development in the current social construct. One such application designed for creating, editing, and presenting information through a user-friendly, virtual domain is Microsoft’s PowerPoint.

The prime focus of this article is to highlight the various shortcuts related to the PowerPoint application.

PowerPoint Keyboard Shortcuts

What are Shortcut Keys?

Powerpoint group shortcut: The keyboard contains a series of keys that users need to utilize for numerous purposes. Computer users use these keys in groups to make the conventional computing process more efficient.

In technological terms, these keys are known as ‘Shortcut Keys.’ The correct usage of them invokes a special operation in the computer software to execute a specific command.

Professionals have designed these keys for faster performance in computing results. PowerPoint Shortcut Keys contributes to making computation easier to perform and much more straightforward.

PowerPoint Shortcut Keys assists users and aids in saving time and avoiding trouble.

List of the essential PowerPoint Shortcut Keys

Powerpoint shortcut keys: Given below is a list of the most general Shortcut Keys used in PowerPoint.

Keys used Function
Ctrl + N Used to create a new presentation
Ctrl + O Used to open an existing presentation
Ctrl + S Used to save a new presentation
Ctrl + F4 or Ctrl + W Used to close the current presentation
Ctrl + Q Used to save and close the current presentation
Ctrl + Z Used to undo an action
Ctrl + Y Used to redo an action
Ctrl + F2 Used to open the ‘Print Preview Option’
Ctrl + F1 Used to hide or show the ribbon
Ctrl + F Used to ‘find and replace’ or ‘search within the presentation’
Alt + F2 or Alt + F12 Used to open and save as dialog box
Alt + F Used to open the file tab menu
Alt + H Used to redirect to the ‘Home Tab’
Alt + N Used to open the ‘Insert Tab’
Alt + G Used to open the ‘Design Tab’
Alt + Y Used to go to the ‘Help Tab’
Alt + A Used to go to the ‘Animations Tab’
F7 Used as Spellcheck

List of the Basic PowerPoint Shortcut Keys used for Formatting and Editing

Powerpoint laser pointer shortcut: Given below is a list of the primary Shortcut Keys used in PowerPoint for the purpose of formatting and editing data.

Keys used Function
Ctrl + X Used to cut the selected text, object, slide that is selected
Ctrl + Insert or Ctrl + C Used to copy the selected text, object, slide that is selected
Shift + Insert or Ctrl + V Used to paste the selected text, object, slide that is selected
Ctrl + Alt + V Used to open the ‘Paste Special dialog box’ option
Ctrl + B Used to bold the text that is selected
Ctrl + I Used to italicize the text that is selected
Ctrl + U Used to add underline or remove it
Ctrl + E Used to change the alignment to center
Ctrl + J Used to justify the text that is selected
Ctrl + L Used to left align the text that is selected
Ctrl + R Used to right align the text that is selected
Ctrl + T Used to display the font dialog box option
Ctrl + K Used to insert a hyperlink within the presentation
Ctrl + M Used to insert a new slide in the presentation
Ctrl + D Used to duplicate the selected slide or object
Delete Key Used to delete the text, object, slide that is selected

PowerPoint Keyboard Shortcuts1

The PowerPoint Shortcut Keys used for Slide Show

PowerPoint Shortcut Keys for Slideshow:

Keys Function
F5 Used to play the current presentation from the beginning
Shift + F5 Used to play the recent presentation from the current slide
Ctrl + P Used to annotate the ‘Pen Tool’ while the Slide Show is playing
Page Down or N Used to move on to the next slide while playing the presentation
Page Up or P Used to move backward to the previous slide while playing the presentation
B Used to change the screen to black while the Slide Show is playing or change the screen from black to the actual Slide.
ESC Used to End a Slide Show

The PowerPoint Shortcut Keys used for Navigating and Selecting

PowerPoint Shortcut Keys used for the purpose of Navigation and Selection are compiled below:

Keys used Function
Shift + F10 Used to display the context menu in PowerPoint
Up or Down Arrow Key Used to move the focus to a specific item
Right Arrow Key Used to move the focus from an item in the group to the first item
Left Arrow Key Used to move the focus from an item in the group to its original group
Shift + Up or Down arrow Key Used to move the focus to the desired item and select it
Enter or Spacebar Used to select a focused item
Shift + Enter or Shift + Spacebar Used to cancel the selection of a focused item
Ctrl + Shift + F Used to move the focused item forward
Ctrl + Shift + B Used to move the focused items backward
Ctrl + Shift + S Used to hide or show a focussed item
F2 Used to rename an item selected
F6 Used to cycle the keyboard focus through different panes.
Alt + Shift + 1 Used to collapse all groups in the tree view of the selection plane
Alt + shift + 9 Used to expand all groups
Shift + Tab or Tab button Used to switch keyboard focus from the tree view and show or hide all buttons within the selection plane
The ‘-’ or ‘+’ sign Used to collapse or expand a focused group

PowerPoint Keyboard Shortcuts2

Four powerful PowerPoint Shortcut Keys used for better Presentation

Shortcut 1: Activating the Laser Pointer

A great way to underline or make your presentation’s critical points stand out is to use the laser pointer. While your slide show is on, you can activate the laser pointer option that comes within the PowerPoint Software.

While presenting, to activate the laser pointer, you need to press the Ctrl key, click and drag with your mouse.

Shortcut 2: Inking Your Slides

While presenting your PowerPoint slides, you may want to highlight specific points, add diagrams or formulas. You can do them by using the inking tools included in the PowerPoint software.

The inking tools include the Pen and the highlighter.

To use the inking tools, you need to press shortcut keys Ctrl + P once to activate them.

Ctrl + I will activate the highlighter pen, and Ctrl + M will remove all pen marks from your slides.

Shortcut 3: Launching Presenter View

To appear professional, you can use the presentation view instead of the Slideshow view in PowerPoint.

In the presentation view, you can do the following:

  • See the notes you made for that specific slide
  • Preview the following slide
  • View the duration of your presentation
  • Make use of the laser pointer and ink tools to level up your presentation.

To activate the Presentation View, you need to press Alt + F5

Shortcut 4: Jumping to a Slide within Your Presentation

If your presentation is quite lengthy, and you have to keep track of time constantly, this shortcut key might come in handy.

Say you want to jump to a specific slide to cut time, and you don’t know what slide you’re on, you can press Ctrl + S (in Slideshow mode) to launch the ‘All Slide Dialog Box.’

The ‘all slide dialog box’ gives a view of all your presentation slides so that you can select the desired slide.

PowerPoint Shortcut Keys used for Pictures, WordArt, Shapes and Objects

The shortcut Keys used for Pictures, WordArt, Shapes and Objects in PowerPoint are:

Keys Function
Alt + N Used to insert a text box
Alt + W Used to insert WordArt
Ctrl + Shift + G Used to ungroup the selected group
Ctrl + Shift + C Used to copy the attributes of shape that’s selected
Ctrl + Shift + V Used to paste the attributes of shape that’s selected

Four Advantages of using PowerPoint Shortcut Keys

  • Performance: Shortcut keys can improve productivity and ease the process of accomplishing more tasks using only the keyboard. Learning about keyboard shortcuts lets users them have more command over their work while putting less effort into the task at hand.
  • Capacity to Multitask: Using keyboard shortcuts can spare time and aid users in getting completing work at a time. Very busy users can enjoy leisure for themselves by finishing more work at once.
  • Wellness issues: Excessive mouse usage can cause RSI or Repetitive Syndrome Injury to users. It is opined by pharmaceutical scientists for people to use shortcuts to reduce the risk of RSI.
  • Exactness: If jobs demand enhanced accuracy, they should use PowerPoint Keyboard Shortcuts to complete the task faster and with more precision.
  • Time Management: With the aid of PowerPoint Keyboard Shortcuts, users can accomplish the task faster than the general time frame.

Conclusion on PowerPoint Keyboard Shortcuts

Using Shortcuts favors users to begin using shortcut keys while operating the computer. It helps in quicker calculation and makes the overall user experience more stable and comfortable. For users employed in the technical sector of the current age, using PowerPoint keyboard shortcuts is the accurate option.

MacBook Keyboard Shortcuts | Keyboard Shortcut Keys for Your Mac Apple

MacBook Keyboard Shortcuts

MacBook Keyboard Shortcuts: A lot of Mac owners will agree that keyboard shortcuts help simplify their lives. However, learning all the available keyboard shortcuts can be a real challenge if you’re new to a Mac. Besides MacBook, many of these shortcuts will now work in iPadOS, too, thanks to the Magic Keyboard available to iPad Pro users.

Mac keyboard shortcuts permit us to do things on our computer that would typically require us to use a mouse, trackpad, or another device with a combination of the keys on your keyboard.

Some keyboard shortcuts may require more than just one or two keys. In this article, we have put together a list of the essential shortcuts you should know.

Wondering How to explore & learn Shortcut Keys for various Operating Systems, Computer Software Programs, Social media applications Keyboards? Here is the one-stop destination for all Keyboard Shortcuts, just take a look & memorize regularly for better performance in competitive exams & real-time situations.

MacBook Keyboard Shortcuts

Basic Important Keyboard Shortcuts

MAC launchpad keyboard shortcut: Some of the most common and basic shortcuts that are very much helpful if you are a MacBook user are listed below:

Keyboard Shortcut Function
Command + Space Open Spotlight
Command + Shift + 4 Capture custom screenshot
Command + Control + D Define highlighted word
Command + Control + Power Restart your Mac (without confirmation dialog box)
Command + Shift + Delete Empty Trash (opens confirmation dialog box)
Command + Comma Open Preferences for the current app
Option + Shift + F11/F12 Change volume in smaller increments
Option + Shift + F1/F2 Change brightness in smaller increments

MacBook Keyboard Shortcuts 1


Keyboard Shortcuts for Cut, Copy, Paste, and Few Other Commands

Keyboard Shortcut Function
Command + A Select all
Command + C Copy
Command + V Paste
Command + X Cut
Command + S Save
Command + Q Quit
Command + N New
Command + Z or Command + Shift + Z Undo/Redo
Command + M Minimize window
Command + W Close window
Command + P Print
Command + B Bold
Command + I Italicize
Command + U Underline

Keyboard Shortcuts for Finder and System

Launchpad keyboard shortcut: The macOS X Lion Finder helps you to access and organize most of the essential macOS X functions while you are working. You can use the Finder keyboard shortcuts to display windows, copy and move files, or launch applications. The keyboard shortcuts for the finder and system are listed below:

Keyboard Shortcut Function
Command + A To select all items in the front Finder window
Command + Option + A Deselect all items
Command + Shift + A Open Applications folder
Command + C Copy selected item/text to the Clipboard
Command + Shift + C Open the Computer window in Finder
Command + D Duplicate selected item
Command + Shift + D Open desktop folder
Command + E Eject
Command + F Find any matching Spotlight attribute
Command + Shift + F Find Spotlight file name matches
Command + Shift + G Go to Folder
Command + H Hide the currently active window
Command + I Get Info
Command + Option + I Show Inspector
Command + Control + I Get Summary Info
Command + Shift + I Open iCloud Drive
Command + J Show View Options
Command + K Connect to Server
Command + Shift + K Open Network window
Command + L Make an alias of the selected element
Command + M Minimize a window
Command + M + Option Minimize all windows
Command + N New Finder window
Command + N + Shift New folder
Command + O Open the selected element
Command + Q + Shift Log out
Command + Q + Shift + Option To log out instantly
Command + R Show origin of alias
Command + T To open the current location in a new tab
Command + Shift + T Show the Tab Bar
Command + Option + T Show or hide the Sidebar
Command + Shift + U Open Utilities folder
Command + V Paste
Command + W Close window
Command + Option + W Close all windows
Command + X Cut
Command + Option + Y Slideshow (For Mac OS X v10.5 or later)
Command + Z or Command + Shift+ Z Undo / Redo
Command + 1 To view as Icon
Command + 2 To view as List
Command + 3 To view as Columns
Command + 4 View as Cover Flow (For Mac OS X v10.5 or later)
Command + Comma (,) To open Finder preferences
Command + Accent (`) Cycle through open Finder windows
Command + Shift + Question Mark (?) Open the Help menu
Command + Left Bracket ([) Go to the previous folder
Command + Right Bracket (]) Go to the next folder
Command + Up Arrow To open the folder that contains the current folder
Command + Down Arrow Open highlighted element
Right Arrow (List view) Open the selected folder
Left Arrow (List view) Close the selected folder
Command + double-click Open a folder in a separate tab
Command + Click window title To see the folders that contain the current window
Command + Delete To move to Trash
Command + Delete + Shift Empty Trash
Command + Delete + Shift + Option Empty Trash without confirmation dialog box
Space bar (or Command + Y) Quick Loo
Command key + Drag To move dragged item to another volume/location
Option key + Drag Copy the dragged item (pointer icon changes while the key is held)
Command + Option key combination while dragging Make an alias of the dragged item (pointer icon changes while the key is held)


MacBook Keyboard Shortcuts 2

Keyboard Shortcuts for Startup

Open launchpad shortcut: Startup programs by Mac are apps and other processes that start running automatically when macOS starts. The keyboard shortcuts that are used to operate the Startup programs are listed below:

Keyboard Shortcut Function
C Start from a bootable media (DVD, CD, USB thumb drive, and so on)
D Use Apple Hardware Test
T Start in FireWire target disk mode
N Start from NetBoot server
X Force MacOS Startup
Option Display all bootable volumes (Startup Manager)
Shift Perform a Safe Boot (Safe Mode Startup)
Left Shift To prevent automatic login
Command + R Use Recovery (OS X Lion or later)
Command + S Start in Single User Mode
Command + V Start in Verbose Mode
Command + Option + P + R Reset NVRAM/PRAM
Hold down the F12 key or Media Eject (⏏) key, or the trackpad button, or mouse Eject removable discs

Keyboard Shortcuts for Other Applications on MacBook

Few more keyboard shortcuts that are used on different applications in a MacBook are listed below:

Keyboard Shortcut Function
Command + Space bar Show or hide the Spotlight search
Control + A Move to the beginning of line or paragraph
Control + B Move a character backward
Control + D Delete the character just in front of the cursor
Control + E Move to end of line or paragraph
Control + F Move a character forward
Control + H Delete the character just behind the cursor
Control + K Start deleting from the character in front of the cursor to the end of the line
Control + L Centre the cursor/selection in the visible area
Control + N Move down a line
Control + O Insert a new line after the cursor
Control + P Move up a line
Control + Transpose the character behind the cursor with the character in front of the cursor
Control + V Move down a page
Command + Tab Move to the next most recently-used application in a list of open applications
Command + Esc Open Front Row (if installed)
F3 Open Mission Control
Command + F3 Hide or show all open windows
Control + F3 To show the open windows for the currently active app and the recently opened documents for that app
F4 Show Launchpad
Command + Option + Accent (`) Move focus to the window drawer
Command + Shift + | Centre-align a selection
Command + Shift + [ Left-align a selection
Command + Shift + ] Right-align a selection
Command + Option + Control + Period (.) Increase screen contrast
Command + Option + Control + Comma (,) Decrease screen contrast
Command + Shift + Colon (:) Display the Spelling window
Command + Semicolon (;) Find misspelled words in the document
Command + Shift + = Increase the size of the selected item
Command + Minus (-) Decrease the size of the selected item
Command + Option + / Turn font smoothing on or off
Command + C Copy the selected data to the Clipboard
Command + Control + C To copy the formatting settings of the selected item and store on the Clipboard
Command + Option + C Copy the style of the selected text
Command + Shift + C Display the Colours window
Command + Shift + 4 Capture a selection to a file
Command + Shift + Control + 4 Capture a selection to the Clipboard
Command + Control + D To display the meaning of the word selected, in the Dictionary application
Command + Option + D Show or hide the Dock
Command + Delete To select “Don’t Save” in dialog box that has a Don’t Save option
Command + E To copy the selection for use with the Find function – Command + F
Command + F To open a Find window (Find Function)
Command + G Find the next occurrence of the selection
Command + Shift + G Find the previous occurrence of the selection
Command + J Scroll to a selection
Command + N To create a new document in the frontmost application
Command + O Display a dialog box for choosing a document to open in the frontmost application
Command + P Display the Print dialog box
Command + Shift + P Display a dialog box for specifying printing parameters
Command + Q To quit the frontmost application
Command + S Save the current document
Command + T Display the Fonts window
Command + Option + T Show or hide a toolbar
Command + V To paste the Clipboard contents at the insertion point
Command + Control + V To apply formatting settings to the selected object
Command + Option + V To apply the style of one object to the selected object
Command + Option + Shift + V To apply the style of the surrounding text to the inserted object

Mac Function Keys

The Mac function keys are placed at the top of the keyboard. The F1-F12 keys can be used both as standard function keys or as built-in Mac features. The look of the function keys may vary depending on what model of Mac you own, but each key shows a self-explanatory image that tells you what the built-in Mac feature is. To decode the icons and keys, we have listed the function keys with their functions for you.

Keyboard Shortcut Function
F1 Lower brightness
F2 Increase brightness
F3 Open Mission Control
F4 Open Launchpad
F5 Lower keyboard brightness
F6 Increase keyboard brightness
F7 Skip back (audio)
F8 Pause/Play
F9 Skip forward (audio)
F10 Mute
F11 Increase volume
F12 Decrease volume

Mac Function Keys

As said earlier, you can use the F1-F12 keys on your Mac as standard function keys also. The function keys will work differently depending on the app you’re using and the keyboard shortcuts that you have set up. If you wish to use the function keys as standard function keys, hold down the Function (fn) key and press a function key.

Conclusion on MacBook Keyboard Shortcuts

Our keyboard can do a lot more than we may realize. As we memorize these Mac keyboard shortcuts, we will be able to navigate our computer even faster. These keyboard shortcuts are major timesavers, and once you start implementing them in your daily lives, you can work more efficiently. These shortcuts are also easy to learn and remember because most of the shortcuts use the first letter of the command.

We hope this article has benefited you and if you want to ace all of the macOS keyboard shortcuts, keep learning and memorizing all of the keyboard shortcuts that you find helpful.

Photoshop shortcut keys – Photoshop Keyboard Shortcuts | Shortcut Keys for Editing Photos Like a Pro

Photoshop Keyboard Shortcuts

Photoshop Keyboard Shortcuts: Adobe Photoshop is a software application used for editing images and retouching photos for use on macOS or Windows Computer. Designers mainly use it, photographers, web developers, creative professionals to add effects, edit images, retouch, create compositions for photos, and website mock-ups.

If you are a designer or a creative professional, or a photographer, you are bound to spend most of your time in Photoshop. Since you spend a lot of your time, you will want to work as efficiently and as fast as you can. The photoshop keyboard shortcuts will help you to speed your workflow up while producing accurate outputs.

Using the keyboard shortcuts, you can manipulate images, select tools, and even make adjustments to your pictures by pressing some keys on your keyboard. The photoshop keyboard shortcuts are pretty easy to execute and will help you increase your productivity and speed up your workflow.

Wondering How to explore & learn Shortcut Keys for various Operating Systems, Computer Software Programs, Social media applications Keyboards? Here is the one-stop destination for all Keyboard Shortcuts, just take a look & memorize regularly for better performance in competitive exams & real-time situations.

Photoshop Keyboard Shortcuts

Most Commonly Used Photoshop Keyboard Shortcuts

Photoshop shortcut keys: These shortcuts are straightforward commands and are easy to carry out. You must know these shortcuts if you will work in Photoshop since they will increase your productivity and boost your workflow.

Given below are the most commonly used photoshop keyboard shortcuts that one must know:

Function For Windows For MacOS
Save As Ctrl + Shift + S Command + Shift + S
Save for Web Ctrl + Shift + Alt + S Command + Shift + S
Undo Ctrl + Z Command + Z
Step Back Ctrl + Alt + Z Command + Option +Z
Duplicate Ctrl + J Command + J
Duplicate all visible layers Ctrl + Shift + Alt + E Command + Shift + Option + E
To hide extras Ctrl + H Command + H
Full screen F F
Default colors D D
Flip foreground and background colors X X
Hand tool while using any other tool Hold spacebar Hold spacebar
Fill with background color Ctrl + Backspace Command + Delete
Fill with foreground color Alt + Backspace Option + Delete
Restore the last selection Shift + Ctrl + D Shift + Command + D
Edit while typing Ctrl + Return Command + Return

Photoshop Keyboard Shortcuts 1

Keyboard Shortcuts for Selection Tools

Adobe Photoshop provides several selection tools. The selection tools are an essential part of photoshop and have many uses. To know how to use these selection tools by using keyboard shortcuts is very beneficial. Hence, for your benefit, the keyboard shortcuts for the most used selection tools are given below

Function  For Windows  For MacOs
To select all Ctrl + A Command + A
For selection of all opaque pixels Ctrl + Layer thumbnail Command + Layer thumbnail
To inverse Shift + Ctrl + I Shift + Command + I
For deselection Ctrl + D Command + D
To restore the last selection Ctrl + Shift + D Command + Shift + D
For feather selection Shift + F6 Shift + F6
For marquee selection tool Press M Press M
To draw marquee from center Hold + Alt Hold + Option
To add to a selection Shift + the selection tool you will use Shift + the selection tool you will use
To subtract from a selection Press Alt Press Option
To intersect with a selection Shift + Alt Shift + Option
To move selections in an increment of 1 pixel Arrow keys Arrow keys
To move selection in increments of 10 pixels Arrow keys + Shift Arrow keys + Shift
To move marquee while drawing selections Hold + Space Hold + Space
To select the luminosity of layers Ctrl + Alt + Shift Command + Option + Shift
For the magic wand tool Press W Press W
For lasso tool Press L Press L
For pen tool Press P Press P
To load pen path selection Ctrl + Enter Command + Enter
To create a Bezier curve P + Add anchor point and then drag to add another P + Add anchor point and then drag to add another

Keyboard Shortcuts for Blending Tools In Photoshop

The blending tools include numerous features for enhancing your graphics and design. The keyboard shortcuts for blending options will help you work faster without moving your mouse. Given below are the keyboard shortcuts which are used commonly:

Function For Windows For MacOS
To cycle through blending modes Shift + or + Shift + or +
For normal mode Shift + Alt + N Shift + Option + N
To clear Shift + Alt + R Shift + Option + R
To dissolve Shift + Alt + I Shift + Option + I
To darken Shift + Alt + K Shift + Option + K
To lighten Shift + Alt + G Shift + Alt + G
For multiplying Shift + Alt + M Shift + Option + M
To overlay Shift + Alt + O Shift + Option + O
For hue Shift + Alt + U Shift + Option + U
For saturation Shift + Alt + T Shift + Option + T
For luminosity Shift + Alt + Y Shift + Option + Y
For color burn Shift + Alt + B Shift + Option + B
For linear burn Shift + Alt + A Shift + Option + A
For soft light Shift + Alt + F Shift + Option + F
For hard light Shift + Alt + H Shift + Option + H
For color dodge Shift + Alt + D Shift + Option + D
For screen Shift + Alt + S Shift + Option + S
To difference Shift + Alt + E Shift + Option + E
For exclusion Shift + Alt + X Shift + Option + X
For color Shift + Alt + C Shift + Option + C

Photoshop Keyboard Shortcuts 2

Keyboard shortcuts for Brush Tools in Photoshop

The brush setting in photoshop is used for various useful things. You can change the shape and size of your brush strokes, the transparency of your strokes to get multiple visual effects. There are keyboard shortcuts present for using these tools, which will make your work easier; before using the shortcuts, first press b to select the brush tool.

Function  For Windows For MacOS 
To make your brush tool bigger the right bracket key ] the right bracket key ]
To make your brush tool smaller the left bracket key [ the left bracket key [
For brush resizing Right click + Alt + Drag left or right Command + Option + Drag left or right
For brush softness Right click + Alt + Drag up or down Command + Option + Drag up or down
For sample colors, while using the brush Alt (for switching to the eyedropper tool) Option (for switching to the eyedropper tool)
To select the previous brush style , ,
To select the next brush style . .
To select the first brush used Shift + , Shift + ,
To select the last brush used Shift + . Shift + .
To display accurate crosshair for brush Shift + Caps lock Shift + Caps lock
For toggle airbrush option Shift + Alt + P Shift + Option + P
For crosshair cursor Caps lock Caps lock
To increase brush hardness Shift + the right bracket key ] Shift + the right bracket key ]
To decrease brush hardness Shift + the left bracket key [ Shift + the left bracket key [
For switching between preset brushes < or > < or >

Some Basic Photoshop Keyboard Shortcuts for Regular Use

For setting up your content 

Functions For Windows  For MacOS 
For changing the image size Ctrl + Alt + I Command + Option + I
For changing the canvas size Ctrl + Alt + C Command + Option + C
For zooming in Ctrl + + Command + +
To zooming out Ctrl + Command +
To show or hide the grid Ctrl + Command +

For moving tools

Functions For Windows  For MacOS 
Zoom tool Z Z
For zooming out Alt Option
To fit screen Ctrl + 0 Command + 0
For hand tool Zoom in and move around the image + Spacebar Zoom in and move around the image + Spacebar
To rotate image R R
To rotate the image in 15-degree increments R + Shift R + Shift

For color tools and transform tools

Functions For Windows  For MacOS 
Eyedropper tool I I
Toggle foreground or background color X X
Default colors D D
For free transform Ctrl + T Command + T
To scale proportionately Shift (when you’re in the free transform mode) Shift (when you’re in the free transform mode)
To scale from the center of your image Shift + Alt Shift + Option

Some quick and easy tips and keyboard shortcuts

To make your photoshop experience more manageable and smoother, some of the basic keyboard shortcuts along with some quick and easy tips, are mentioned in the list below:

How to unlock your background layer?

To unlock your background layer, double-click on it and then press the enter key. Another more straightforward way is to press or click on the lock icon present on the background layer.

How to create guides?

When the rulers are visible, click and drag from them.

A quick tip: It works on both the axis, vertical as well as horizontal.

For rulers: Ctrl + R (for Windows) and Command + R (for MacOS)

How to access the subsets of the photoshop tools?

Firstly, press the shift key and press the shortcut key for the tool you are trying to access. If you continue doing it multiple times, you will be able to toggle between the available tools given in any panel. This shortcut works for all the tools present in the tools panel and has additional tools available.

How to save your work?

To save your work as:

For Windows – Ctrl + Shift + S

For MacOS – Command + Shift + S

To save your work for Web and other devices:

For Windows – Ctrl + Shift + Alt + S

For MacOS – Command + Shift + Option + S

Some quick tips

While using the keyboard shortcut for undo, use it multiple times to toggle your last history state

When you are cropping tools using the shortcut key, make sure to uncheck the box of Delete cropped pixels.

To reveal the keyboard shortcut for a specific tool, hover over it in the tools panel, and the shortcut will get displayed.

Conclusion

There is a load of photoshop keyboard shortcuts available. These shortcuts help you to maximize your workflow and increase your speed and productivity. Familiarizing yourself with photoshop keyboard shortcuts will save time and speed up your post-production workflow.

After effects precompose shortcut – List of All Keyboard Shortcuts in After Effects

After Effects Common Keyboard Shortcuts

After Effects Common Keyboard Shortcuts: One might be intimidated right now as a new user of After Effects. It’s expected. One has a lot to discover! After all, After Effects is a fiercely versatile arrangement of software, and it can produce so much.

Nevertheless, as a promise — whether anyone is studying to develop amazing visual effects or create high-quality motion graphics — one will get there sooner than any individual thinks. And some basic keyboard shortcuts will come in handy while using the software.

Wondering How to explore & learn Shortcut Keys for various Operating Systems, Computer Software Programs, Social media applications Keyboards? Here is the one-stop destination for all Keyboard Shortcuts, just take a look & memorize regularly for better performance in competitive exams & real-time situations.

These simple key sequences let any person or user perform instructions that one did typically execute with their mouse. While these shortcuts may only save a few seconds each time one uses them, those collected seconds over the duration of a project will add up to saved hours.

Aside from arranging a faster computer, there’s probably nothing that will speed up one’s motion graphic workflow more beneficial than learning keyboard shortcuts. Simply like with significant NLEs like Premiere Pro, FCPX or Avid, and in the case of After Effects, keyboard shortcuts can streamline several repetitive tasks.

The more keyboard shortcuts one knows, the better.

Common Keyboard Shortcuts

Must-know Keyboard Shortcuts of After Effects

After effects precompose shortcut: Here are the few most common keyboard shortcuts that a person should learn first and then make use of them efficiently.

Windows And Mac users, take note — of anyone using Mac language in the illustrations below. Use Command if one is using Mac OS, otherwise use Control command instead for Window users, and if anywhere one see Option that is for Mac, and for Windows, just use Alt.)

One can easily speed up their motion graphics workflow in a major way with these

Press V: To Initiate Selection Tool

Precompose shortcut after effects: This tool performs precisely what one expects it to — it chooses anything from keyframes to masks to layers. For most video editors, this feature is hands down the most-used keyboard.

No matter what one has done or where one is at inside After Effects, any individual can always proceed back to the frequently used Selection tool, all-important section, by simply pressing V.

Press H: To Activate Hand Tool

Precompose after effects shortcut: The Hand tool enables one to move around in the Layer, Footage panel or Composition. One may regularly practice this tool to pan a separate part of the composition into view, especially when the person has zoomed in. It’s an example of those tools that one must try before one realises how immensely beneficial and handy it is.

Press U: To Reveal All Keyframed Properties

After effect precompose shortcut: This command prompts the users about which keyframes they previously affixed.

After applying the Selection tool to pick one or several layers, one can observe all the keyframes that have been combined to those layers with a quick and straightforward press of the key- U.

Hot tip: If one reopens a project after time off from it, this command will help the users remember the keyframes that they added in previous sessions.

Press Ctrl + Shift + C: To Precompose Selected Layers

Precompose shortcut after effects: This combination of keys benefits a person to declutter their timelines exponentially. With the help of this shortcut, one can take one or more layers that are previously in composition and adapt them into their individual composition. This latest precomp will remain in their current composition, and the multiple layers now get rendered as one!

In the matter of organising their composition, precomposing layers come in great help.

An Expert of Adobe could instantly identify an editor’s level of experience with a quick glimpse at their timelines. If any users are found to be not using these precomps, they will be clearly stated as a beginner.

Press T: Hide/Show Opacity

After effects shortcuts windows: Anyone can access the opacity option by just pressing T.

By simply pressing the key- T, one can access the Opacity property for single or for multiple layers. This enables a person to notice all the opacity keyframes present on particular layers. One can one-up this command by simply pressing the Option + T combination. This immediately adds an opacity keyframe on all chosen layers wherever the playhead is located. This can end up as a majestic time-saver.

The shortcuts for starting up other work properties in the exact identical way:

Press S – For Scale

Press R – For Rotation

Press P – For Position

Press A – For Anchor Point

Press Shift + / : To Fit to Screen

After effects quick keys: So often, one finds themself zooming in on their viewer to do some thorough work in After Effects.

This specific key combination permits a user to go back to where their composition fits the screen.

In these circumstances, this key combination is ideal, as one can instantly operate back out to where their comp fits the available space in the screen.

After Effects Common Keyboard Shortcuts 2

Press Cmd + Shift + D: To Split Layer

Shortcuts after effects: This keyboard shortcut permits a user to split their footage over two layers.

This keyboard shortcut allows one to split their footage over two layers at a preferred point. It’s the closest one can get to the Blade/Razor tool found in Premiere Pro and FCPX.

Press Option + ]: To Trim Layer Out Point to Current Time

After effects cut layer shortcut: Cut chosen layers with the help of this key combo.

This key combination provides an alternate way to cut any picked layers. However, unlike the former shortcut, it doesn’t retain the portion after the cut.

Press Command + Right/Left Arrow: To Go Forward/Back One Frame: 

Somewhat confusingly, this command doesn’t possess the same shortcut as it behaves in most software used in editing. Instead of just practising the Right/Left Arrow keys to drive the playhead by a frame, one must also press Command( for mac) or Control (for Windows) key simultaneously.

One can use this shortcut to watch their work frame by frame, especially when they are fine-tuning their placement of the keyframe.

Press Option + Mouse Drag: To Stretch Keyframes

In order to Highlight the keyframes, one is required to press the option key and drag with the mouse.

Once commence using keyframes, this shortcut can be an absolute game-changer for the user.

One will no longer have to drag each keyframe separately when one wants to slow down the animation. Instead, one will simply highlight the fancied keyframes and then press and hold the Option key while moving the keyframes with the help of the mouse.

Press Shift+Command+Option+H: To Fit Canvas Width

Alternatively scaling up the object by hand, one can quickly fit their layer to their canvas width by practising this quick shortcut.

Press Command+Option+F: To Fit to Canvas

Like the preceding shortcut, this one will auto-scale both the height and the width of their current composition.

Press [ or ]: To Set End Point or Start Point

To quickly move the endpoint or start of a layer to their playhead position, simply click the [ or ] button with their layer selected. The new layer will snap to the current position of the playhead of the user interface. This is great if a person is working with external video equipment or just simply trying to manipulate their object’s timing.

After Effects Common Keyboard Shortcuts 1

Press Option + Drag: To Replace

Let’s suppose one has a pre-comp or asset in their timeline, but one has to decide whether they want to exchange that asset or pre-comp for something distinct. Instead of eliminating the original object, one can utilise this simple trick for replacing objects in their timeline.

Press Selected Keyframes + Option: To Drag to Retime.

Any individual can stretch their keyframes while proportionally maintaining keyframe distance by simply holding down the option key and moving their keyframes. If one wants more info, then they must check out more on stretching keyframes.

Press ~: To Full-Screen Panel

If one wants to immediately full screen a specific panel, the one need just to glide their mouse above their desired panel and simply press the “~” key. The entire screen will be then taken over by the panel. This technique or shortcut also operates in Premiere Pro.

Press Command + Right Arrow or Left Arrow: To Skip Frames.

Unlike other video editing software, using the arrow keys in After Effects doesn’t transfer the playhead forward. Rather, if one click the arrow key, one will move the current position of the object in the direction of the pressed arrow. However, if a person holds down the command button, then that person will be able to move the playhead both backwards or forward.

Press I or O: To Go to Layer In-Point or Out-Point

A user can instantly navigate to the out-point or in-point of their selected layer by simply pressing the I or O key. This can be extremely convenient if one is working in a composition for a prolonged duration.

Press Command + ” / ” + ” + ” : To Add to Composition from Project Panel

If one is in the Project panel and desire to add an object into their composition, clearly practice “Command” + “/” + “+”. Automatically, the object will be combined as the first layer at the top of its composition.

Press Command + Option +T: To Time Remapping

One of the most vital features in all of After Effects is Time remapping. If a person is a professional motion graphic designer, the odds are that person probably often use this feature. Alternatively, navigating to time remapping from the application menu, simply practice Command +Option +T to pop-up time remapping with keyframes already established and available to be edited.

Press Command +Shift+L: To Unlock All Layers

If one is working with an external or template project, then there is a reliable chance that any of the layers may be locked. If one wishes to unlock the layers, then they can individually either select each lock icon or press the command Command+Shift+L.

Press CTRL + D: To Duplicate Selected Layers.

When working with motion graphics or visual effects, people often require to duplicate their layers. Sometimes even many times more than often. While one can progress into the menu and choose Edit -> Duplicate, a much quicker technique is to simply select the layers one want to duplicate and press CTRL + D. For another copy, one can press them again. Super useful, super simple!

Press CTRL + SHIFT + C: Pre-Compose Selected Layers

If one is creating anything beyond the most simplistic composition in Adobe After Effects, then one will have to pre-compose their layers. One could go into the main menu and preferred Layer -> Pre-Compose to do this. However, this is such a routine task that an individual user much prefers the keyboard shortcut. Naturally, select the layer(s) one want and press CTRL + SHIFT + C to bring up the Pre-Compose dialogue.

Press U or UU (press U twice): To Reveal Keyframed Properties

Once one start adding keyframes and animation to their layers, things can get a bit cramped in their timeline view. A user may collapse their layers to make a little more space, but then that person also might find themself searching for the keyframes every time one requires to tweak them.

One of the shortcuts people use all the time is U or UU. Pressing will exhibit all properties on the currently picked layers that have keyframes implemented to them. Pressing UU (press U twice) will also show properties with characters.

Press ALT + /: To Zoom Preview Window To 100%

Sometimes, after one worked on a small detail all the way zoomed in, one wants to return to a 100% view of their composition. While one can practice the dropdown box at the foot of the preview window, a much quicker process is to press ALT + / to reset the preview window to 100% (fit) zoom.

Press CTRL + SHIFT + Y: To Open Layer Settings

If one is struggling with a lot of Solid layers, this one shortcut becomes really handy. One can access the layer settings for the chosen layer by going to the main menu and then selecting Layer -> Settings. A much more instantaneous way is to use the keyboard shortcut- CTRL + SHIFT + Y.

Summing Up

One save all the shortcuts we just looked at or print it out to keep it close. Once one has got the shortcuts memorised, they won’t just feel more comfortable in After Effects; rather, they will be way more efficient as well.

Shortcuts in intellij – IntelliJ IDEA Keyboard Shortcuts | List of All Shortcut Keys for IntelliJ IDEA

IntelliJ IDEA Keyboard Shortcuts

IntelliJ IDEA Keyboard Shortcuts: IntelliJ IDEA is a unique Java platform that is often used for the purpose of developing various computer software. Developed by the renowned JetBrains, you can use this program across various operating systems, like Windows or Linux. If you are a new programmer, feel free to use this program because the ease of its use is unbeatable.

Do you know that you can also use this program for languages other than Java as well? Yes, you can use IntelliJ IDEA for JPQL, SQL and even HTML. So you must be intrigued to know that there are various keyboard shortcuts that you can use so that your program experience is even smoother. There are lots of keyboard shortcuts for IntelliJ IDEA that are related to its navigation, debugging, editing or refactoring features. If you memorize these hotkeys, it will no doubt save you lots of time and make you more productive!

Wondering How to explore & learn Shortcut Keys for various Operating Systems, Computer Software Programs, Social media applications Keyboards? Here is the one-stop destination for all Keyboard Shortcuts, just take a look & memorize regularly for better performance in competitive exams & real-time situations.

IntelliJ IDEA Keyboard Shortcuts

Choosing The Right Keymap

Shortcuts in intellij: Choosing a proper keymap is quite crucial, and automatically IntelliJ IDEA suggests a keymap that I based on your computer environment. You must make sure before finalizing the keymap that the suggestion from IntelliJ IDEA matches your operating system. If it doesn’t match, then you have to use some other editor or IDE that actually suits your operating system.

You will always be able to modify any previous copy of the predefined keymap. This allows you to assign your own set of shortcuts for all the frequently used commands. The predefined keymaps are given below:

  1. Visual Studio or Visual Studio for macOS: The Visual Studio keymap is a perfect recommendation for you if you are a fresh starter and have no previous experience with any other IDEs. You can also use this keymap if you are accustomed to using the plain version of Visual Studio.
  2. IntelliJ (macOS): IntelliJ macOS is highly recommended for you if you have any earlier experience with the IntelliJ IDEA platform or any other platform of a similar type from JetBrains.
  3. ReSharper (macOS) or Resharper: The ReSharper keymap is a recommendation for you if you are familiar with Visual Studio.

Learning The Shortcuts

Intellij idea shortcuts: Given below are the most commonly used shortcuts in the IntelliJ IDEA platform:

IntelliJ IDEA Keyboard Shortcuts 2

Shortcut Action Explanation
Double Shift Search Everywhere Quickly find a file, or any action, tool window, symbol. It is also applicable to find any setting in
IntelliJ IDEA platform, or in your current project, and also in the current Git repository.
Alt+Enter Show Context Actions It is a quick fix for any highlighted errors or warnings.
It is also a useful fix for any intention action
for the purpose of improving and optimizing any code.
Ctrl+Shift+Enter Complete Current Statement Used for inserting any necessary trailing symbols.
The symbol, after being inserted is put in the caret where you can start typing the next statement.
Ctrl+Shift+A Find Action To find any command and successfully execute it
or to open a tool window
or to search for any particular setting.
F2 Navigate between code issues
Shift+F2 Jump to the next or previously highlighted error.
Ctrl+Alt+L Reformat Code Reformat the entire file or any selected fragment of the file
following the current style settings of the code.
Alt+1 Focus the Project tool window
Escape Focus the editor
Ctrl+W Extend or shrink selection
Ctrl+Shift+W Increase or decrease the scope of selection according to specific code constructs.
Alt+F7 Find Usages It shows all the places where you have used any code element in your project.
Ctrl+/ Add/remove line or block comment It is used to select or reopen a recently opened file, from the folders in the list.
Ctrl+Shift+/ Comment out a line or block of code. It is used to refactor any given element under the caret.
For an example,copy, safe delete, rename, move, and many others.
Ctrl+B Go To Declaration Used to navigate to the initial or first declaration
of the instantiated class, which is called method (also field).
Ctrl+E View recent files
Ctrl+Alt+Shift+T Invoke refactoring

IntelliJ IDEA Keyboard Shortcuts 1

Using The Advanced Features

Apart from the keyboard shortcuts given above, there are certainly other useful features which are for advanced programmers. These are as follows:

  • Refactor: Crl+Alt+Shift+T
  • VCS Operation: Alt+
  • Vertical tool resize: Ctrl+Shift+Left or Ctrl+Shift+Right
  • Horizontal tool resize: Ctrl+Shift+Up or Ctrl+Shift+Down

Comparison Of Keyboard Shortcuts Between Various Keymaps

Shortcuts for general operations:

Command Visual Studio ReSharper IntelliJ
Searching Everywhere Double Shift Double Shift Double Shift
Find Ctrl+Shift+A Ctrl+Shift+A Ctrl+Shift+A
Refactor Ctrl+Shift+R Ctrl+Shift+R Ctrl+Alt+Shift+T
Open File or Folder Ctrl+O Ctrl+O N/A
Show Intention Actions Alt+Enter Alt+Enter Alt+Enter
Settings Ctrl+Alt+S Ctrl+Alt+S Ctrl+Alt+S
Recent Files Ctrl+Comma Ctrl+E Ctrl+E
Code Cleanup Ctrl+E, C Ctrl+Alt+F N/A
Select Alt+F1 Alt+F1 Alt+F1
View Breakpoints Ctrl+Alt+B Ctrl+Shift+F8 Ctrl+Shift+F8
Generate Alt+Insert Alt+Insert Alt+Insert
Build A Solution Ctrl+Shift+B Ctrl+Shift+B Ctrl+F9
Debug Alt+Shift+F9 Alt+Shift+F9 Alt+Shift+F9
Open a Solution or previous Project Ctrl+Shift+O Ctrl+Shift+O Ctrl+Shift+O
Attach Process Ctrl+Alt+P Ctrl+Alt+F5 Ctrl+Alt+F5
Reformat Code Ctrl+Alt+Enter Ctrl+Alt+L Ctrl+Alt+L
Inspect Ctrl+Alt+Shift+A Ctrl+Alt+Shift+A Ctrl+Alt+Shift+A
Find Usages Shift+F12 Alt+F7 Alt+F7
Navigate Alt+` Ctrl+Shift+G Ctrl+Shift+G
VCS Operations Popup Ctrl+Alt+Q Alt+` Alt+`

Comparison Of Keyboard Shortcuts Between Various Keymaps

Shortcuts for Basic Editing

Command Visual Studio ReSharper IntelliJ
Cut Ctrl+X Ctrl+X Ctrl+X
Copy Ctrl+C Ctrl+C Ctrl+C
Paste Ctrl+V Ctrl+V Ctrl+V
Paste as Plain Text Ctrl+Alt+Shift+V Ctrl+Alt+Shift+V Ctrl+Alt+Shift+V
Paste from History… Ctrl+Shift+V Ctrl+Shift+V Ctrl+Shift+V
Duplicate Line or Selection Ctrl+D Ctrl+D Ctrl+D
Open source in new window Shift+F4 Shift+F4 Shift+F4
Copy Paths Ctrl+Shift+C Ctrl+Shift+C Ctrl+Shift+C
Copy Reference Ctrl+Alt+Shift+C Ctrl+Alt+Shift+C Ctrl+Alt+Shift+C
Save All Ctrl+Shift+S Ctrl+Shift+S Ctrl+S
Delete Line Ctrl+Shift+L Ctrl+Shift+L Ctrl+Y
Scratch File Ctrl+Alt+Shift+Insert Ctrl+Alt+Shift+Insert Ctrl+Alt+Shift+Insert
Indent Selection Tab Tab Tab
Unindent Line or Selection Shift+Tab Shift+Tab Shift+Tab
Start New Line Shift+Enter Shift+Enter Shift+Enter
Start New Line Before Current Ctrl+Enter Ctrl+Enter Ctrl+Alt+Enter
Toggle Case Ctrl+Shift+U Ctrl+Shift+U Ctrl+Shift+U
Undo Ctrl+Z Ctrl+Z Ctrl+Z
Redo Ctrl+Y Ctrl+Y Ctrl+Shift+Z

Shortcuts for Navigating the Content

Command Visual Studio ReSharper IntelliJ
Previous Method Alt+Up Alt+Up Alt+Up
Next Method Alt+Down Alt+Down Alt+Down
Go to Line/Column… Ctrl+G Ctrl+G Ctrl+G
Switcher Ctrl+Tab Ctrl+Tab Ctrl+Tab
Select In… Alt+F1 Alt+F1 Alt+F1
Locate/Select in Solution View Alt+Shift+L Alt+Shift+L N/A
Show Bookmarks Ctrl+` Ctrl+` Shift+F11
Forward Ctrl+Shift+Minus Ctrl+Shift+Minus Ctrl+Alt+Right
Last Edit Location Ctrl+Shift+Backspace Ctrl+Shift+Backspace Ctrl+Shift+Backspace
Back Ctrl+Minus Ctrl+Minus Ctrl+Alt+Left
Select Next Tab Alt+Right Alt+Right Alt+Right
Select Previous Tab Alt+Left Alt+Left Alt+Left
Add to Favorites Alt+Shift+F Alt+Shift+F Alt+Shift+F
Toggle Bookmark with Mnemonic Ctrl+F11 N/A Ctrl+F11
Toggle Bookmark Ctrl+K, K N/A F11
Recent Files Ctrl+Comma Ctrl+E Ctrl+E
Recently Changed Files Ctrl+Shift+Comma Ctrl+Alt+Shift+Backspace N/A
Show Favorites window Alt+2 Alt+2 Alt+2
Show Structure window Ctrl+Alt+F Ctrl+F11 Alt+7
Show Find window Alt+3 Alt+3 Alt+3

Shortcuts for Navigating the Content

Shortcuts for Caret Options

Command Visual Studio ReSharper IntelliJ
Move Caret to Previous Word Ctrl+Left Ctrl+Left Ctrl+Left
Move Caret to Next Word Ctrl+Right Ctrl+Right Ctrl+Right
Move Caret to Line Start Home Home Home
Move Caret to Line End End End End
Containing Declaration Ctrl+[ Ctrl+[ Alt+Shift+[
Next Method Alt+Down Alt+Down Alt+Down
Previous Method Alt+Up Alt+Up Alt+Up
Move Caret to Page Top Ctrl+Page Up Ctrl+Page Up Ctrl+Page Up
Move Caret to Page Bottom Ctrl+Page Down Ctrl+Page Down Ctrl+Page Down
Move Caret to Text Start Ctrl+Home Ctrl+Home Ctrl+Home
Move Caret to Text End Ctrl+End Ctrl+End Ctrl+End
Extend Selection Ctrl+Alt+Right Ctrl+W Ctrl+W
Clone Caret Above Double Ctrl + Up Double Ctrl + Up Double Ctrl + Up
Clone Caret Below Double Ctrl + Down Double Ctrl + Down Double Ctrl + Down
Clone Caret Above with Virtual Space Alt+Shift+Up Alt+Shift+Up N/A
Clone Caret Below with Virtual Space Alt+Shift+Down Alt+Shift+Down N/A
Move Caret to Matching Brace Ctrl+] Ctrl+] Ctrl+Shift+M
Move Caret to Code Block Start Alt+Shift+[ Alt+Shift+[ Ctrl+[
Move Caret to Code Block End Alt+Shift+] Alt+Shift+] Ctrl+]
Move Caret to Previous Word with Selection Ctrl+Shift+Left Ctrl+Shift+Left Ctrl+Shift+Left
Move Caret to Next Word with Selection Ctrl+Shift+Right Ctrl+Shift+Right Ctrl+Shift+Right
Move Caret to Line Start with Selection Shift+Home Shift+Home Shift+Home
Move Caret to Line End with Selection Shift+End Shift+End Shift+End
Up with Selection Shift+Up Shift+Up Shift+Up
Down with Selection Shift+Down Shift+Down Shift+Down
Select Containing Declaration Ctrl+Shift+[ Ctrl+Shift+[ Ctrl+Alt+Shift+[
Move Caret to Code Block Start with Selection Ctrl+Alt+Shift+[ Ctrl+Alt+Shift+[ Ctrl+Shift+[
Move Caret to Code Block End with Selection Ctrl+Alt+Shift+] Ctrl+Alt+Shift+] Ctrl+Shift+]
Move Caret to Page Top with Selection Ctrl+Shift+Page Up Ctrl+Shift+Page Up Ctrl+Shift+Page Up
Move Caret to Page Bottom with Selection Ctrl+Shift+Page Down Ctrl+Shift+Page Down Ctrl+Shift+Page Down
Page Up with Selection Shift+Page Up Shift+Page Up Shift+Page Up
Page Down with Selection Shift+Page Down Shift+Page Down Shift+Page Down
Move Caret to Text Start with Selection Ctrl+Shift+Home Ctrl+Shift+Home Ctrl+Shift+Home
Move Caret to Text End with Selection Ctrl+Shift+End Ctrl+Shift+End Ctrl+Shift+End
Shrink Selection Ctrl+Alt+Left Ctrl+Shift+W Ctrl+Shift+W
Page Up Page Up Page Up Page Up
Page Down Page Down Page Down Page Down
Select All Ctrl+A Ctrl+A Ctrl+A
Left with Selection Shift+Left Shift+Left Shift+Left
Right with Selection Shift+Right Shift+Right Shift+Right
Add/Remove Caret Alt+Shift+Click Alt+Shift+Click Alt+Shift+Click
Toggle Column Selection Mode Alt+Shift+Insert Alt+Shift+Insert Alt+Shift+Insert
Add Caret to Each Line in Selection Alt+Shift+G Alt+Shift+G Alt+Shift+G
Add Selection for Next Occurrence Alt+Shift+. Alt+Shift+. Alt+J

Conclusion on IntelliJ IDEA Keyboard Shortcuts

These shortcuts are highly beneficial to learn, as you can see. It hardly takes five to ten minutes to memorize them, yet stays for a lifetime. It will no doubt save you lengths of time and make you tech-savvy. We hope we have been of help to you!

Windows 10 shortcut keys list – Windows 10 Keyboard Shortcuts | List of All Windows 10 Keyboard Shortcut Keys and Hotkeys

Windows 10 Keyboard Shortcuts

Windows 10 Keyboard Shortcuts: The advancement of technology and its development over the years has increased the number of computer users across the world. Computers play a crucial part in shaping the future of the technology sector of today’s society. With the emergence of advanced computing, human life has undergone drastic changes.

Being the structural and functional system of technology, computers have revolutionized communication.

The increase of computer-related technical ideas has floored to create new ideas and improved artificial intelligence over the years. Owing to the points mentioned above, the demand for computer-related careers has multiplied drastically.

Wondering How to explore & learn Shortcut Keys for various Operating Systems, Computer Software Programs, Social media applications Keyboards? Here is the one-stop destination for all Keyboard Shortcuts, just take a look & memorize regularly for better performance in competitive exams & real-time situations.

The jobs in this field are tedious and demand precision and devotion for the future of humankind.

Windows system developers have aimed at providing user interest features that help them deliver quality work and make the method of computing a lot more comfortable.

The principal focus of this article is to state the various shortcuts related to the Windows 10 version.

Table of Content

What is Meant by Shortcut Keys?

Windows 10 shortcut keys list: The keyboard comprises a series of keys that users use for a diverse range of tasks. When used in a specific order and group, these keys can make computing more efficient.

In technological terms, these group keys are perceived as ‘Keyboard Shortcut Keys.’ When users use these keys in the correct order, it prompts the system function to create a specific result without the long process of general computing ways.

The keys designed for Windows 10 by professionals have increased performance in computing results. These Shortcut Keys provide users with a straightforward and user-friendly computing process.

The Windows 10 Shortcut Keys are very effective for individuals employed in any such computer-related segment of society.

List of the Frequently Used Windows 10 Shortcut Keys

Given below is a list of the frequently used Windows 10 Shortcut Keys.

Keys used Function
Windows Key + X Used as the power Menu
Windows Key + Tab Used to launch the ‘Task View’ of Windows 10
Windows Key + Q Used to search the web browser and Windows via Cortana (Speech) function.
Windows Key + S Used to search the web browser via the inbuilt Cortana (Speech) function.
Windows Key + I Used to open windows Settings
Windows Key + A Used to open the windows 10 notification bar
Windows Key + L Used to lock the Windows 10 device
Windows Key + Ctrl + D Used to create a new virtual desktop
Windows Key + Ctrl + F4 Used to close the current virtual desktop
Windows Key + Ctrl + (right, Left, Up, Down Keys) Used to position the Windows on your screen according to the key used.
Windows Key + H Used to share app content (if supported)
Windows Key + K Used to connect to wireless devices and audio display
Windows Key + X Used to open the Start Button context menu
Windows Key + D Used to Show the Windows Desktop
Windows Key + G Used to Start App Recording
Windows Key + E Used to open File Explorer
Windows Key + Spacebar Used as keyboard input language option
Windows Key + R Used as the ‘Run Command’ Option

Windows 10 Keyboard Shortcuts 2

List of the Elementary Windows 10 Shortcut Keys used for My Computer and File Explorer

Below is a list of the elementary Windows 10 Shortcut Keys used for My Computer and File Explorer.

Keys used Function
Ctrl + F3 or Ctrl + F Used to open the search option
F2 Used to rename any specific item
Shift + Del Key Used to delete a file or folder permanently
Alt + Double Click or Alt + Enter Key Used to access the properties of the selected file
Pressing Ctrl while dragging a specific file(s) Used to copy the particular file
Pressing Ctrl + Shift while dragging a file Used to create a shortcut in Windows 10
Ctrl + A Used to select all text and objects on the screen
F5 Used to refresh the contents of a window
Backspace Key Used to view the folder above the current folder level
Pressing Shift Key while clicking on the close button Used to close the folder and it’s parent folder that’s selected.
F6 Used to switch between the right and left panels of Windows
Pressing the Numlock + the Asterisk key when using a numeric keyboard Used to expand all subfolders that fall under the folder that is selected
Pressing the Numlock + the Plus sign key when using a numeric keyboard Used to expand the folder that is selected
Pressing the Numlock + the Minus sign key when using a numeric keyboard Used to collapse the folder that is selected
Right Arrow Key Used to select the subfolder
Left Arrow Key Used to select the parent folder

List of the Windows 10 Shortcut Keys used for Command Control

Windows 10 Shortcut Keys used for Command Control:

Keys Function
Shift + Left Arrow Used to move the cursor to one character left of the current selection
Shift + Right Arrow Used to move the cursor to one character right of the current selection
Shift + Up Arrow Used to extend the selection, a line above the current insertion point
Shift + Down Arrow Used to extend the selection, a line below the current insertion point
Shift + Page Down Used to extend the selection up to a screen below the current screen
Shift + Page Up Used to extend the selection up to a screen above the current screen
Ctrl + Shift + Home button Used to extend the selection to the start of the screen buffer
Ctrl + Shift + Right Arrow Key Used to extend the selection to one word right of the current position end of the screen buffer
Ctrl + Shift + Left Arrow Key Used to extend the selection to one word left of the current position end of the screen buffer
Ctrl + Shift + end Used to extend the selection to the end of the screen buffer
Ctrl + A Used to select all text from the first types character to the last one
Shift + Home Button Used to extend the selection to the next character (first time) and then to the left margin (second time).

List of the Windows 10 Shortcut Keys used for History Navigation and Editing Commands

Windows 10 Shortcut Keys used for the purpose of History Navigation and Editing Commands are mentioned below:

Keys used Function
Ctrl + V Used to paste the text into the command line
`Windows Key + V Used to open the clipboard history menu
Page Keys Used to move the cursor page-wise to the specified direction
Arrow Keys Used to move the cursor to the specified direction
Shift + Insert Used to paste the text into command line
Alt Key Used to begin selection in block mode when used with specific keys
Ctrl + C Used to copy the selected text to clipboard
Ctrl + Insert Used to copy the selected text to clipboard
Ctrl + M Used to enter ‘Mask Mode’ and move the cursor within the window
Ctrl + End Used to locate the cursor to the end of the buffer
Ctrl + Home Button Used to move the cursor to the beginning of the buffer
Ctrl + Up Arrow Key Used to move one line up the output history
Ctrl + Down Arrow Key Used to move one line down the output history
Ctrl + Page Down Used to move one page down the output history
Ctrl + Page Up Used to move up one page up the output history
Ctrl + F Used to open the ‘Find’ option in Windows console
Alt + F4 Used to close the window console

List of Dialog Windows Shortcut Keys for Windows 10

The list of essential dialog command shortcut keys for Windows 10 are given below:

Keys used Function
Tab Key Used to move forward through the options
Shift + Tab Key Used to move backward through the options
Ctrl + Tab Key Used to Move forward through the tabs
Ctrl + Shift + Tab Key Used to Move backward through the tabs
Ctrl + O + F4 Used to open and save in the Windows Address Bar
F5 Used to refresh windows 10
Backspace Key Used to open the folder a level above the selected folder

Twenty most essential Windows 10 Shortcut Keys you need to know

The top twenty essential Windows 10 Shortcut Keys users need to know right now are compiled below:

Keys used Function
F1 Used to access the ‘Windows Help’ Services available within the system
F10 Used activate the Windows 10 Menu Bar
Alt + F4 Used to close any current program
Ctrl + F4 Used to close the current window in multiple documents interface-based program
Shift + F10 Used to access the right click menu in the application currently in use
Ctrl + Esc Key or Windows Key Used to launch the Start Menu on Windows 10
Ctrl + X Used to cut the selected object or text
Ctrl + C Used to copy the selected object or text
Ctrl + V Used to paste the selected object or text
Del Key Used to delete the object or text as selected
Ctrl + Z Used to redo a specific function
Windows Key + Break or Pause Used to show System Properties for Windows 10
Pressing Shift while inserting any storage device Used as a bypass autoplay option when an external storage is connected
Windows Key + F Used to launch the Feedback Hub Application
Windows Key + O Used to lock the device Orientation
Windows Key + J Used to set the focus on a particular tip for Windows 10 whenever applicable
Windows Key + M Used to minimize all the windows
Windows Key + B Used to set focus on a specific area of the Notification Bar in Windows 10
Windows Key + C Used to Launch the Cortana Application
Windows Key + W Used to open the Windows Ink Workspace

Windows 10 Keyboard Shortcuts 1

Major advantages of using Windows 10 Shortcut Keys

  • Completing More Tasks: Using keyboard shortcuts can spare time and support users in completing work. Using Windows 10 Keyboard Shortcuts, users can get more than one task done simultaneously, which helps to increase their efficiency while aiding multitasking abilities.
  • Faster Performance: The latest update for Windows is Windows 10. Entrepreneurs associated with a business need to be up-to-date with the current trends and keep the quality of their articles explicit. They must try using the Windows 10 Keyboard Shortcuts because it helps in faster performance of tests.
  • Scrupulousness: Keyboard Shortcut Keys allow users to get their tasks done with precision. When users are under pressure and need to deliver scrupulous work, keyboard shortcuts are a go-to tool. It helps with the accuracy and correctness of the article while shortening the process of lengthy calculation.
  • Better Execution: Keyboard shortcut keys are a handy tool for computer users. It helps users to execute complex problems in less time and more efficiently. Users who know their way around keyboard shortcuts can achieve precision and accuracy in shorter time frames than the general computation process.

Conclusion on Windows 10 Keyboard Shortcuts

Having knowledge about keyboard shortcuts has a plethora of benefits in the everyday life of individuals involved in the technical sectors worldwide. It helps to save time and effort and makes the lengthy method of computation very straightforward.

Every user who accesses computers with Windows 10 and wants to save time and energy should definitely try Windows 10 keyboard Shortcuts.

Windows Media Player Shortcuts | Keyboard Shortcut Keys for Windows Media Player

Windows Media Player Shortcuts

Windows Media Player Shortcuts: One can control the default Windows Media Player like most other media players, exclusively via their keyboard. Maintaining keyboard shortcuts helps to gain more control over playing music, videos, movies, etc. It gives one freedom over the media playing smoothly. The shortcuts that are useful for most in Windows Media Player are as follows.

Windows Media Player Shortcuts

Navigate with Keyboards in the WMP Library

Windows media player shortcut keys: In most applications, the tab button works well to move between various panes such as the left-hand playlist, library, etc. However, in the WMP, it seems that after pressing the Tab from the main window, the focus can get lost going through every available icon on the WMP. Hence, it is wise to pick a starting point such as Ctrl + e to always begin from the top and move it from there.

Keyboard Shortcut Function
Ctrl +E Moving the focus to the search box in the library
Ctrl + E and 2x Tab Go to playlist or library pane. You can use arrow keys to navigate between the playlists now playing and library options.
Ctrl + E and then 3x tab Go to the main window or pressing Tab once when coming from the playlist and the library pane.
Ctrl + 7 Switching to Artists in Music or to the first category in any media category after recently added.
Ctrl + 8 Switching to Album in Music or the second category in any media category after recently added.
Ctrl + 9 Switching to songs in music or the third category in the media category after recently added.
Alt + Arrow Left/ Alt + Arrow Right Go to the previous or next view that is the same as Back and Forward Buttons.
F4 Change how you see the items in the Details pane by using the options available with the View Options button. The focus must be on the main window. Then press Ctrl + e then press 3x Tab before.

Windows Media Player Shortcuts 1

Play Music With Shortcuts

Keyboard Shortcut Function
Ctrl + P P is for Play and Pause a file.
Ctrl + F/ Ctrl + B Play the next song or the previous song.
F7 Mute or Unmute the volume of the music
F8 and F9 Increase or decrease the volume.
Ctrl + H Turn on shuffle or Turn it off.
Ctrl + Shirt + G Play faster than the average speed or fast forward it.
Ctrl + Shirt + S Play the videos slower than the average speed or time compression.
Ctrl + Shift+ N Play at normal speed.
Alt + L or Alt + A Save a new or an old playlist to your library.
Ctrl + L and B Show a list of items you want to burn to the CD in the list pane in the library.
Alt + L and C Select the columns you want to see in your library.
Alt + L and E Show a playlist from your library in the list pane.
Alt + L and N Create an auto playlist or create a playlist in the list pane in the library.
Alt + L and S Sort the items in the list according to the name, artist, rating, album or file name in the library or show or hide the list pane in the library or show a list of items to synchronize to a portable device in the list pane in the library.
Alt + L and U Edit the items in the list pane and use the edit playlist dialog box from your library.
Ctrl + W Close or stop a file that is playing.
Ctrl + S Stop the playback.
Ctrl + Shift + F Fast-forward through the video or music that is playing.

Play Videos with Shortcuts

Windows media player keyboard shortcuts windows 10: The Windows Media Player has a mode called skin mode, with which you can see visualization effects when audio files are playing. One can switch from one skin mode to another quickly by using the shortcuts below.

Keyboard Shortcut Function
Alt + 1/ Alt + 2/ Alt + 3 Used to zoom videos to 50 or 100 or 200 percent.
Alt + Enter Show video in full screen.
Ctrl + J Eject a CD or DVD except on computers with two or more CD or DVD disc drives.
Alt + 1 Zoom video to 50 percent.
Alt + 2 Zoom video to 100 percent.
Alt + 3 Zoom video to 200 percent.
Alt + B Start burning any CD in the Burn feature.
Alt + C Rip music from the CD to your computer in the rip feature or change the synchronization settings from the sync feature.
Ctrl + 2 Switch to skin mode.
Ctrl + Arrow keys and spacebar Select or clear the checkboxes for multiple items that are not contiguous.
Ctrl + D Editing the current playlist on the file menu.
Ctrl + Shift + B Rewind a video.
Ctrl + Shift + C Turn caption or subtitles on or off.
Ctrl + U Specify the path or the URL of a file.
Ctrl + W Close or stop playing an ongoing file
Ctrl + P Play or pause a file
Ctrl + S Stop playback
Ctrl + F/ Ctrl + B Play the previous or the next item on the list.
Ctrl + H Turn on shuffle or turn it off. Shuffling the playlist on the play menu or the skin shortcut menu.
Ctrl + I Capturing a still image from a DVD on the view menu option.
Ctrl + O Opening a file on the skin shortcut menu or the file menu or play or open a file in the Anchor window.
Ctrl + Shift + B Rewind option but it is not available for all files.
F8 and F9 Increase or decrease the volume.
Ctrl + Shift + G and Ctrl + Shift + S Playing the file slower than standard or time compression.
Ctrl + Shift + N Play at the average speed.
Ctrl + Tab Switch between the outer and inner areas of the player.
Alt + O or Alt + I Activate the double-clicking feature to play only selected items from a playlist from your library.
Alt + O or Alt + P Activate double-clicking to play all the items in a playlist from your library.
Alt + O and Alt + R Play the items in the now playing list repeatedly in your library.
Alt + O and Alt + W Show a list of items to play in the list panel in the library.
Ctrl + Shift + F Fast-forward through the video or music.
F7 Mute or unmute the volume of the file.

Manage the Media Player Windows

Keyboard Shortcut Function
Ctrl + 1 Switch to the entire model on the screen.
Ctrl + 2 Switch to only skin mode.
Ctrl + M Display or hide the classic menu or the menu bar in full mode.
Alt + Space Open the title bar menu or the default Windows feature.
Alt + Space + Enter Restore Windows to the default Windows feature.
Alt + Space + X Maximise the Window to the default Windows feature.
Alt + Space + N Minimise the Window to the default Windows feature.
Alt + P Display the play menu.
Alt + S Search for the items in your library that have the text in the search box or start r stop synchronizing the sync feature or stop ripping the music from the Rip feature or Stop burning a CD from the burn feature or access and download more skins from the skin chooser.
F5 Refresh the information in the panes from the sync feature.
Spacebar Select or clear a check box or play an item or carry out the command for the selected item or the button or go to the selected link.
Up arrow Select the last item in the list.
F11 Turn the full page view on or off according to the default Windows feature.
Alt + F4 Close the WMP feature according to the default Windows feature.

Manage Playlists and Library

Keyboard Shortcut Function
Ctrl + N Create a new playlist.
F3 Add media to the library.
F2 Edit the item.
Shift + F10 and a Add items to the playlist.

Other Windows Media Player 11 Shortcuts

Windows media player shortcuts windows 10: Most music albums have a box art on the full mode in the window. One can expand it or decrease its size according to the shortcuts below. There are many more Windows media player keyboard shortcuts, and some of the keys mentioned here may be different for the distinct versions of the Windows Media Player. These should operate best in versions 11 and 12.

Keyboard Shortcut Function
F1 Open the Help panel.
F5 Refresh the information in the panes.
F6/ Shift + F6 Increase or decrease the size of the album art.
Esc Hide the menu.
Enter Play an item or carry out the command for the item you selected or the button. It can also mean go to the selected link.

Windows Media Player Shortcuts 2

Keyboard Shortcuts for Gmail | List of All Gmail Keyboard Shortcut Keys

Keyboard Shortcuts for Gmail

Keyboard Shortcuts for Gmail: Sending and receiving emails has become an integral part of our daily lives. For this purpose, one of the most popular platforms that we use regularly is Gmail. Though Gmail has a very user-friendly interface, knowing shortcut keys or hotkeys helps us out in any platform that we work in. These shortcuts help us in reducing our effort and save our time while working.

However, for Gmail, one needs to turn the keyboard shortcuts on manually to use the feature. The process to turn the keyboard shortcuts on will be discussed in detail further in this article.

Wondering How to explore & learn Shortcut Keys for various Operating Systems, Computer Software Programs, Social media applications Keyboards? Here is the one-stop destination for all Keyboard Shortcuts, just take a look & memorize regularly for better performance in competitive exams & real-time situations.

Below in this article are the lists of keyboard shortcuts that one can use on a computer, Android device, or Apple device.

Table of Content

How to Turn on Keyboard Shortcuts on Computer for Gmail?

Gmail shortcut keys: For Gmail, some keyboard shortcuts only work if you’ve turned them on manually. However, all keyboards do not support keyboard shortcuts, but most of them do. To turn keyboard shortcuts on, you need to follow the below steps:

  1. Step 1: On a computer, go to Gmail.
  2. Step 2: In the top right corner, click Settings followed by See all settings.
  3. Step 3: Click Settings.
  4. Step 4: Scroll down to the “Keyboard shortcuts” section.
  5. Step 5: Select Keyboard shortcuts on.
  6. Step 6: Scroll down again to the bottom of the page and click Save Changes.

Gmail Keyboard Shortcuts That You Can Use on Computer

Gmail hot keys: Some of the functions for which you can use keyboard shortcuts in Gmail are listed below:

  1. To navigate your inbox and messages.
  2. Format text.
  3. Complete actions like archiving and deleting.

Besides these, there are a lot more functions as well, which we will get to know later in this article.

If you wish to see an entire list of keyboard shortcuts, including those that need to be turned on, you need to type ‘?’ after you open Gmail.

Note: Keyboard shortcuts work differently on PC and macOS computers or devices. For PCs, you’ll use Ctrl instead of Cmd and vice-versa for macOS computers.

Keyboard Shortcuts to Compose and Chat

Keyboard Shortcut Function
p Previous message in an open conversation
n Next message in an open conversation
Shift + Esc Focus the main window
Esc Focus the latest chat or compose
Ctrl + . Advance to the next chat or compose
Ctrl + , Advance to previous chat or compose
Cmd / Ctrl + Enter Send
Cmd / Ctrl + Shift + C Add cc recipients
Cmd / Ctrl + Shift + B Add bcc recipients
Cmd / Ctrl + Shift + F Access custom from
Cmd / Ctrl + K Insert a link
Cmd + ; Go to the next misspelt word (Mac only)
Cmd / Ctrl + M Open spelling suggestions

Keyboard Shortcuts for Gmail

Keyboard Shortcuts for Formatting Text

Keyboard Shortcut Function
Cmd /Ctrl + Shift + 5 Previous font
Cmd / Ctrl + Shift + 6 Next font
Cmd / Ctrl + Shift + – Decrease text size
Cmd /Ctrl + Shift and + Increase text size
Cmd / Ctrl + B Bold
Cmd / Ctrl + I Italics
Cmd / Ctrl + U Underline
Cmd / Ctrl + Shift + 7 Numbered list
Cmd / Ctrl + Shift + 8 Bulleted list
Cmd /Ctrl + Shift + 9 Quote
Cmd / Ctrl + [ Indent less
Cmd / Ctrl + ] Indent more
Cmd / Ctrl + Shift + L Align left
Cmd / Ctrl + Shift + E Align centre
Cmd / Ctrl + Shift + R Align right
Cmd / Ctrl + \ Remove formatting

Keyboard Shortcuts for Gmail 2

Keyboard Shortcuts for Actions

Keyboard Shortcut Function
, Move focus to toolbar
x Select conversation
s Toggle star/rotate among superstars
e Archive
m Mute conversation
! Report as spam
# Delete
r Reply
Shift + r Reply in a new window
a Reply all
Shift + A Reply all in a new window
F Forward
Shift + F Forward in a new window
Shift + N Update conversation
] or [ Archive conversation and go previous/next
Z Undo last action
Shift + I Mark as read
Shift + U Mark as unread
_ Mark unread from the selected message
+ or = Mark as important
Mark as not important
b Snooze
; (This shortcut isn’t available in classic Gmail)
: Expand entire conversation
Shift + t Collapse entire conversation

Keyboard Shortcuts for Hangouts

Keyboard Shortcut Function
h + m Show menu
h + a Show archived hangouts
h + i Show Hangout requests
h + c Focus on the conversation list
h + p Open phone

Keyboard Shortcuts for Jumping

Keyboard Shortcut Function
g + i Go to Inbox
g + s Go to Starred conversations
g + b Go to Snoozed conversations
g + t Go to Sent Messages
g + d Go to Drafts
g + a Go to All mail
Cmd / Ctrl + Alt + , and Cmd / Ctrl + Alt + . Switch between the Calendar/Keep/Tasks sidebar and your inbox.
g + k Go to Tasks
g + l Go to label

Keyboard Shortcuts for Thread List Selection

Keyboard Shortcut Function
* + a Select all conversations
* + n Deselect all conversations
* + r Select read conversations
* + u Select unread conversations
* + s Select starred conversations
* + t Select unstarred conversations

Keyboard Shortcuts for Navigation

Keyboard Shortcut Function
g + n Go to the next page
g + p Go to the previous page
u Back to thread list
k Newer conversation
j Older conversation
o or Enter Open conversation
` Go to the next Inbox section
~ Go to the previous Inbox section

Keyboard Shortcuts for Application

Keyboard Shortcut Function
c Compose
d Compose in a new tab
/ Search mail
g Search chat contacts
. Open the “more actions” menu
v Open “move to” menu
l Open “label as” menu
? Open keyboard shortcuts help

Note: Always remember these shortcuts keys will not work until keyboard shortcuts are turned on manually.

How to Customize Keyboard Shortcuts for Gmail on Computer?

Besides the default keyboard shortcuts in Gmail, you can add, delete or customize shortcuts as per your convenience. The steps below will guide you in the process:

Turn on Custom Keyboard Shortcuts

  1. Step 1: On your computer, go to Gmail.
  2. Step 2: At the top right corner, click Settings followed by See all settings.
  3. Step 3: Click Advanced.
  4. Step 4: Next to “Custom keyboard shortcuts,” choose Enable.
  5. Step 5: At the bottom of the page, click Save Changes.

Change Your Keyboard Shortcuts

  1. Step 1: On your computer, go to Gmail.
  2. Step 2: At the top right corner, click Settings followed by See all settings.
  3. Step 3: At the top, click Keyboard Shortcuts.
  4. Step 4: Next to the action, type the keyboard key to make a new shortcut.
  5. Step 5: At the bottom of the page, click Save Changes.
  6. Note: At a time, one key can refer to only one action.

Gmail Keyboard Shortcuts That You Can Use on Android

For Android devices, you can use the shortcuts listed below if you plug an external keyboard into the device. These keyboard shortcuts work with most kinds of external keyboards. The shortcuts are listed below:

Keyboard Shortcut Function
Ctrl + n Compose a new email
Ctrl + d Archive an email
Ctrl + Enter Send an email
Ctrl + s Save a draft
Ctrl + u Refresh your inbox
Right arrow Open selected conversation
Enter Expand or collapse an email in a conversation
Ctrl + x, Ctrl + c, or Ctrl + v Cut, copy, or paste
Ctrl + a Select all
Ctrl + m Open the side menu
Ctrl + , Open settings
Ctrl + ? Open Help & Feedback
Ctrl + r Reply all
Ctrl + i Mark as read or unread
Ctrl + p Print

How to Turn on Keyboard Shortcuts on iPad and iPhone for Gmail?

By following the below steps, you can turn on keyboard shortcuts for Gmail on your iPad. However, keyboard shortcuts aren’t supported on all keyboards. Also, as said earlier, iPhones currently do not support keyboard shortcuts in the Gmail app.

  1. Step 1: On an iPad, open the Gmail app.
  2. Step 2: In the top left, tap on Menu, and then click on Settings.
  3. Step 3: Tap on Enable keyboard shortcuts.

Gmail Keyboard Shortcuts That You Can Use on iPhone and iPad

If you connect your keyboard to the iPad, you can use the keyboard shortcuts listed below for the Gmail app. Some shortcuts will show a description when you touch and hold the ⌘

or Cmd on the keyboard you have connected to your iPad. To use any shortcut, tap the key after you have turned on keyboard shortcuts for Gmail.

Note: iPhones currently do not support keyboard shortcuts in the Gmail app.

Shortcuts You Can Use While Composing an Email

Keyboard Shortcut Function
Cmd + Delete Delete a line
Option + Delete Delete a word
Cmd + Return Send
Cmd + W Close

Shortcuts with Description Available

Keyboard Shortcut Function
z Undo
u Unselect all
! Mark as spam
# Delete
a Reply all
c Compose
m Mute
e Archive
f Forward
r Reply
x Select
Shift + I Mark as read
Shift + U Mark as unread
Cmd + U Refresh

Shortcuts Without Any Description

Keyboard Shortcut Function
Escape Go back
Return Open item
Up arrow Previous item
Down arrow Next item
j Next conversation
k Previous conversation
n Next message
p Previous message


Conclusion on Keyboard Shortcuts for Gmail

In conclusion, we can say that using keyboard shortcuts or hotkeys on any platform or software always help us to ease out our process of working, and it is the same for Gmail as well.

By remembering all the keyboard shortcuts, you can easily move around and work without going to your mouse every time. If you want, you can print these shortcuts, which will help you work even more efficiently.